Agents
The documentation provides a description of the interface in Russian.
Agents perform work tasks, are used in shift planning, and are tracked during shift monitoring. Agents can be mobile employees (for example, operators and couriers), special vehicles, etc.
Before creating agents, create an agent template or select an agent type from pre-filled templates. A template contains a set of attributes that are specified when creating an agent.
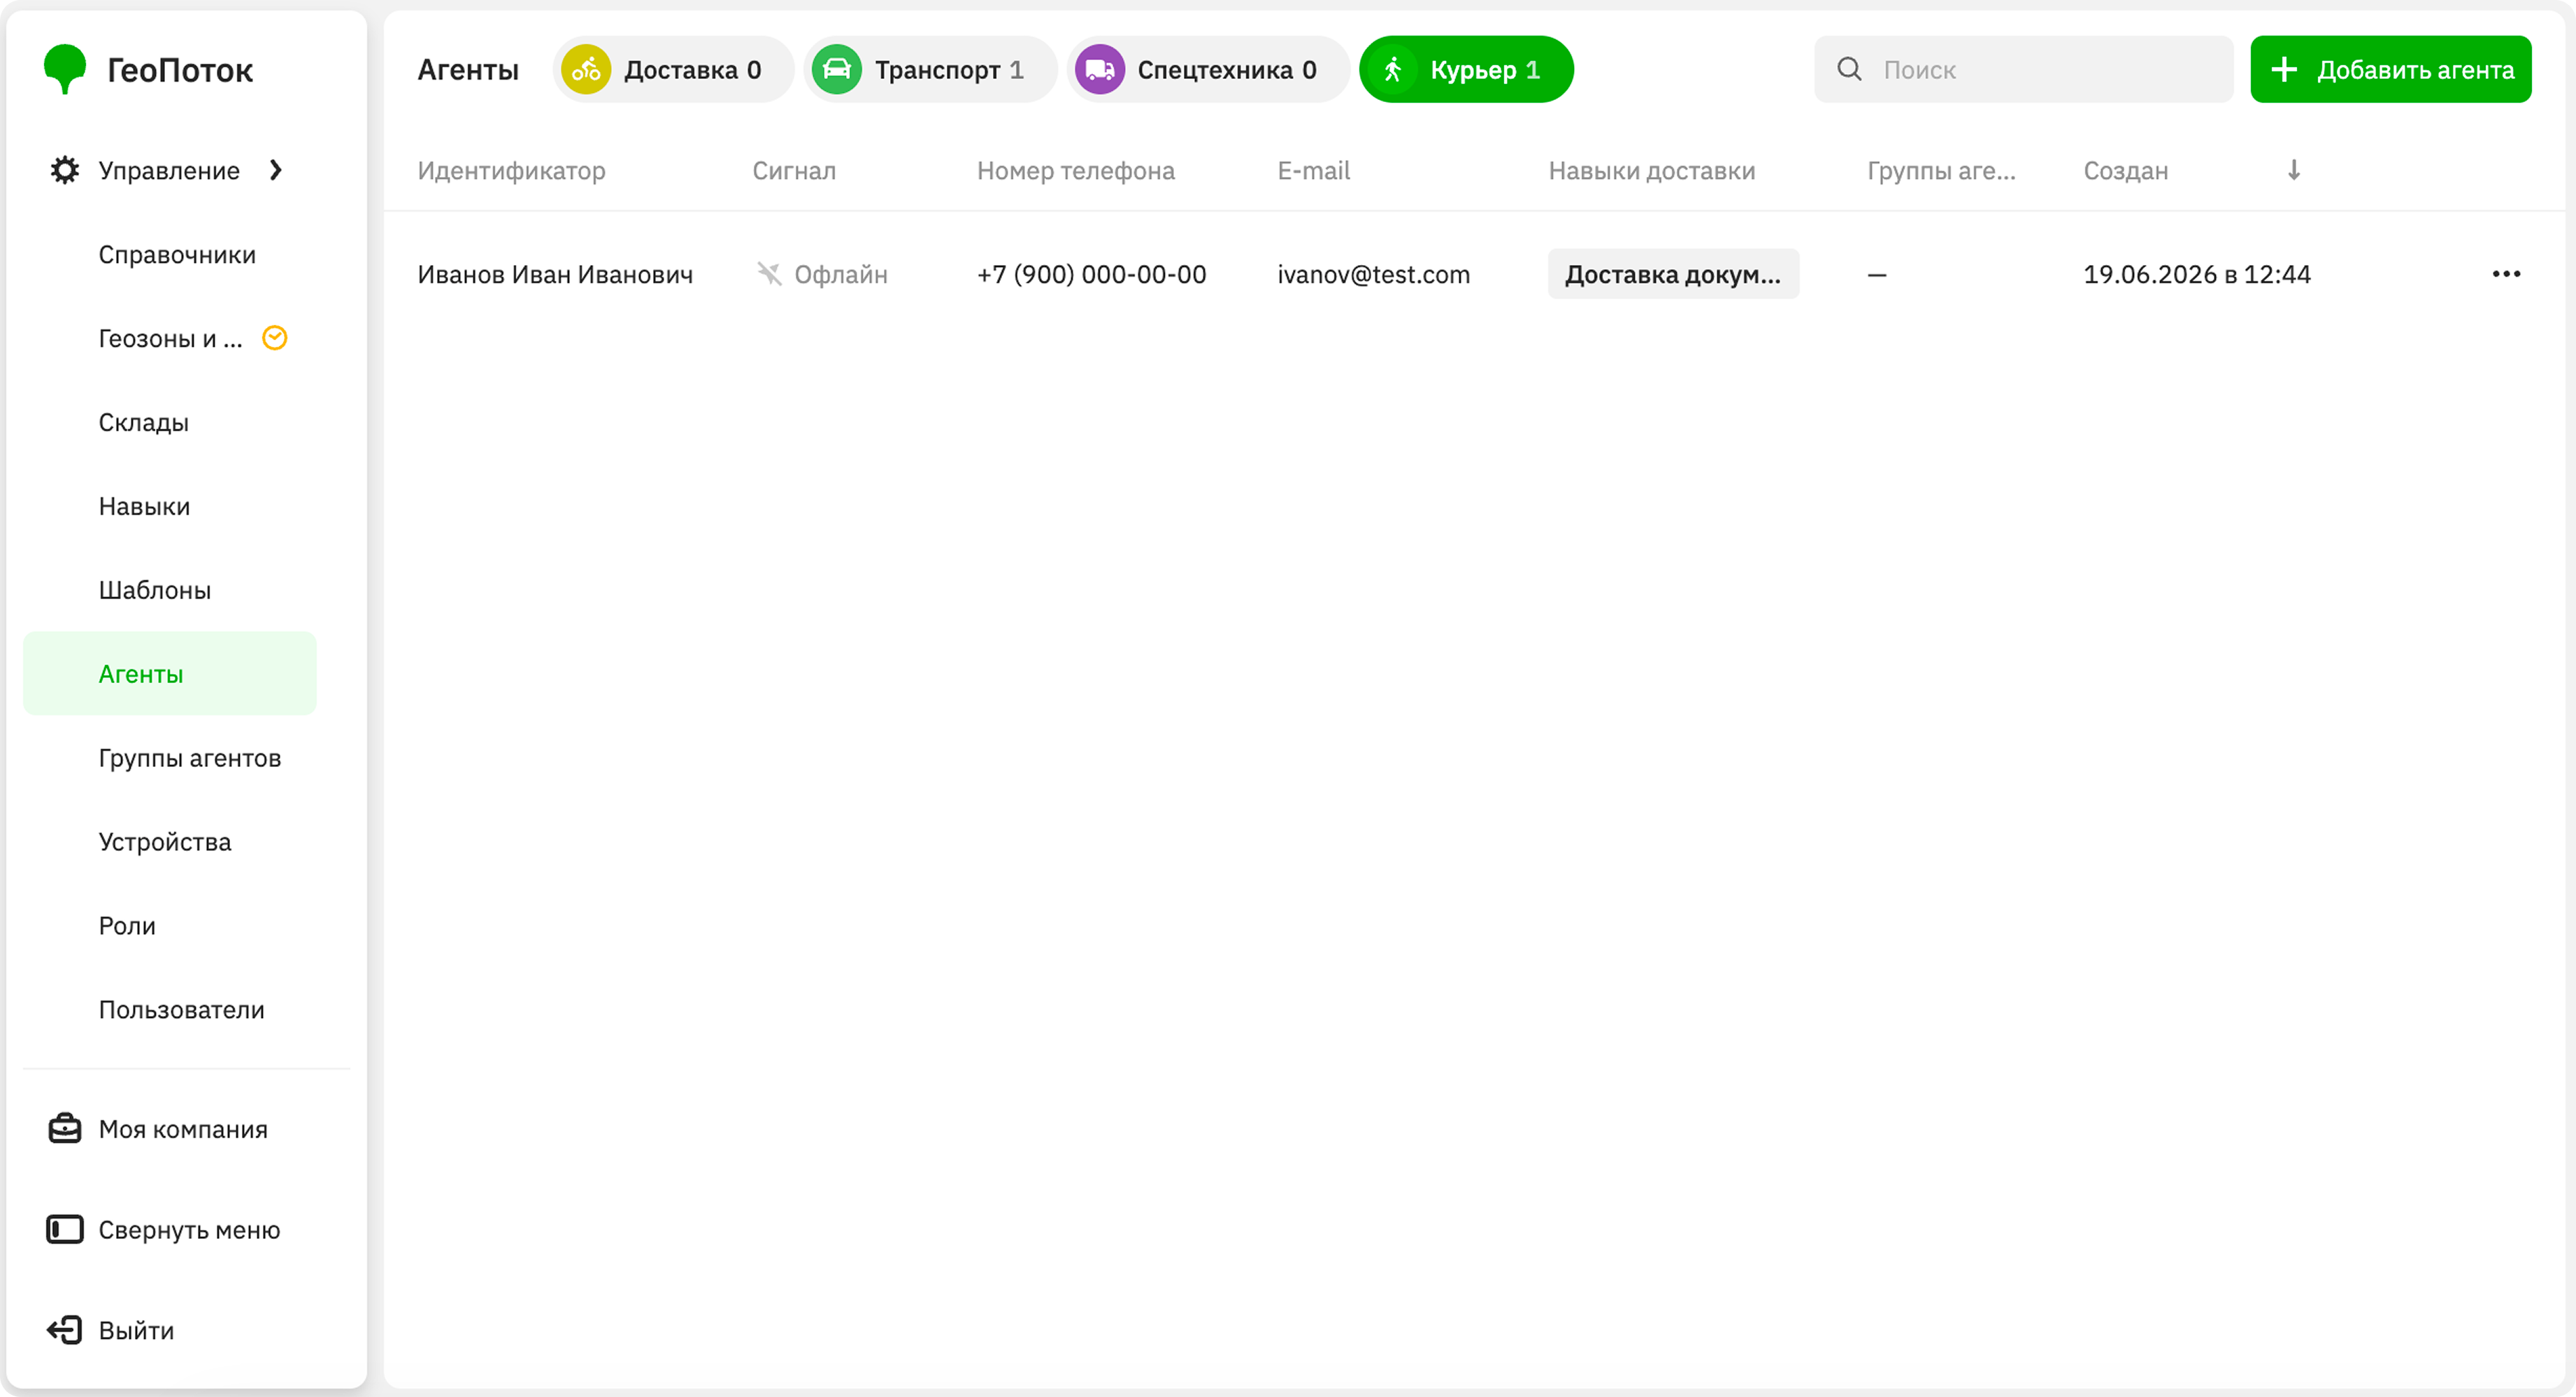
With the Main administrator and Company administrator roles, you can work with agents on the Management → Agents tab:
With the Dispatcher role, you can view the list of agents and their information. With the Agent group manager role, you can view agents from your group.
Creating an agent
-
Go to the Management → Agents tab.
-
Click Add agent.
-
If you have created multiple agent templates, select one of them.
-
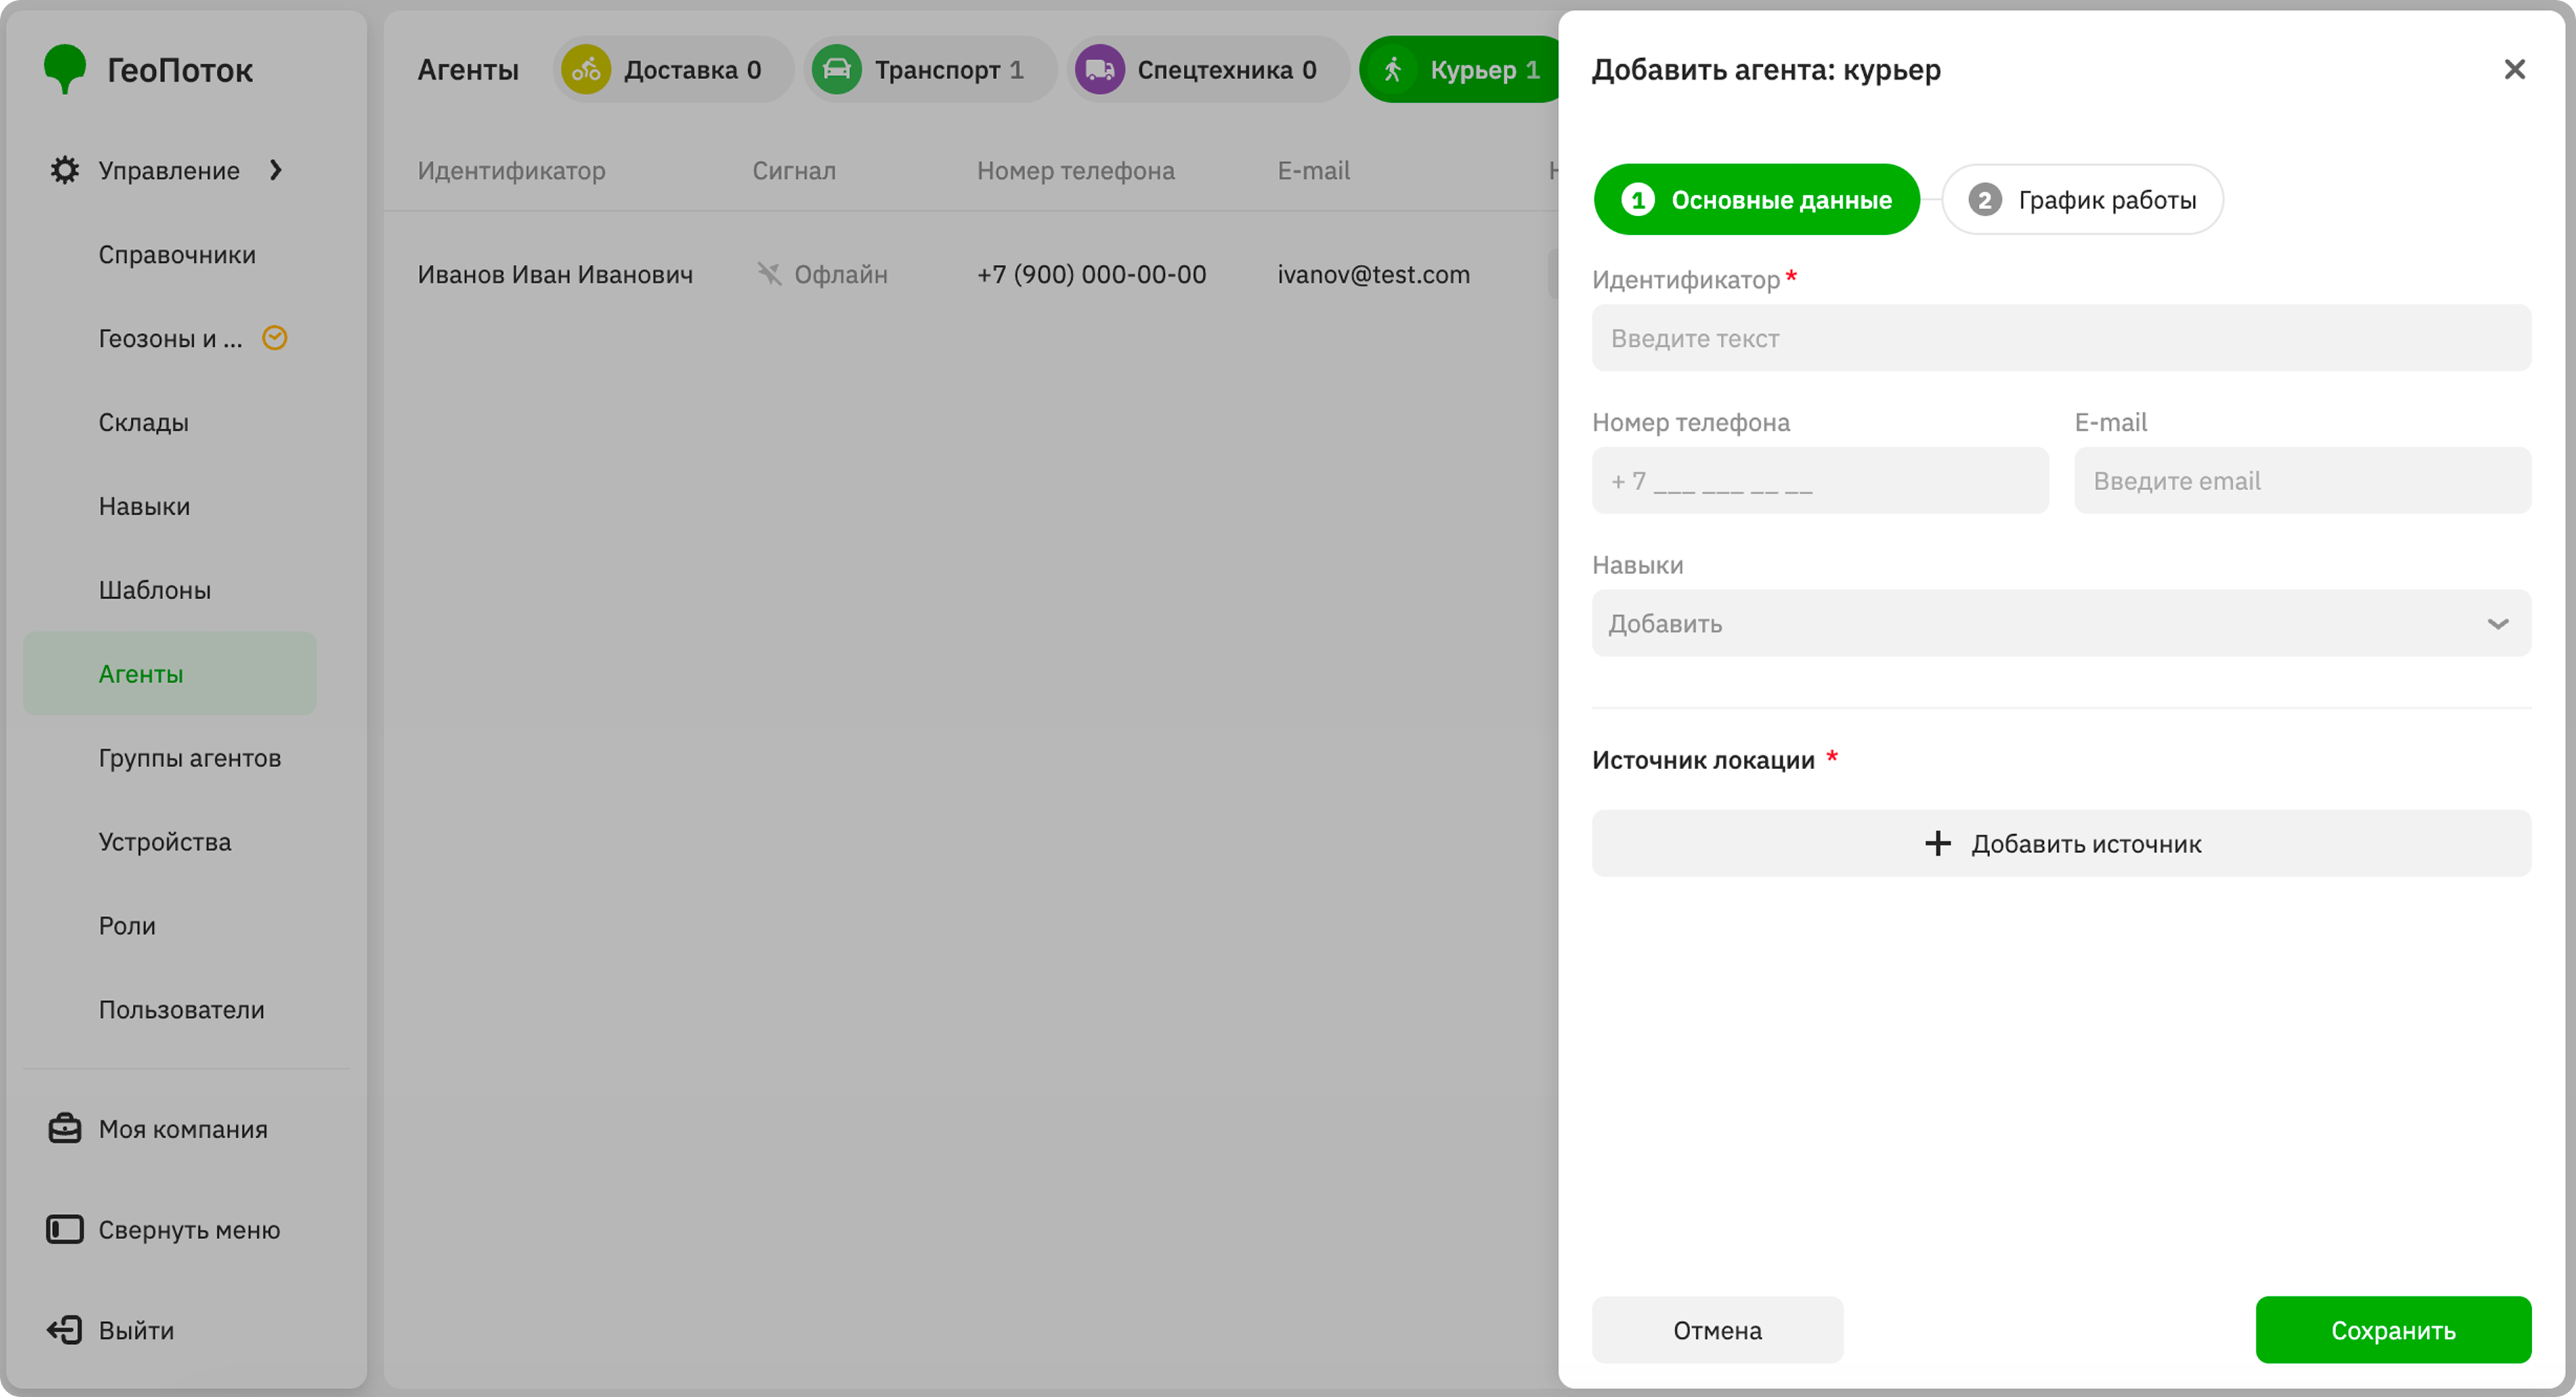
Specify agent main data, which depend on the selected template.
-
Click Add source and select one of the location source types:
- Application: select a user who uses the mobile application and will be linked to the agent.
- EGTS tracker: select a device that will be linked to the agent and used to collect agent location data.
You can select multiple location sources for one agent, but each source can only be linked to one agent at a time.
To add a source, click Add source. To delete a source, click
 icon next to it.
 -
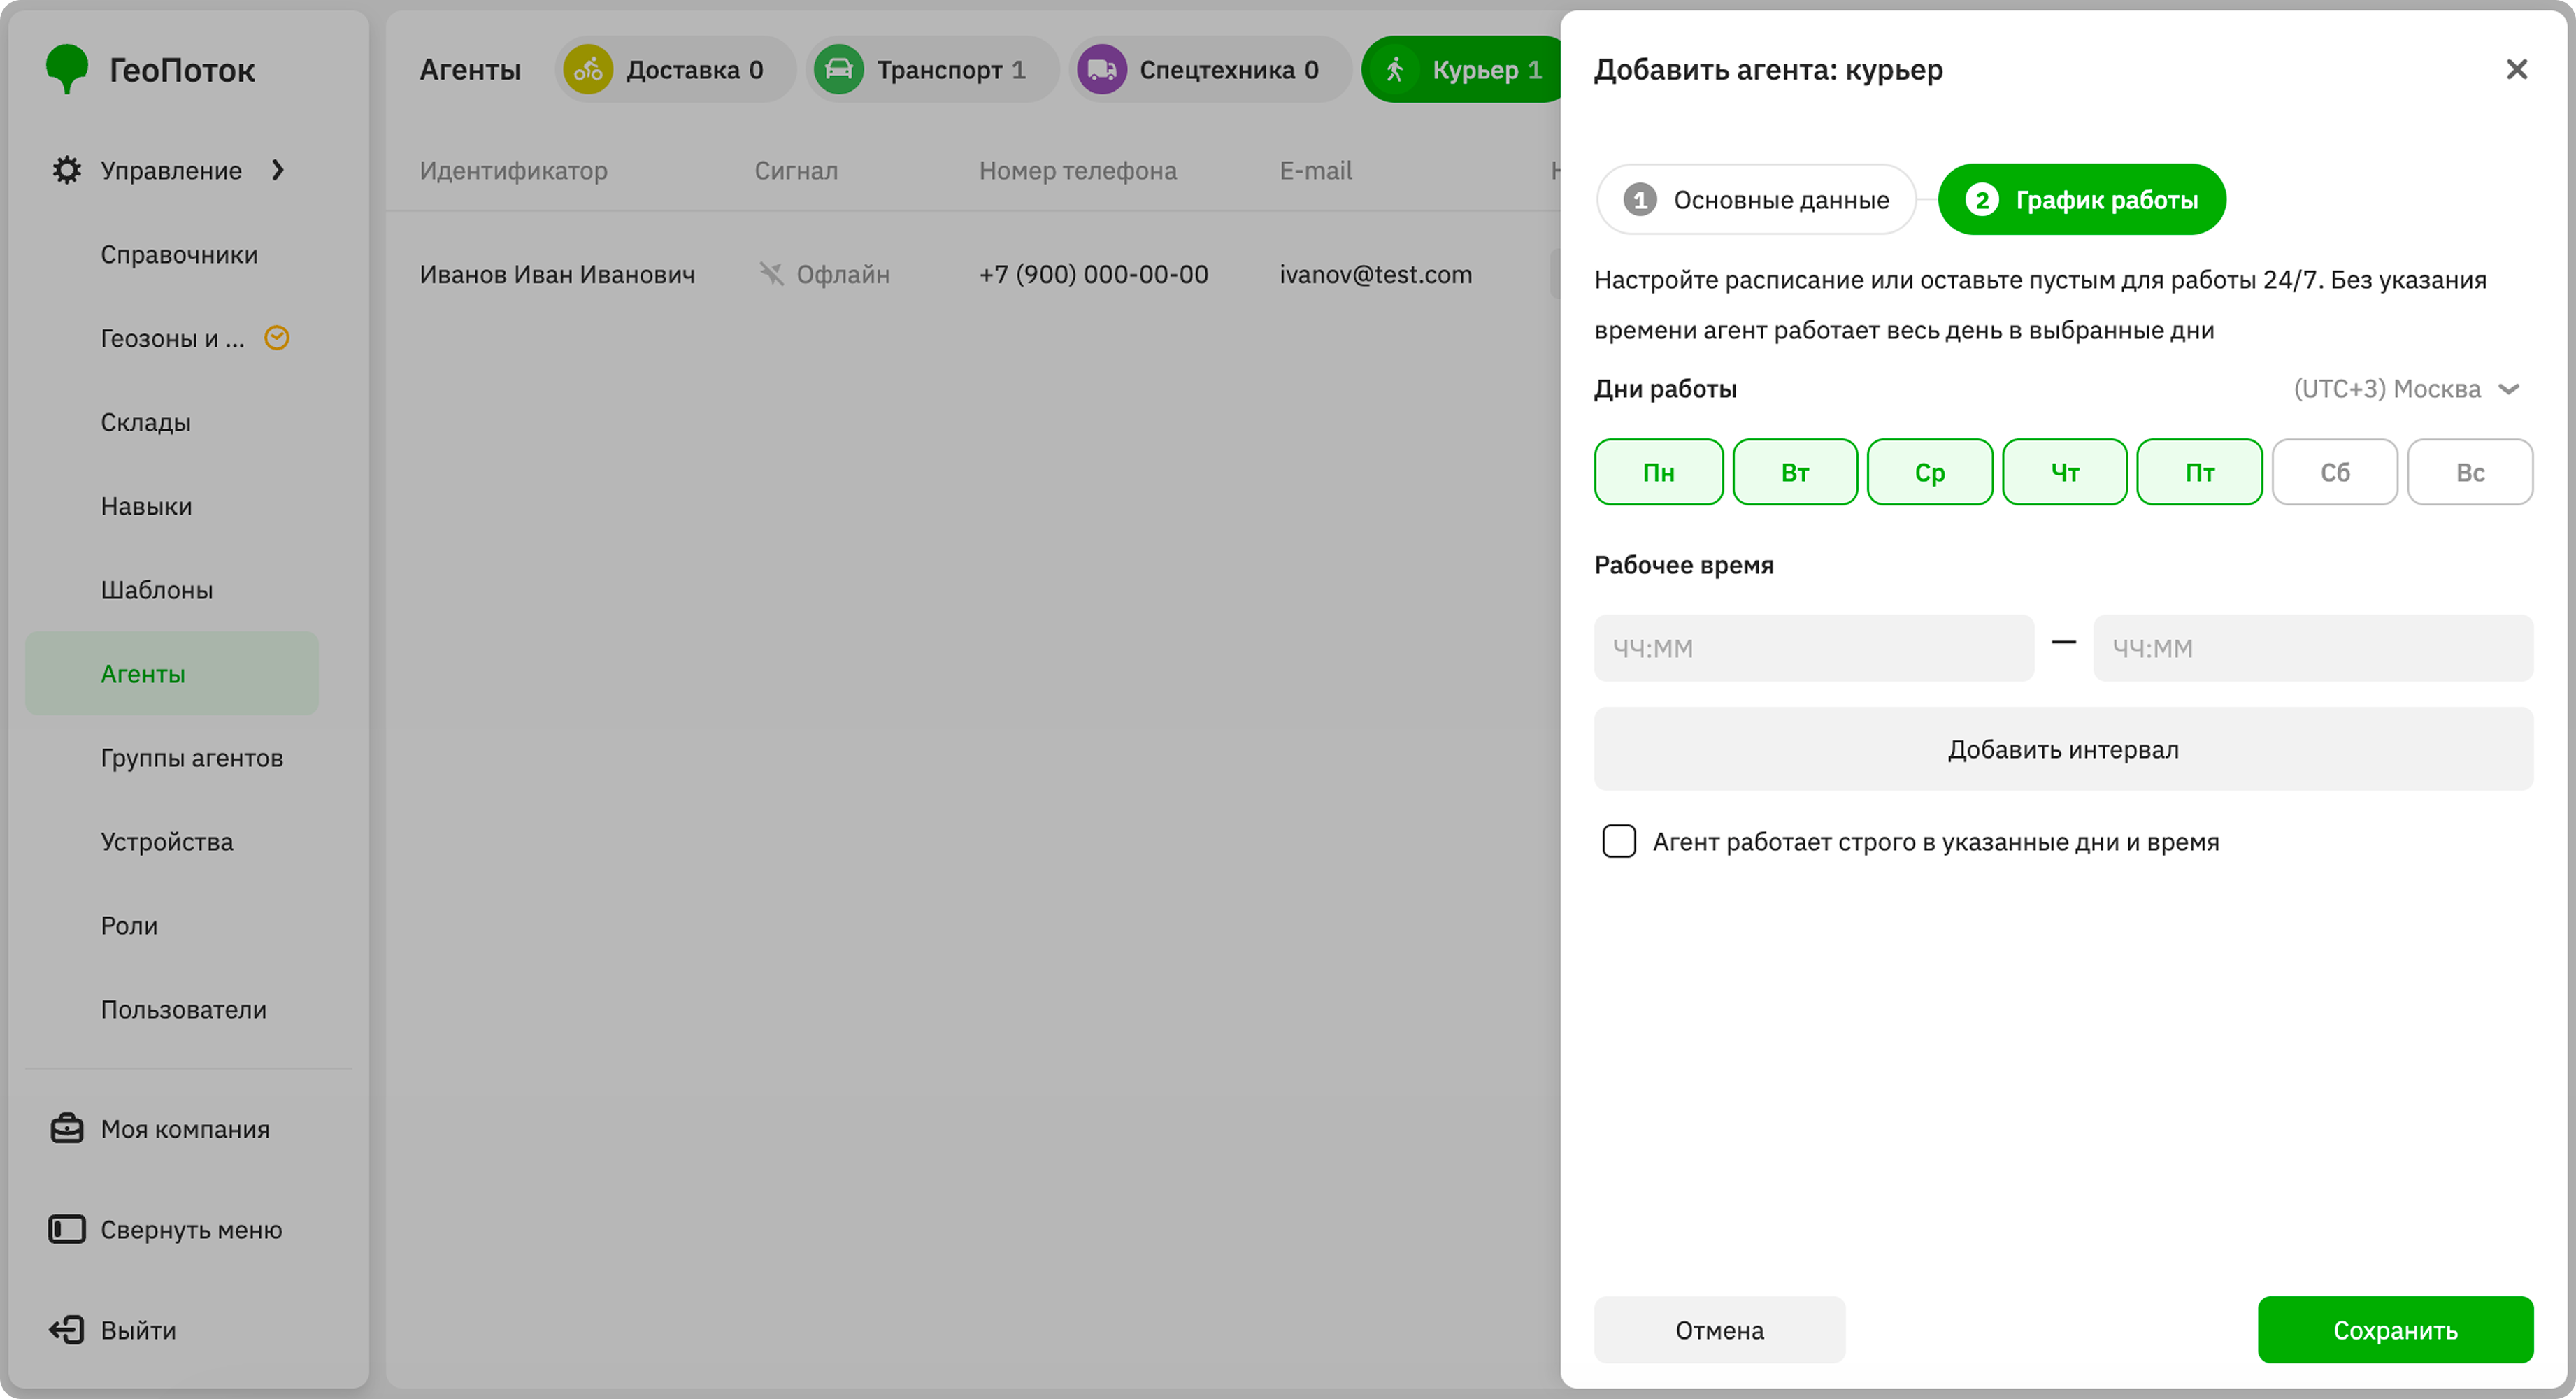
(Optional) Specify the agent work schedule:
-
Time zone: time zone for which the agent working time is specified.
-
Days of the week: select the days of the week when the agent works.
-
Working hours: enter the time when the agent works.
To add a working interval, click Add interval and enter the time. To delete an interval, click
icon next to it. -
The agent works strictly at the specified days and time: select the checkbox if the agent can work only on the specified days and at the specified time.
-
-
Click Save.
Viewing agent information
- Go to the Management → Agents tab.
- Open the agent card. You can search agents by name and filter them by agent type (template).
The agent card displays:
-
Name: unique identifier specified when creating the agent. The field may have a different name depending on the agent template: for example,
Identifier. -
Main data:
-
Main data: data specified when creating the agent. Depends on the agent template.
-
Location source: sources used to collect agent location data (a mobile application or a tracker).
- Application: name of the user who uses the mobile application and is linked to the agent.
- EGTS tracker: name and unique identifier of the device.
- Signal: current GPS signal status on the agent's location source.
- Last activity: time the agent was last active. For agents using the mobile application, it is the time of the last sign-in to the mobile application. For agents using a tracker, it is the time when location data was last obtained.
- View movement history: click to open the agent's current location and movement history on the map.
-
Creation date: date and time the agent was created.
-
Last modified: date and time the agent's information was last updated.
-
-
Work schedule: agent operation time (days of the week and working hours).
Editing agent information
You can edit the main data and the work schedule of agents.
- Go to the Management → Agents tab.
- In the agent row, click
 icon and select Edit.
 - Apply changes to the agent information.
- Click Save.
Duplicating an agent
- Go to the Management → Agents tab.
- In the agent row, click icon and select Duplicate.
- (Optional) Specify new agent parameters.
- Click Save.
Deleting an agent
An agent will be removed from shifts and tasks they were added to. You cannot restore a deleted agent.
- Go to the Management → Agents tab.
- In the agent row, click icon and select Delete.
- Confirm the deletion.