Templates
The documentation provides a description of the interface in Russian.
Templates are prepared sets of attributes for creating agents and tasks. Templates allow you to:
- create typical agents (for example, couriers) and typical tasks (for example, delivery tasks)
- filter agents and tasks by type when planning shifts
- filter agents by type and view agent performance metrics on the monitoring dashboard
With the Main administrator and Company administrator roles, you can work with templates on the Management → Templates tab:
With the Dispatcher and Agent group manager roles, you can view the list of templates and their information.
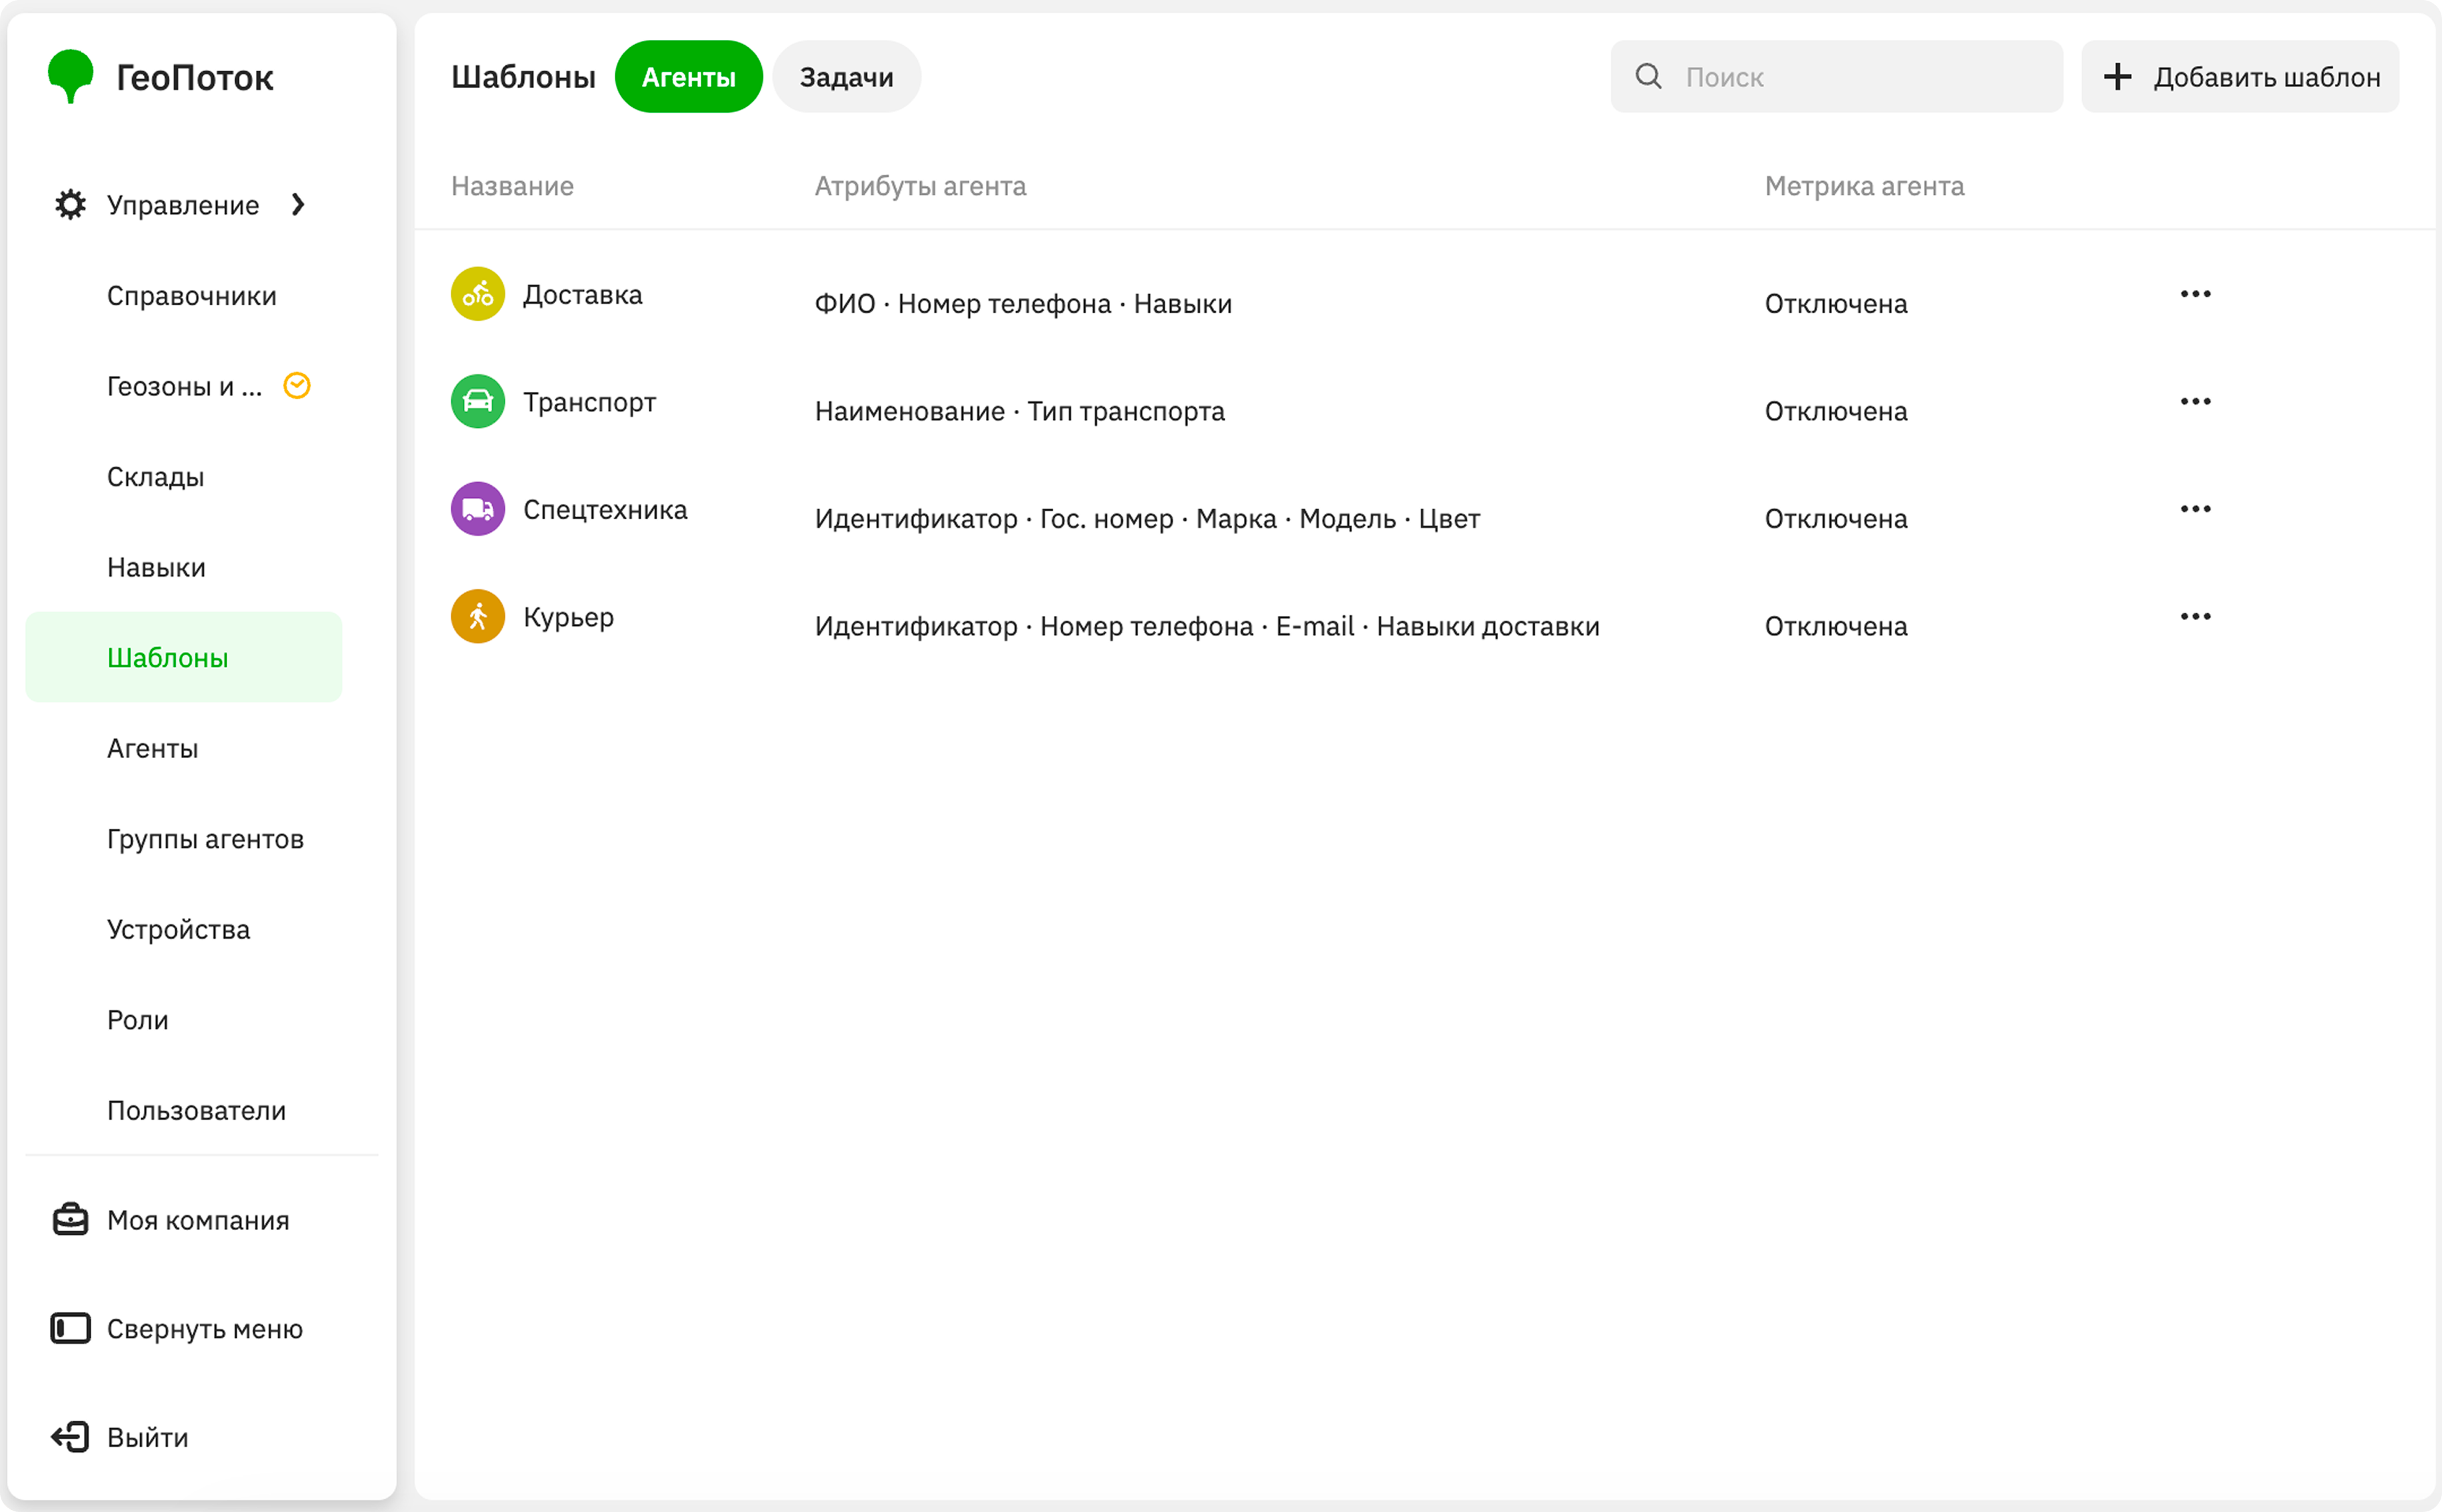
Creating an agent template
-
Go to the Management → Templates tab.
-
Click Add template.
-
Select Agent from the dropdown list.
-
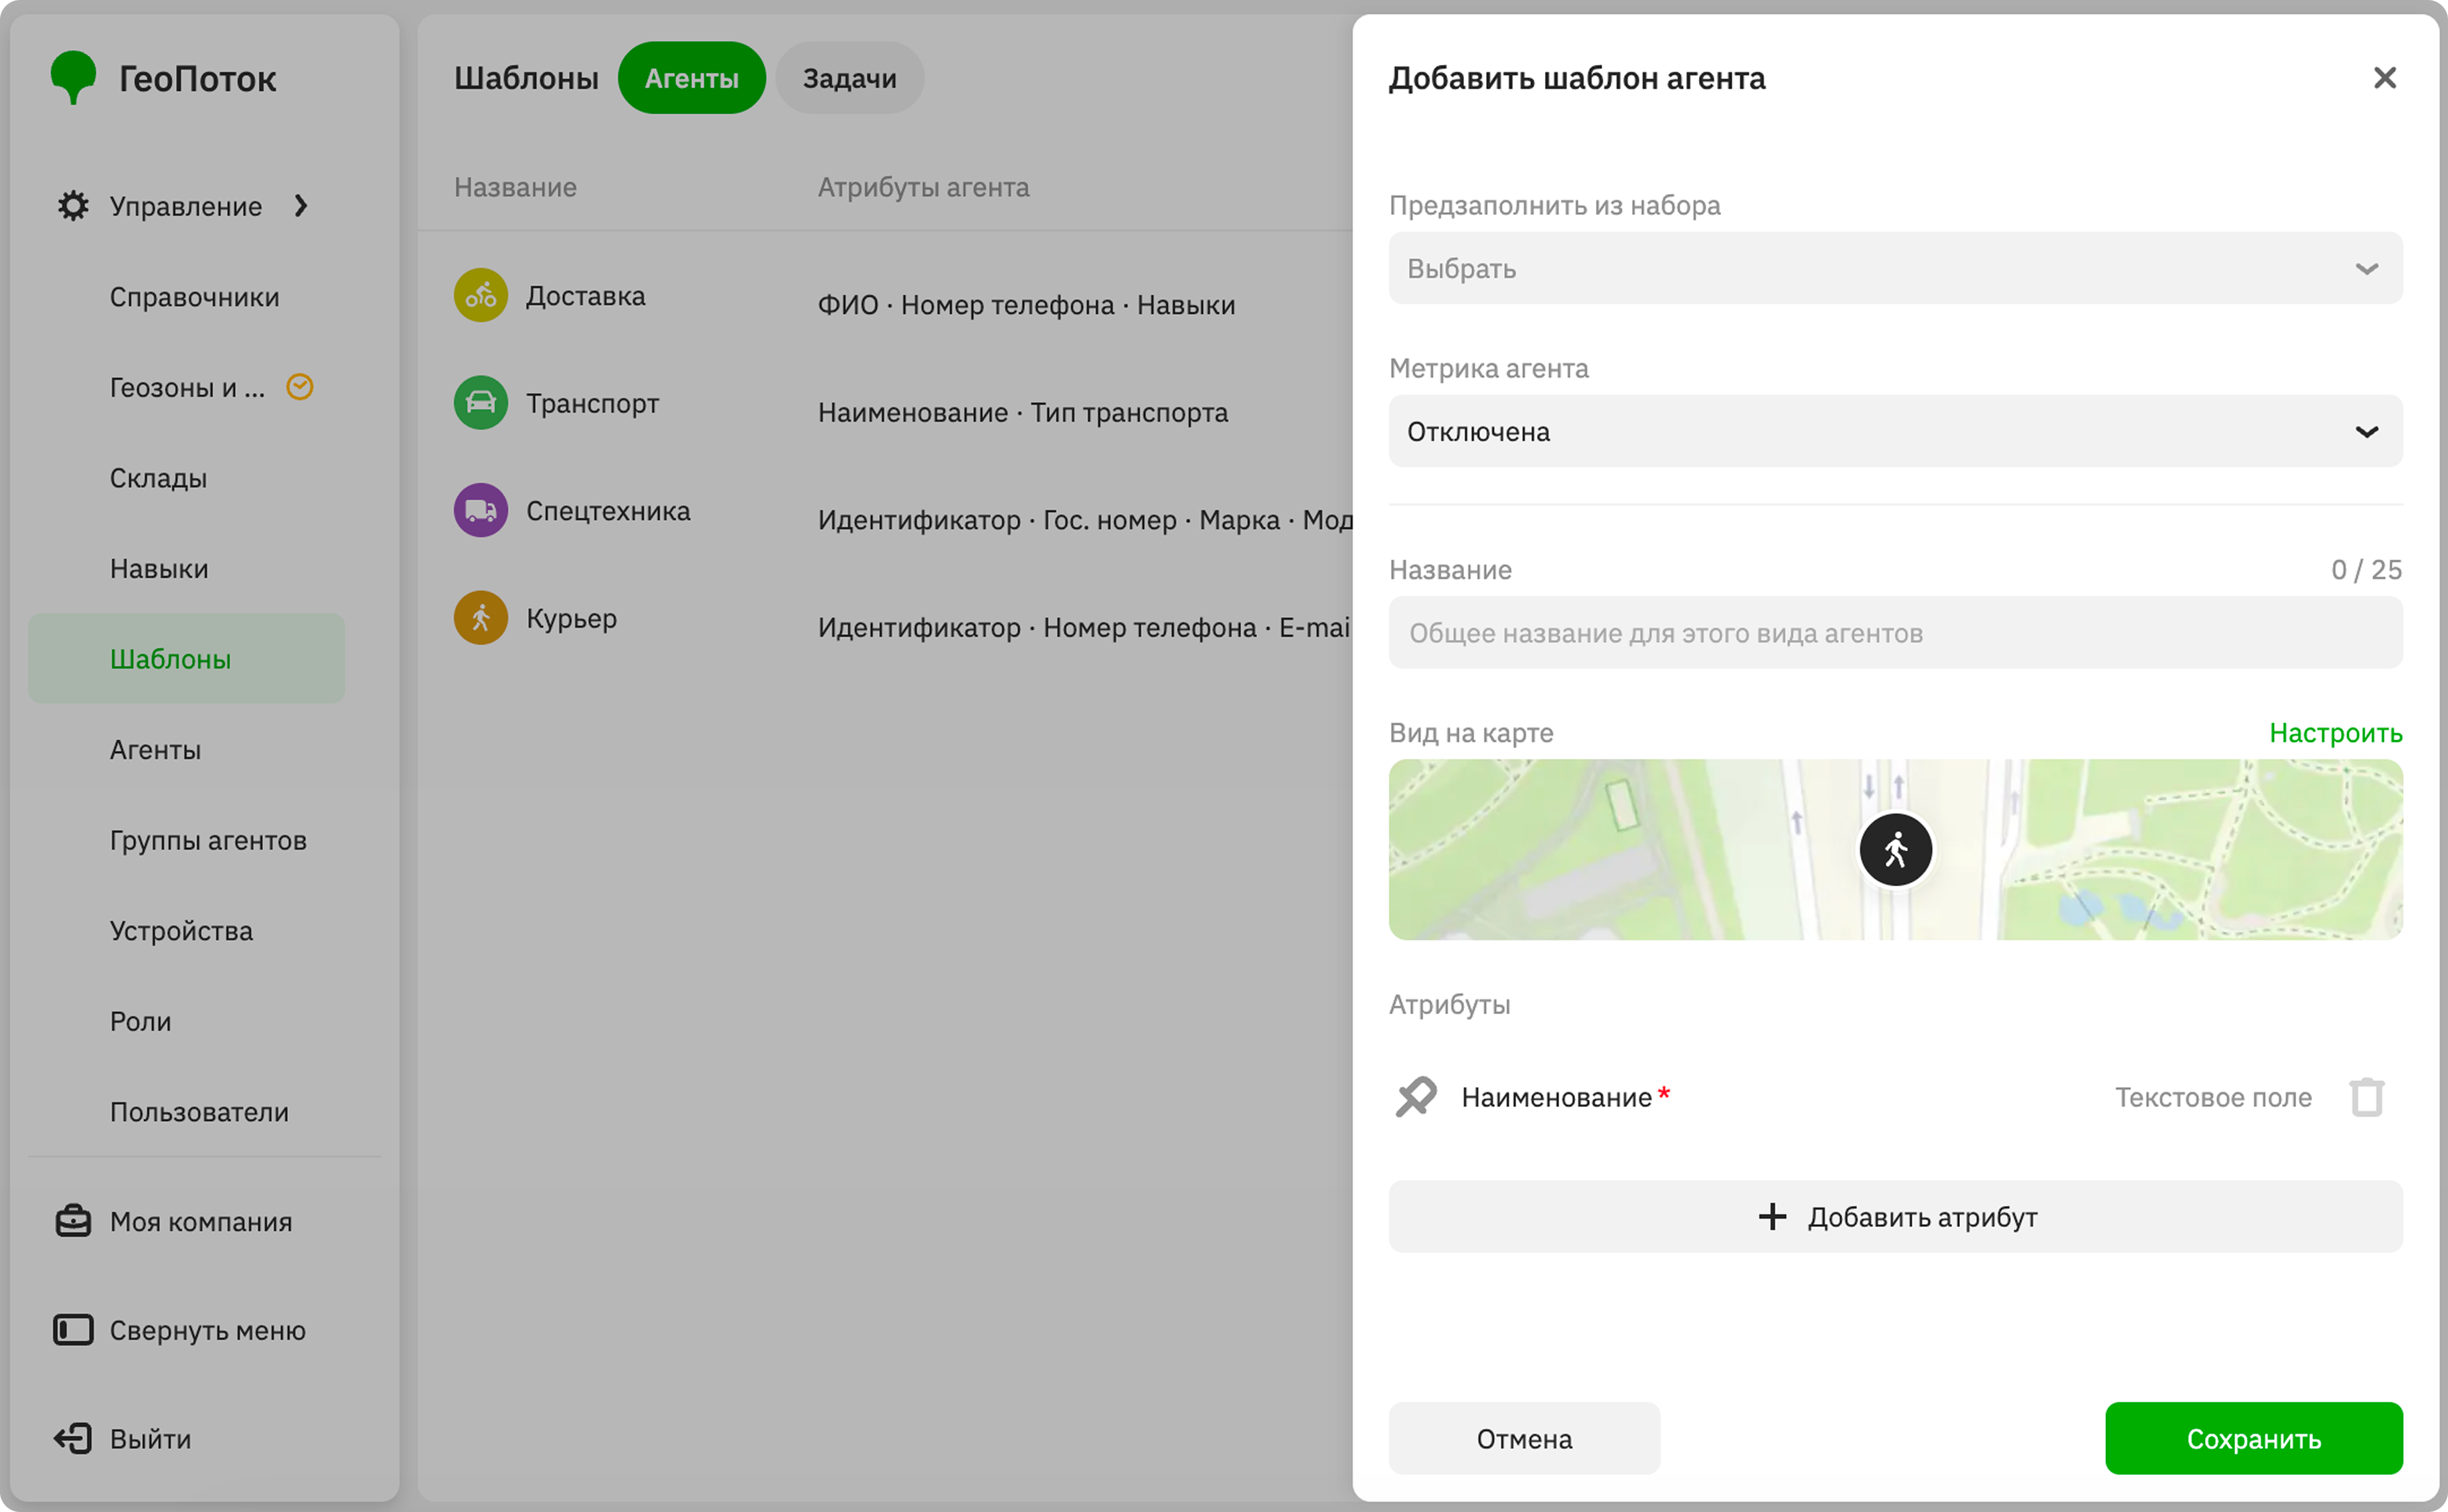
To create a custom agent template, leave the Pre-fill from set field empty. To use a pre-filled template, select one of the ready-made agent types in this field:
- Operator: an employee who performs tasks.
- Courier: an employee who delivers documents or packages.
- Special vehicle: vehicles or machines that perform work. For example, a courier vehicle, fuel truck, excavator, etc.
The parameters below will be filled in automatically for the selected type. You can edit them if necessary.
-
In the Agent metric field, select the metric that will be used to calculate the agent's performance and displayed during monitoring of the shift in the agent's card on the Metrics tab:
- Disabled: agent performance data will not be displayed.
- Task completion performance: ratio of the number of tasks completed during a shift to the number of tasks assigned in the shift.
- Work performance: ratio of the time the agent was in geozones to the time since the shift started.
-
In the Name field, enter a general name for the agent type.
-
(Optional) In the Map appearance block, specify the display of the agent icon on the map. Click the map preview and specify the parameters:
- Icon: agent icon.
- Color: icon color.
Click Save.
-
In the Attributes block, specify the list of fields for creating agents of this type.
For each template, the required attribute with the
Text fielddata type for identifying an agent is added by default: for pre-filled templates, it isIdentifier, and for custom templates, it isName. As the attribute value, you can specify any unique set of characters (for example, a personnel number or full name). You can rename this attribute.Each attribute has parameters:
- Title: attribute name.
- Data type: type of the attribute data.
- Required field: to make the field required when creating an agent, select the checkbox.
For attributes with some data types, the additional parameters are available:
Data type Additional parameters Directory- Directory: directory with agent features.
- Allow multiple selection: to allow selecting multiple values from the directory when creating an agent, select the checkbox.
To add another attribute, click Add attribute. To delete an attribute, click
 icon next to it. To change the order of attributes, hold
  icon next to the attribute and drag it.
 -
Click Save.
Creating a task template
-
Go to the Management → Templates tab.
-
Click Add template.
-
Select Task from the dropdown list.
-
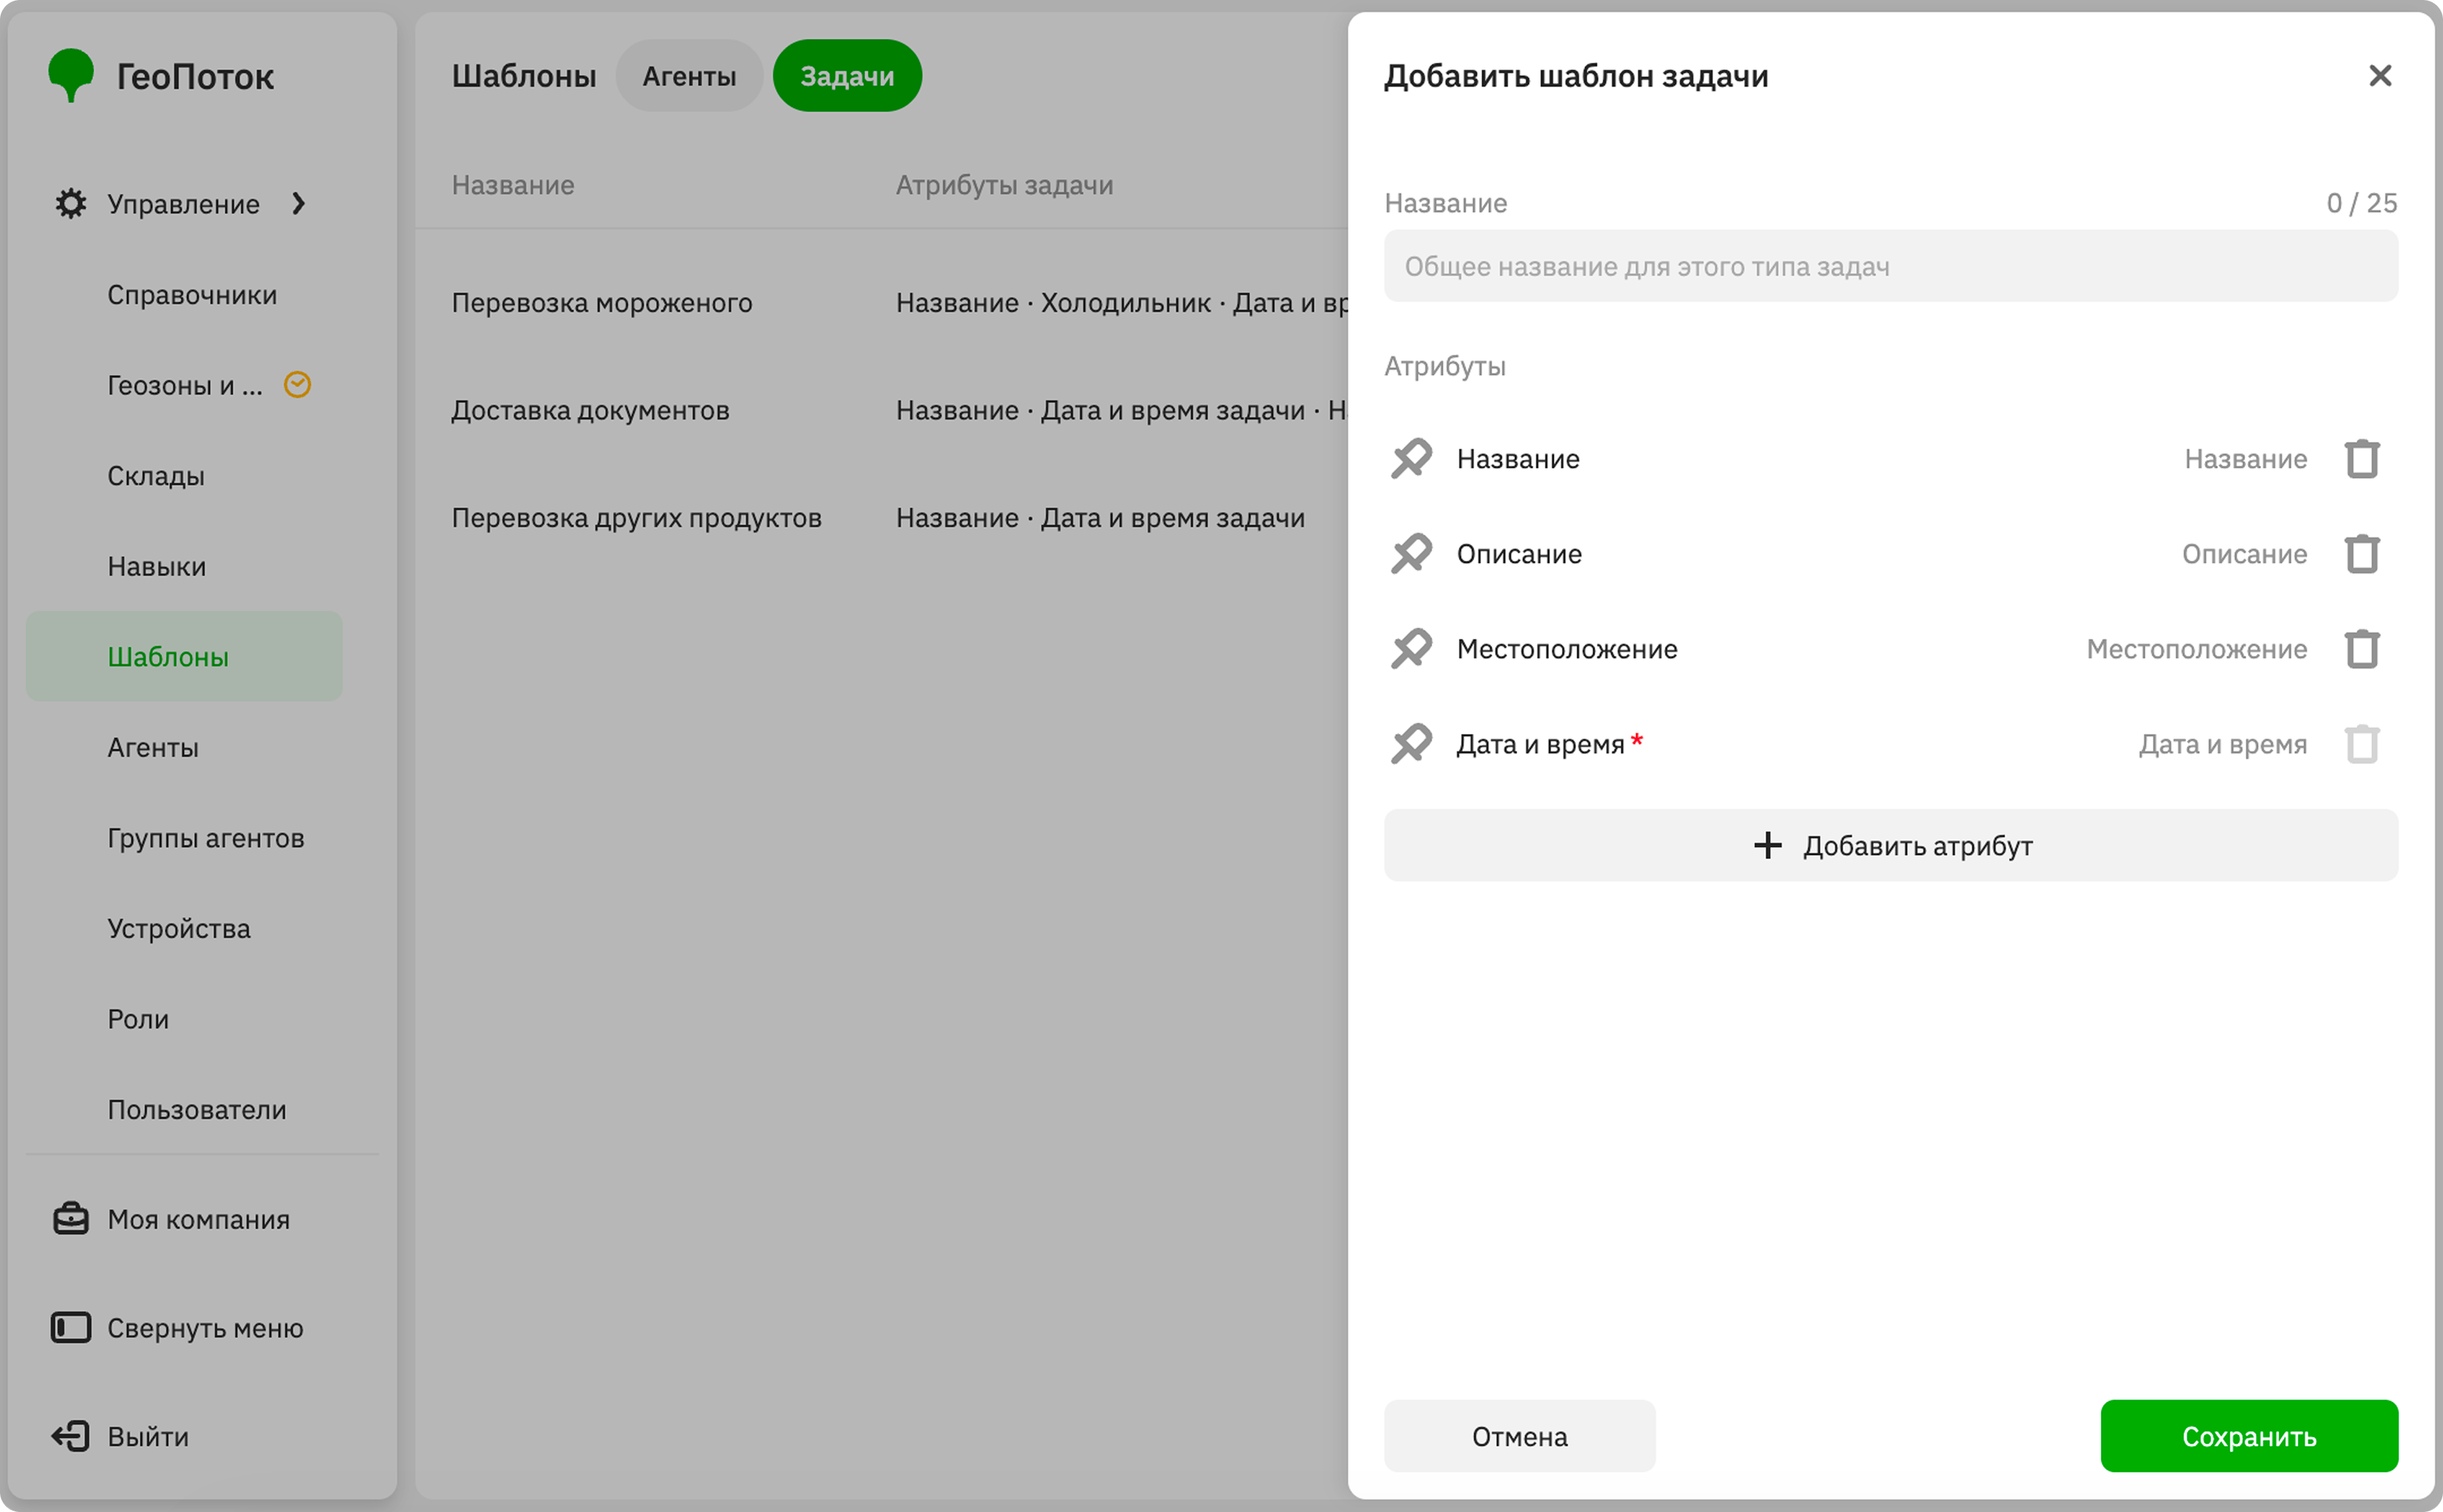
In the Name field, enter a general name for the task type.
-
In the Attributes block, specify the list of fields for creating tasks of this type.
For each template, the required
Date and timeattribute for specifying a task completion time is added by default. To limit the time for completing a task, select the Time to complete the task in minutes checkbox. You can rename this attribute.Each attribute has parameters:
- Title: attribute name.
- Data type: type of the attribute data.
- Required field: to make the field required when creating a task, select the checkbox.
For attributes with some data types, the additional parameters are available:
Data type Additional parameters Directory- Directory: directory with task features.
- Allow multiple selection: to allow selecting multiple values from the directory when creating a task, select the checkbox.
Contacts- Name: contact person's name.
- Phone: contact person's phone number.
- Email: contact person's email address.
To add another attribute, click Add attribute. To delete an attribute, click
icon next to it. To change the order of attributes, hold icon next to the attribute and drag it. -
Click Save.
Editing a template
Editing a template (for example, its attributes) changes the settings of all agents or tasks created from this template.
You can edit templates:
- Rename the template.
- Change the list of attributes, their names, type, and whether they are required.
- Additionally for agent templates: change the agent metric and icon appearance on the map. If you change the metric, the performance indicators for it will be calculated from the start of the next shift.
To edit a template:
- Go to the Management → Templates tab.
- In the template row, click
 icon and select Edit.
 - Apply changes to the template.
- Click Save.
Duplicating a template
- Go to the Management → Templates tab.
- In the template row, click icon and select Duplicate.
- (Optional) Specify new template parameters.
- Click Save.