Working with the Platform Manager
Differences between On-Cloud and On-Premise versions
The Platform Manager is available both On-Cloud (see more in the account documentation) and On-Premise. The available features differ depending on the installation.
| On-Cloud | On-Premise | |
|---|---|---|
| Viewing licenses | ✗ | ✓ |
| Creating access keys | ✓ | ✗ (Only in the API keys management web interface) |
| Managing access keys | ✓ | ✓ (Also in the API keys management web interface) |
| Managing users | ✓ (See the Managing users) instruction | ✗ (Only in the API keys management web interface) |
| Managing companies | ✓ (See the Managing companies) instruction | ✗ |
| Uploading custom map styles | ✗ (You can specify the style in map settings) | ✓ |
| Testing services in the playground | ✓ | ✓ |
| Viewing statistics on access keys | ✓ | ✓ |
| Monitoring services | ✗ | ✓ |
Getting started
- Make sure the Platform Manager service is installed and works properly. For details, see the Installing the Platform Manager instruction.
- Follow a URL in the
https://platform.example.comformat that you received after installing the service.
Platform Manager interface
Work with the following tabs in the Platform Manager:
- Licenses: to view information about licenses installed within the On-Premise suite.
- API Keys: to view the list of API keys and manage services included in them.
- Map Styles: to upload and manage custom map styles.
- Playgrounds: to test the operation of key APIs.
- Statistics: to view statistics on access keys and download it as a file.
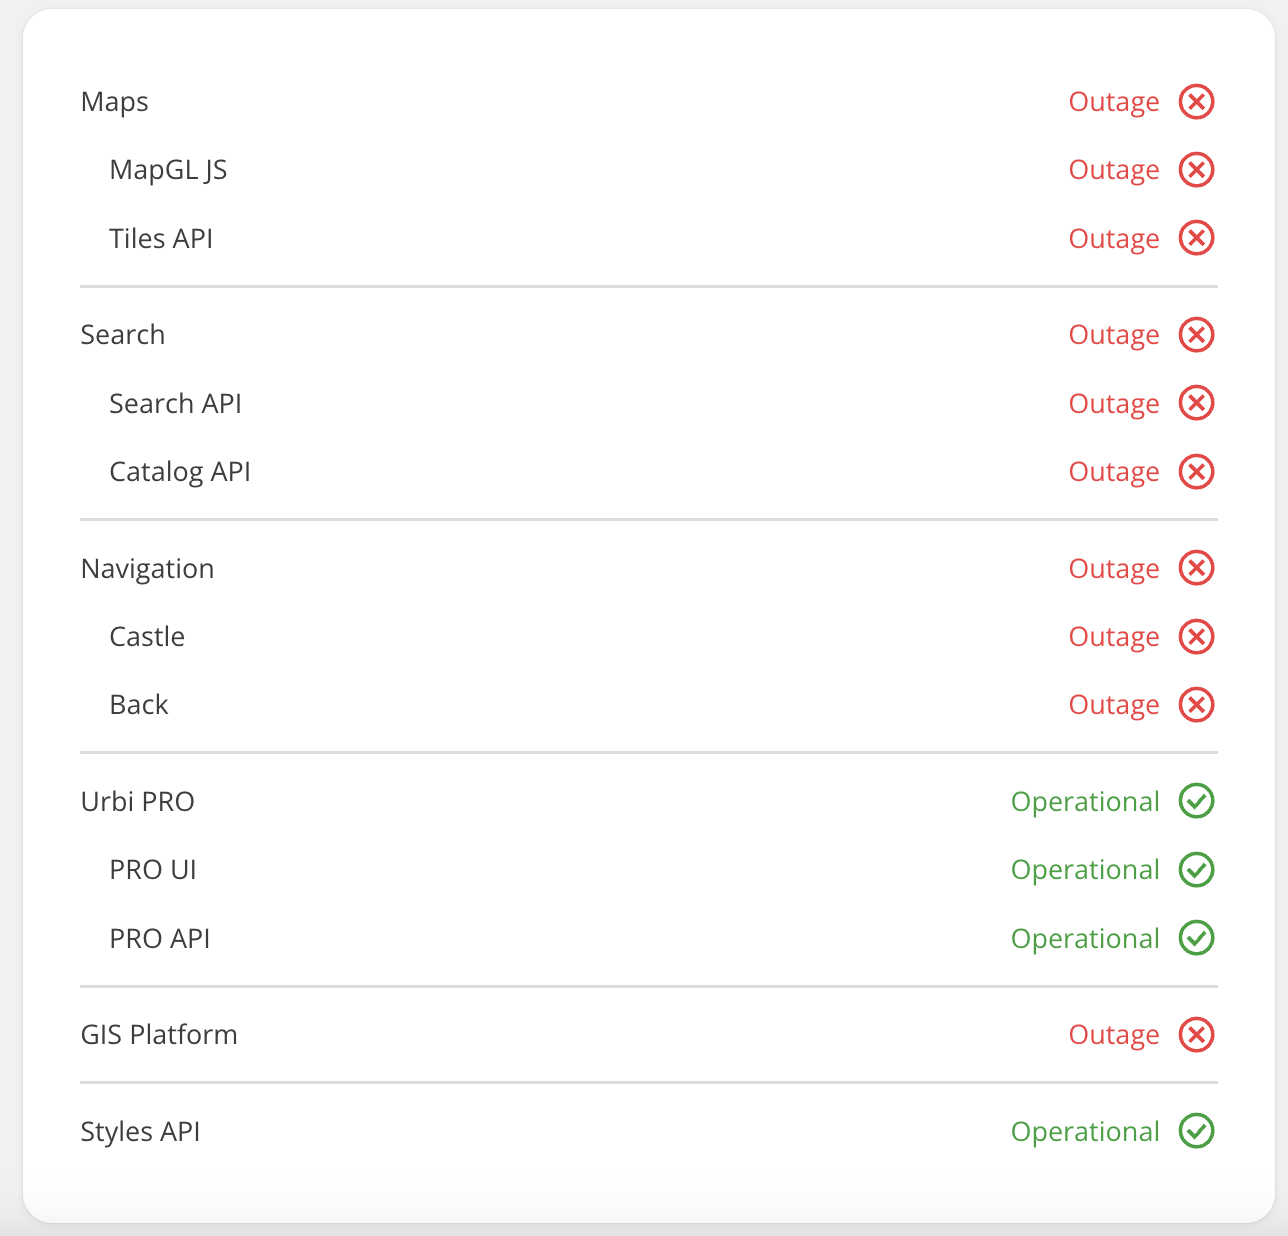
- Status Page: to view the statuses of services installed within the On-Premise software suite.
Viewing licenses
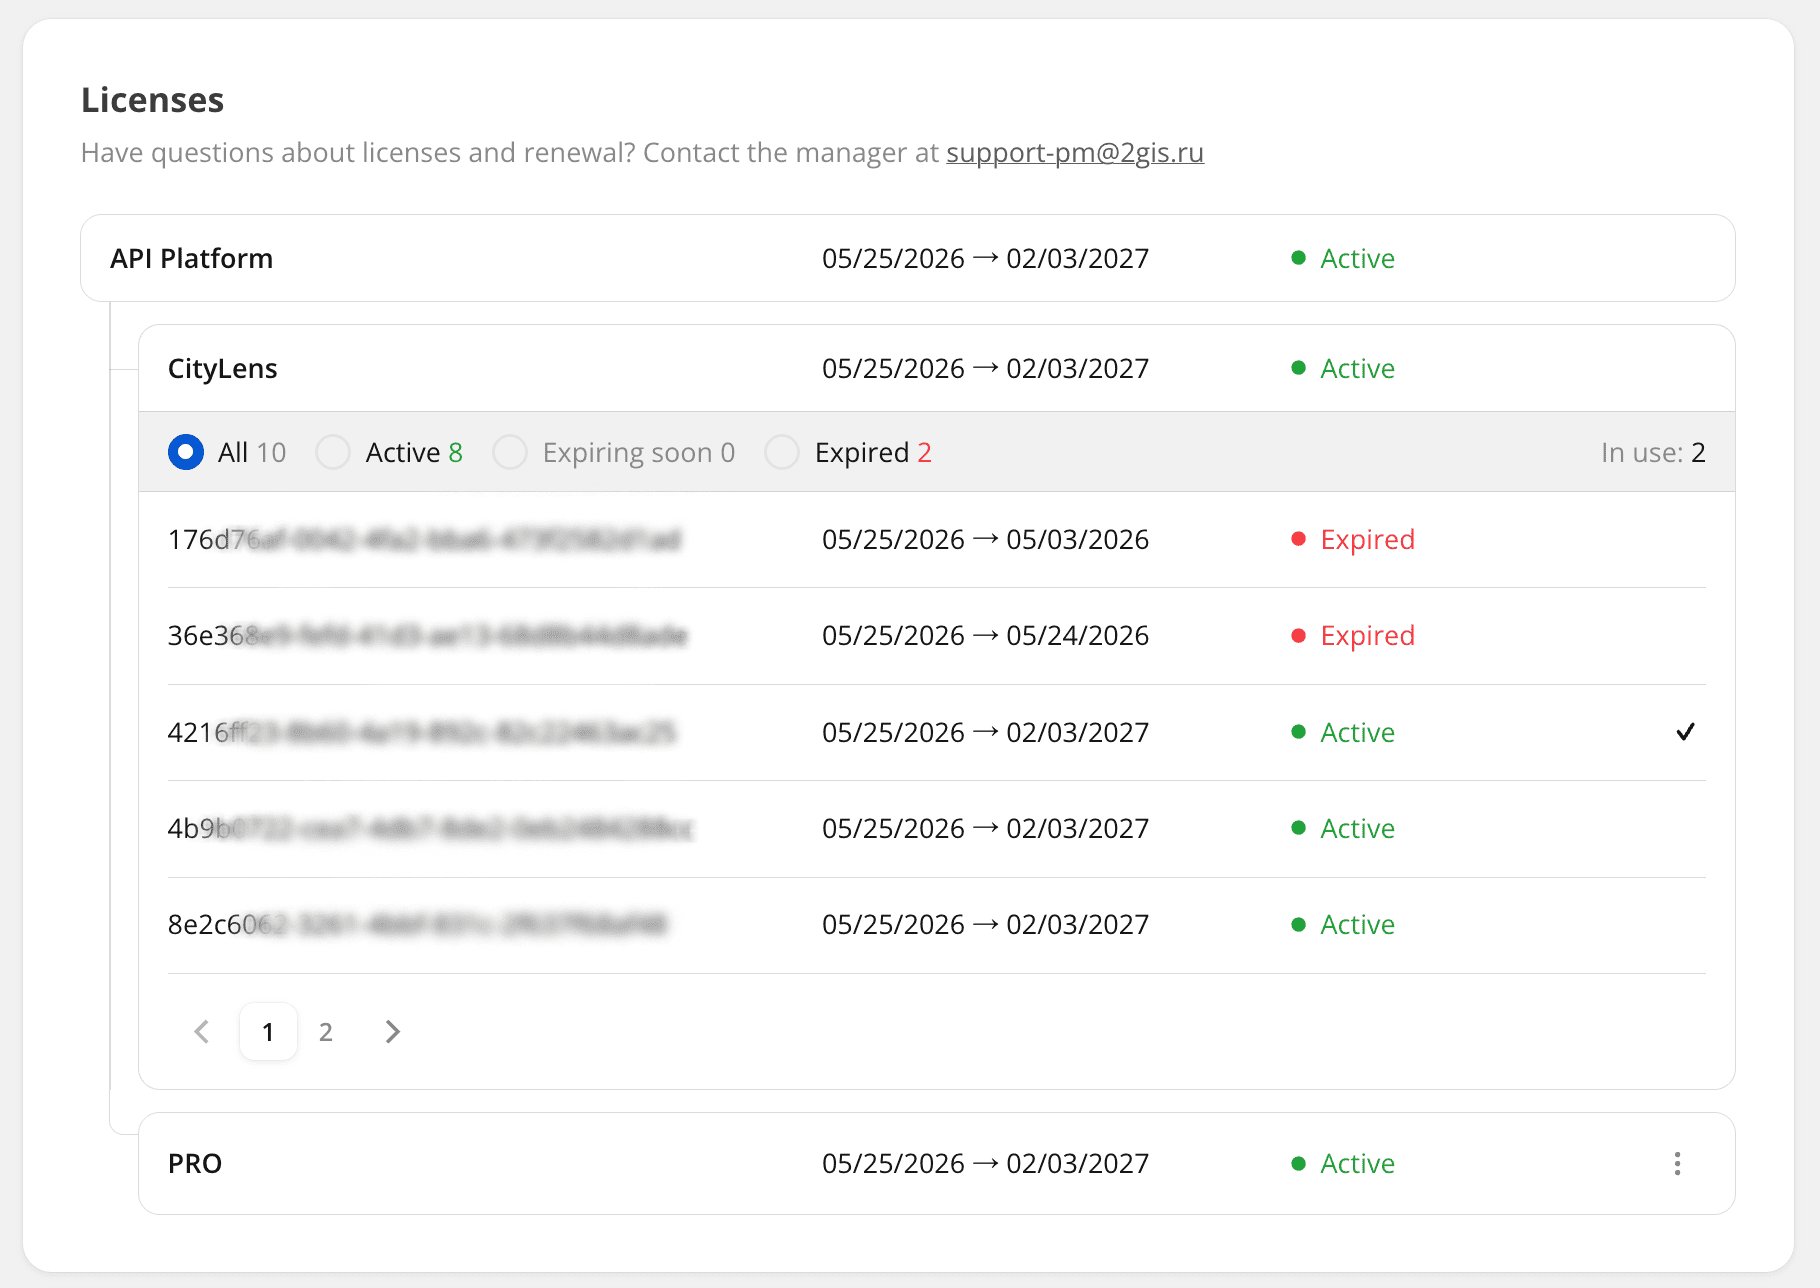
On the Licenses tab, you can view information about licenses installed within the On-Premise suite.
For each license, the following information is displayed:
- service the license is issued for
- license ID
- validity period
- status:
Active,Expiring soon(appears 10 days before expiration), andExpired
To view the JSON file with additional license parameters, click  icon next to the license.
Managing access keys
Users with the Administrator role can manage access keys.
Configuring JSON parameters for services in a key
You can configure additional JSON parameters for services enabled in an API key. These are the same settings available in the API keys service web interface: if a parameter is set in one interface, it is also displayed in the other.
Below are popular usage scenarios for this setting.
Configuring the matrix size for Distance Matrix API
To change the maximum number of starting and ending points a partner can pass in a single Distance Matrix API request:
-
On the API Keys tab, click the key name to open the list of services it includes.
-
In the row of the Distance Matrix API service, click
 icon.
icon.A text field with the current JSON service parameters for this key appears. If no parameters were set previously, the field is empty.
-
Switch to the Partner tab and specify
max_sourcesandmax_targetsvalues in the text field, for example:{"max_sources": 10,"max_targets": 10}Where:
max_sources- maximum number of starting points per request.max_targets- maximum number of ending points per request.
-
Click Save.
You cannot set the matrix size separately for synchronous and asynchronous requests as the restriction is common for both types of requests within the same key. To set different limits for synchronous and asynchronous requests, use two different API keys with different max_sources and max_targets values.
Configuring available fields for Places API
You can allow a partner to receive additional fields with information about a place (for example, floor data) through Places API, or grant access to individual permissions, such as displaying emails for all branches. To do this:
-
On the API Keys tab, click the key name to open the list of services it includes.
-
In the row of the Places API service, click
icon.A text field with the current JSON service parameters for this key appears. If no parameters were set previously, the field is empty.
-
Switch to the Partner tab and specify available
fieldsandpermissionsin the text field, for example:{"fields": ["items.floors","items.floor_plans"],"permissions": ["allow_emails_for_all_branches"]}Available values
-
fieldsvalues:-
Fields with place geometry and address information:
items.point- coordinates of an object in the WGS84(4326) coordinate system inlon, latformat.items.address- address of an object without specifying the city.items.adm_div- administrative division.items.full_address_name- address of an object including the city.items.geometry.centroid- visual center of the object geometry.items.geometry.hover- geometry of the area used to determine whether the cursor is within the object's zone.items.geometry.selection- geometry used for object highlighting.
-
Fields with additional information about a place:
items.rubrics- company categories.items.org- organization the branch belongs to.items.brand- brand the branch belongs to.items.schedule- company operating hours.items.schedule_special- special company operating hours.items.access- parking access type.items.capacity- parking capacity.items.description- geo object description.items.flags- list of object flags. For example, that there are photos of the object, or that the branch is temporarily closed, etc. You can view the full list of available flags in the response schema insideitems.items.floors- number of floors.items.floor_plans- floor plans.items.is_paid- whether the parking is paid.items.for_trucks- parking for trucks.items.is_incentive- whether the parking is park-and-ride.items.purpose- parking purpose.items.level_count- number of parking levels.items.links- related objects (nearest parking lots, public transport stops, etc.).items.links.database_entrances- entrance point information.items.links.database_entrances.apartments_info- apartment information in the building.items.name_ex- components of the object name.
-
System fields:
items.geometry.style- style ID for rendering.items.group- objects grouped into a combined card.items.is_main_in_group- indicates whether the object is the main one in a hybrid object group.items.city_alias- city alias where the object is located.items.detailed_subtype- detailed type of an administrative-territorial unit.items.alias- transliterated object name.items.caption- object name.items.routes- transport routes passing through the station or stop.items.directions- route directions.items.is_routing_available- indicates whether the object is reachable by vehicle.items.entrance_display_name- entrance number at a metro station if the object is an entrance (station_entrance).items.locale- current locale for the region.items.region_id- unique project ID.items.segment_id- unique segment ID.items.has_apartments_info- indicates whether there is apartment information available in the building.items.station_id- unique ID of the stop the platform belongs to.items.platforms- stop platforms of a stop.items.search_attributes- search result parameters for the found object. Each field insideitems.search_attributesmust be requested separately using dot notation, for example,items.search_attributes.segment_id. You can view the full list of available fields insideitems.search_attributesin the response schema for any object insideitems.items.poi_category- POI category.items.temporary_unavailable_atm_services- indicates whether there are unavailable services at the ATM or terminal.items.floor_id- floor ID.items.purpose_code- building purpose code.items.name_back- localized name of a road sign in the reverse direction (if available).items.value_back- kilometer marker on a road sign in the reverse direction.items.ev_charging_station- EV charging station attributes.items.ski_lift- ski lift information.items.summary- summary information block.items.settlements_group_name- settlement name.items.sport_route_type_name- sports route type.items.ski_track- ski track information.
-
-
permissionsvalues:allow_emails_for_all_branches- permission to view email in the contact list for all branches.government_address_classifiers- permission to view the codes of the state classifiers: Federal Information Address System, National Classifier of Administrative Territorial Entities, and National Classification of Territories of Municipal Formations.
-
-
Click Save.
Managing map styles
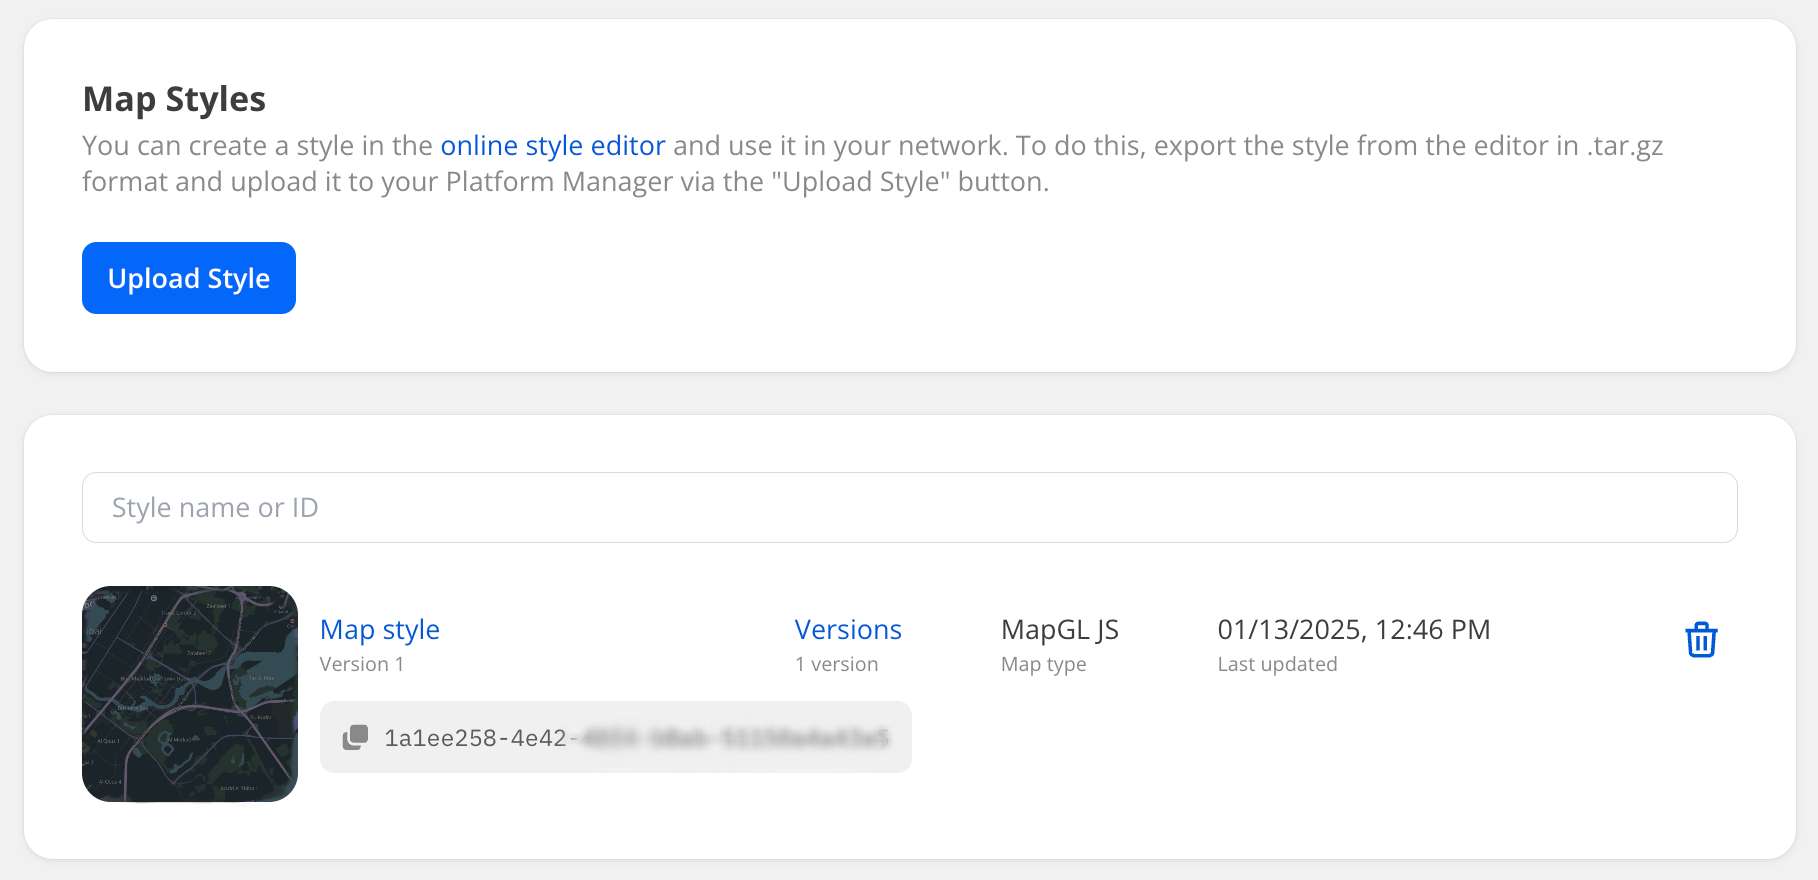
On the Map Styles tab, you can:
- Upload custom map styles to use in a private environment.
- Update map styles and switch between them. You can use new styles or upload updated versions of the same style.
- View the list of uploaded styles along with their details: style ID, version, and the map type they are created for.
- Delete uploaded styles.
Uploading and applying a map style
You can create a unique map style and use it in your environment.
-
Make sure that the Styles API is installed along with other map services.
-
Open the Style editor and create a map style.
See instructions on creating and configuring styles in the Style editor documentation.
-
Export the created style from the Style editor:
-
In the Style editor, open the card of the required style in the My styles block.
-
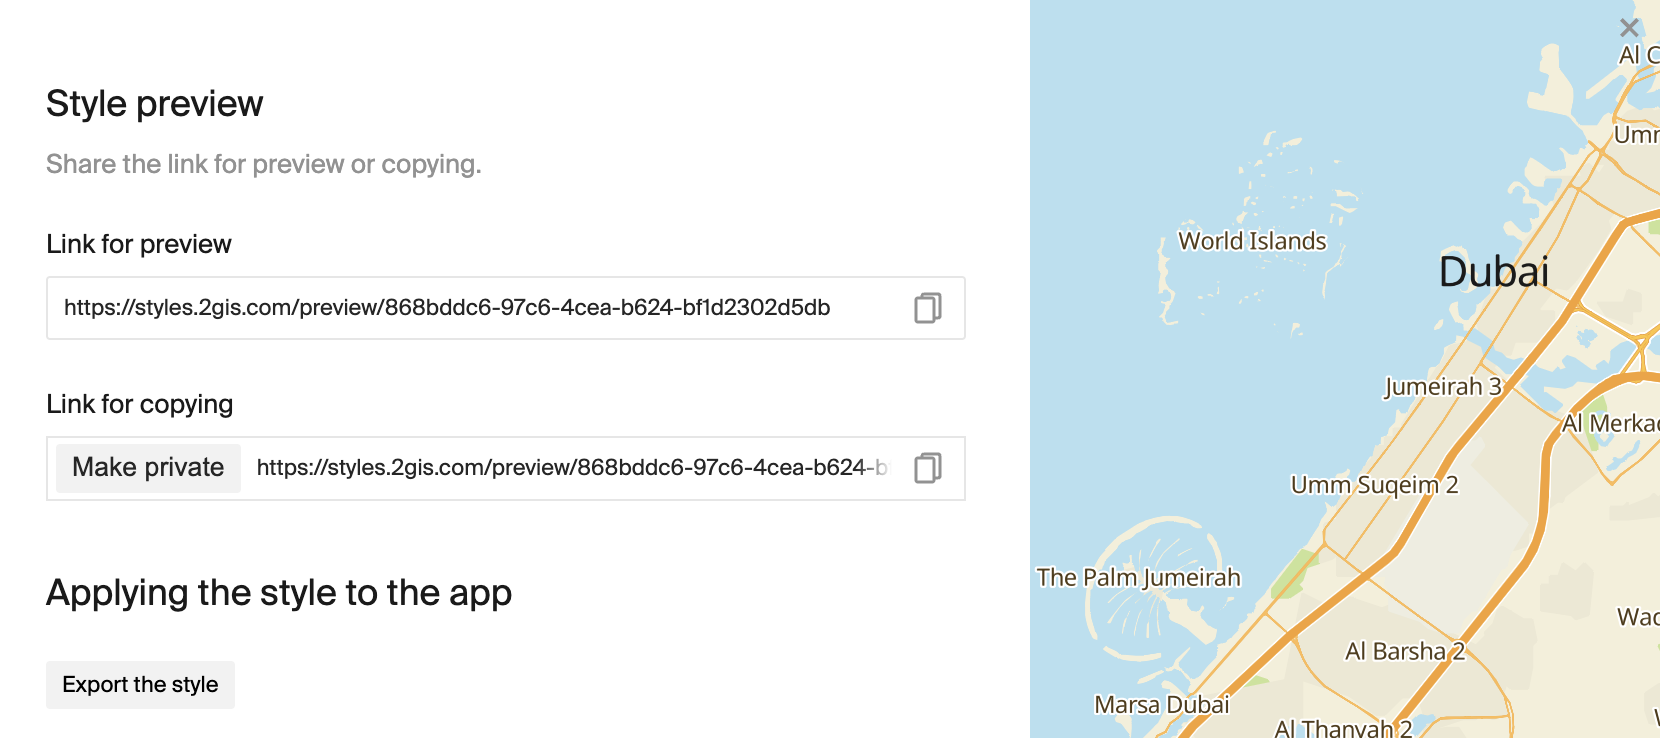
In the top menu, click Share, and then click Export the style in the opened dialog.
-
Select the required style from the list and click Export.
A new panel appears, preparing the archive for download.
-
When the style is in the Done status, select it from the list and click Download the style.
-
Save the generated
.tar.gzarchive locally.
-
-
Upload the style to the On-Premise environment:
- Open the Platform Manager.
- Go to the Map Styles tab and click Upload Style.
- Add the exported
.tar.gzarchive and wait until it is successfully uploaded (the archive status must be Uploaded).
-
To check how the uploaded style looks in the playground, on the Map Styles tab, click the required style name.
-
Copy the generated style ID from the Map Style ID field and apply it to the map using the MapGL JS API.
You can upload different versions of one style and switch between them in the Platform Manager: for more details, see the Updating a map style section.
Updating a map style
You can apply a new style to the map or update a previously created one.
-
Open the Style editor and create a new style or edit an existing one.
See instructions on creating and configuring styles in the Style editor documentation.
-
Follow the steps to export the style from the Style editor and upload it to the Platform Manager.
-
If you upload an updated version of the existing style, its ID does not change. The Platform Manager detects the update as a new version of the style. You can switch between versions of one style.
-
If you upload a new style, copy the generated style ID from the Map Style ID field and apply it to the map using the MapGL JS API.
Deleting a map style
Before deleting a style, make sure it is not applied to any active map. Otherwise, the map may display incorrectly when the style is removed.
- Go to the Map Styles tab.
- Click
 icon next to the required style.
Working with playgrounds
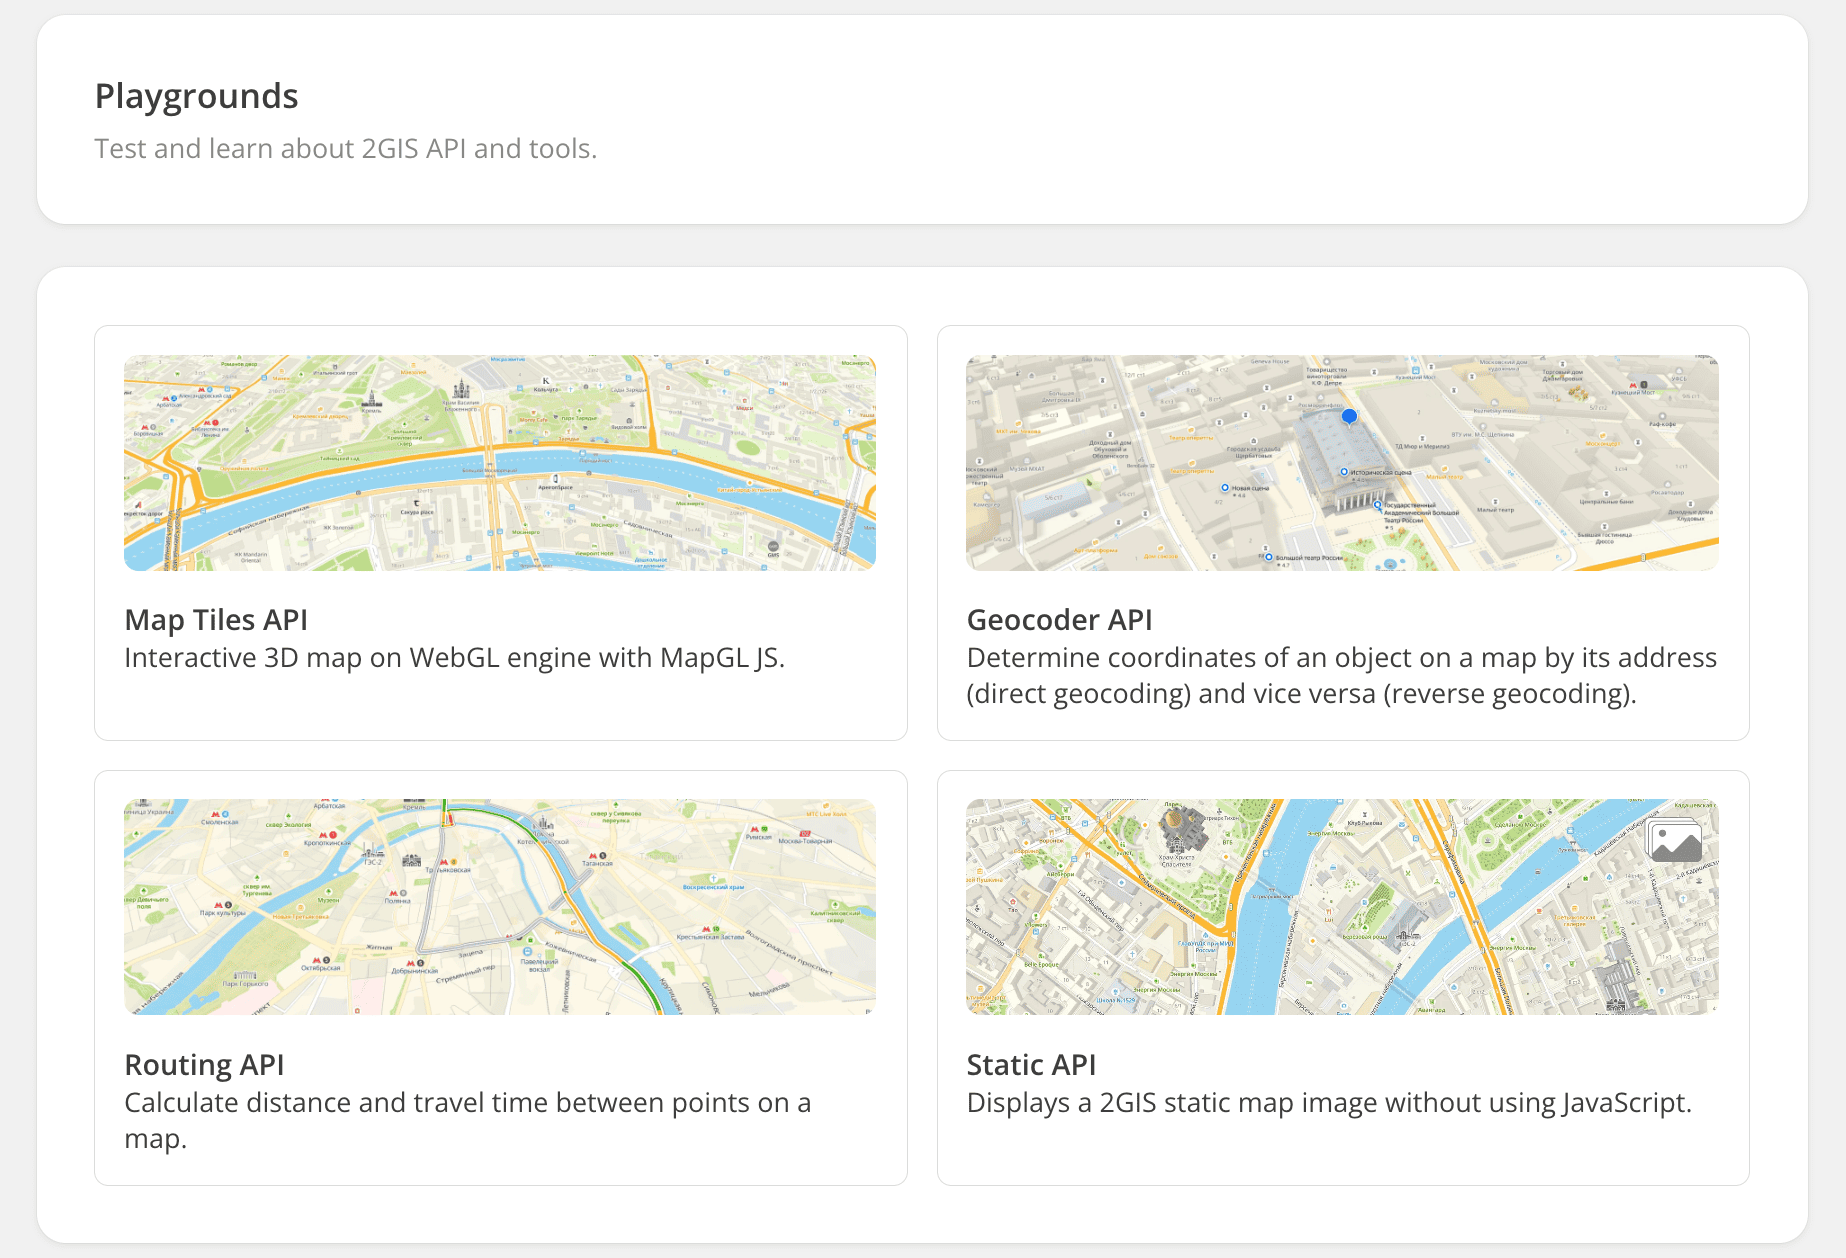
On the Playgrounds tab, you can test the operation of key APIs (you do not need to install services to work with playgrounds):
- Map Tiles API: 3D interactive map based on the WebGL engine with MapGL JS.
- Static API: static maps without using JavaScript.
- Geocoder API: search API for determining the coordinates of an object by address (direct geocoding) and vice versa (reverse geocoding).
- Directions API: navigation API for building car, bicycle, and pedestrian routes.
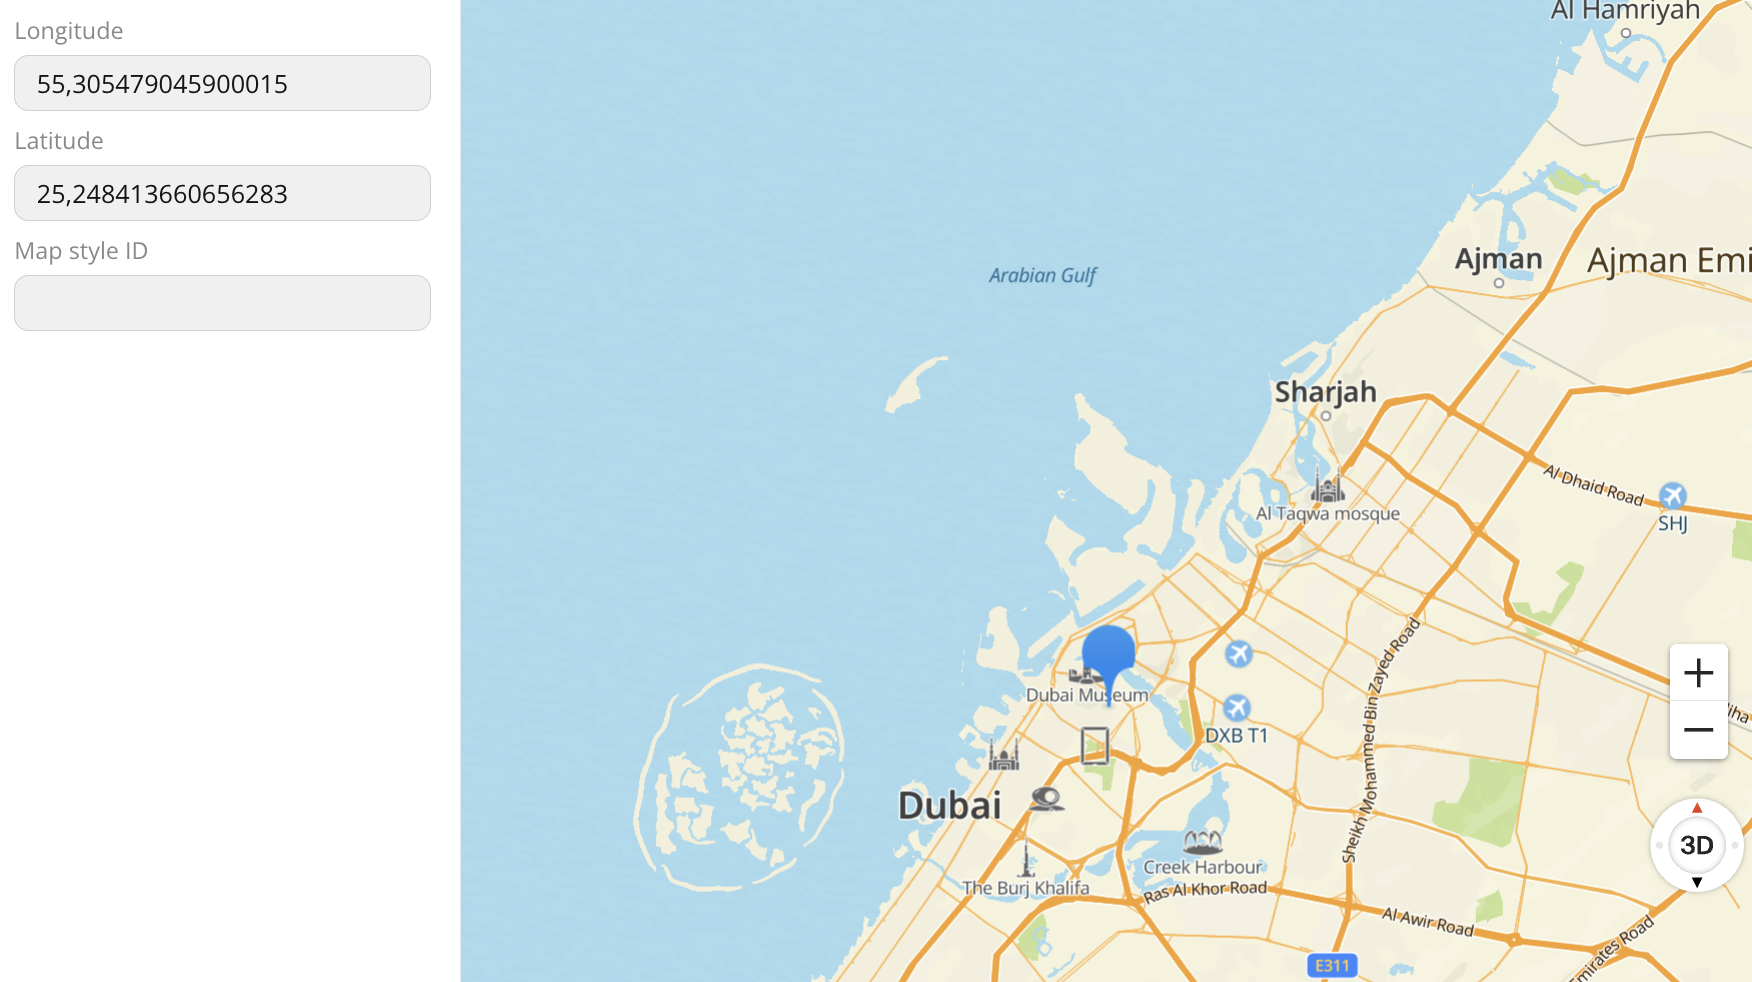
Example of working in the Map Tiles API playground:
Viewing statistics
On the Statistics tab, you can view detailed data on the number of requests. You can filter the data by time period, service, and API key.
Example of statistics display:
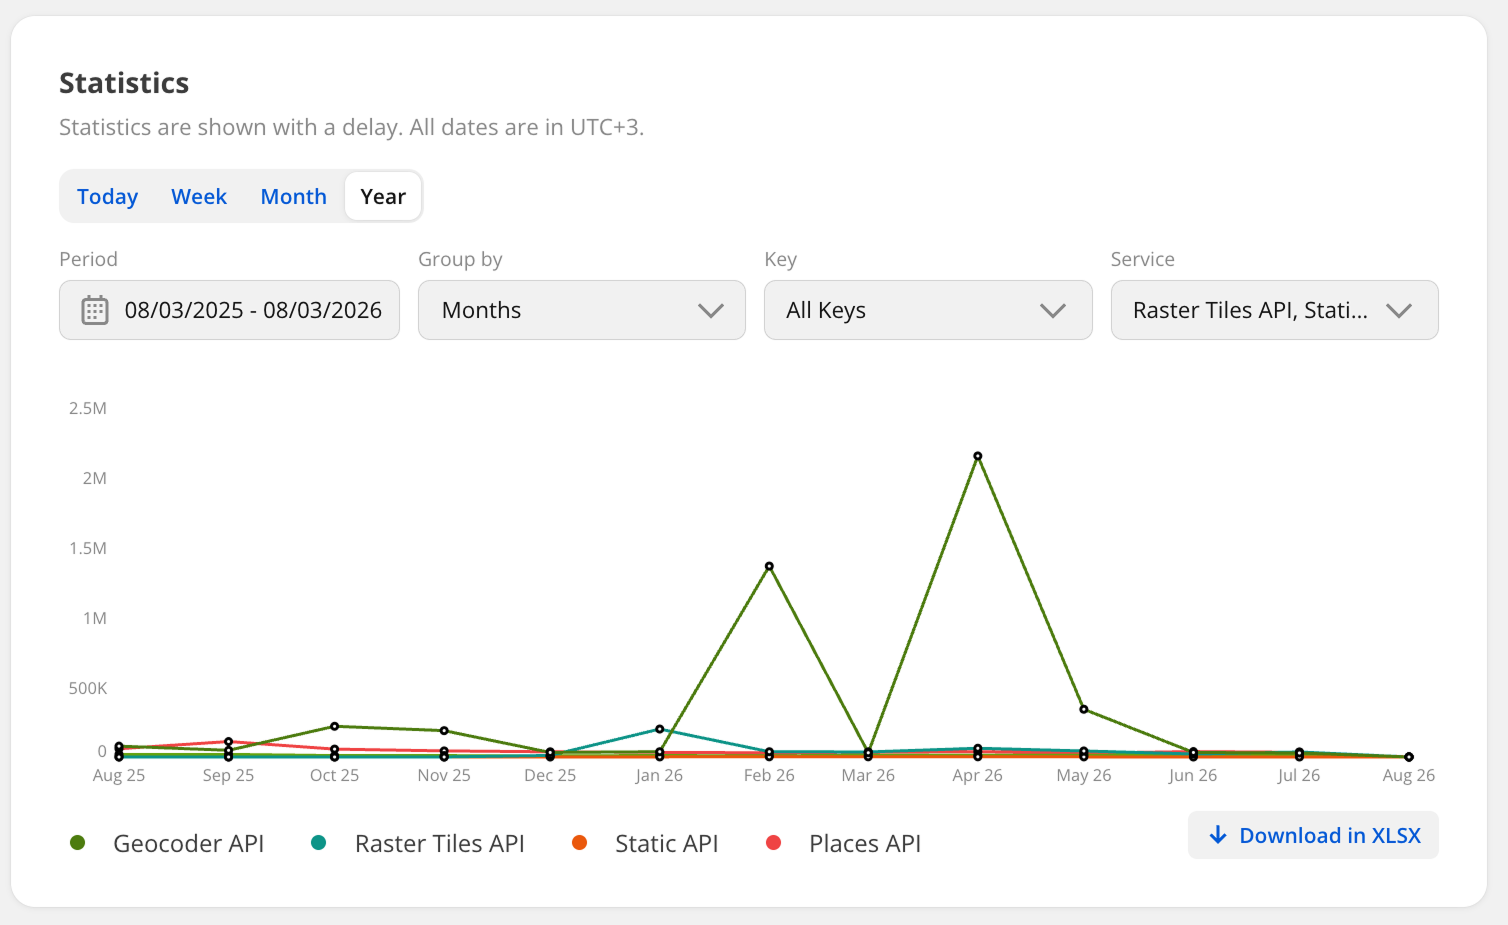
The graph displays the number of requests to services over the year grouped by months.
Request distribution statistics
To view the statistics of request distribution:
-
Go to the Statistics tab.
-
Select the period for which you need to get the statistics (today, the last week, month, or year) or specify a custom period of time in the Period field. Date and time are specified in UTC format. When selecting a monthly or yearly period, you can choose how the data will be displayed in the Group by field: by days, weeks, or months.
-
In the Key field, select the access keys for which you need to get the statistics. To select all keys, select Select all.
To filter keys by status and usage mode, click
 icon, select the key status (
Active,Inactive) and mode (Demofor a demo key andProdfor the main key). -
In the Service field, select the services for which you need to get the statistics. To select all services, select Select all.
Downloading a file with the statistics
You can download the statistics as a file with a table in .xlsx format. The table contains the fields:
- Key: key ID.
- Date: request date.
- Service: service to which a request is sent.
- Mode: key usage mode (
demofor a demo key orprodfor a main key). - Method: endpoint to which a request is sent.
- Result: request result (
Success,Empty response, orError). - Result code: code of a request result.
- Requests amount: number of requests during a day specified on a date.
- Organizations: number of organizations that are received via the Places API, the Suggest API, and the Markers API.
- Geoobjects: number of geoobjects that are received via the Search APIs.
- Routes: number of routes that are built via the Navigation APIs, excluding the Isochrone API.
To download a file containing the statistics of request distribution:
- Go to the Statistics tab.
- Select a period, keys, and service.
- Click Download in XLSX.
Monitoring services status
On the Status Page tab, you can view the list of services installed within the On-Premise suite and check their status.