Purchasing and changing a subscription
To start working with 2GIS maps, search, or navigation APIs, you need to purchase a subscription and create API keys.
- Subscription is a package of services and usage limits. Within a subscription, you create API keys that provide access to the purchased service package and consume the specified limits. If the subscription is inactive (expired or unpaid), the API keys also stop working.
- API key is a unique access key that you specify when working with services. Each API key by default has access to all the services included in the subscription.
You can get a free demo key for one month to test the 2GIS APIs functionality.
Purchasing a subscription
-
Sign in to the Platform Manager.
-
Go to the Dashboard tab and click Buy Subscription.
Subscription purchaseIf you do not see the Buy Subscription button in the interface, click Contact Manager to purchase a subscription and skip the steps below. Once the subscription is created, you can proceed with managing access keys and viewing statistics.
-
Select the payment period: 1 month or 1 year.
-
Select the services you need access to. You can select separate services or a prepared set depending on the task, for example, searching for a business on the map or building routes.
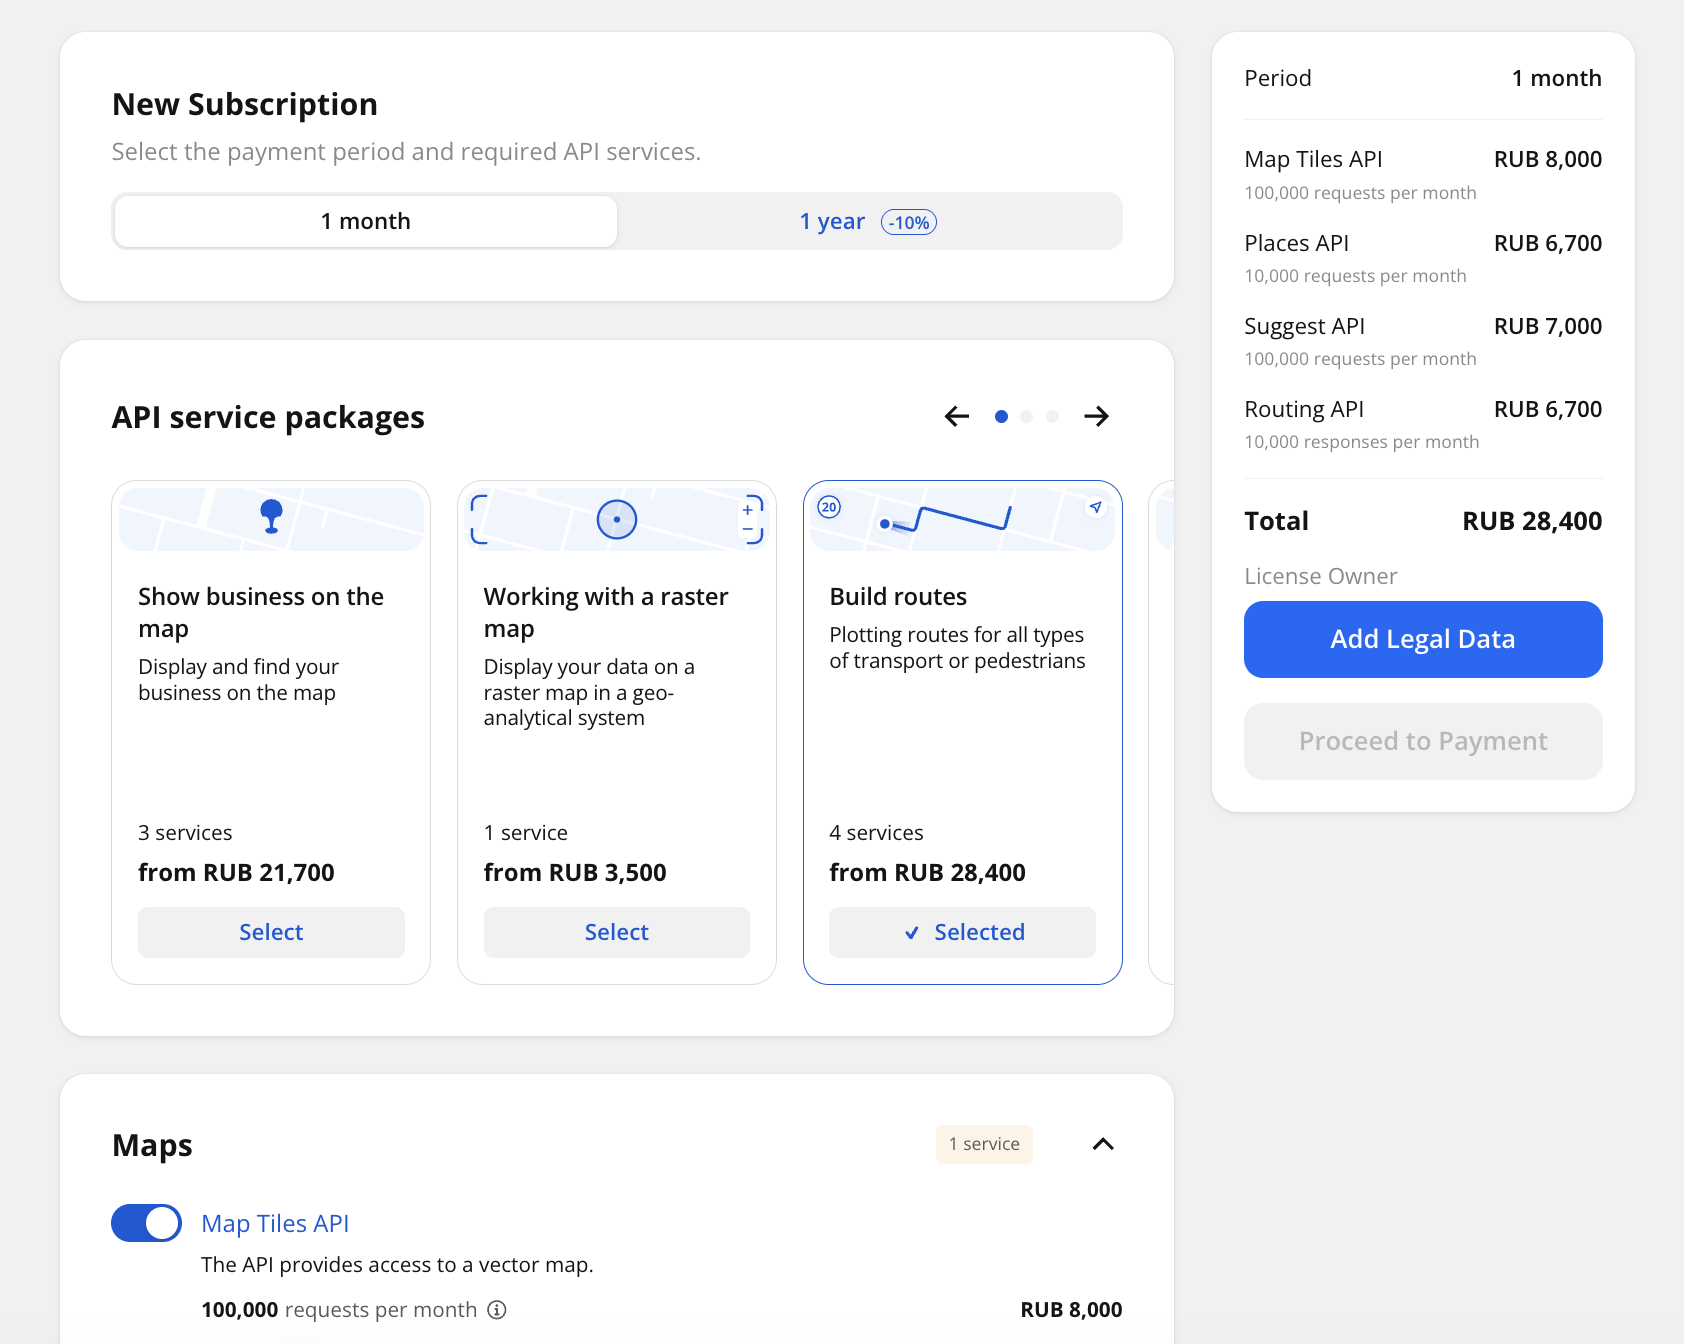
If the services are not sufficient during operation, you can purchase additional services.
-
For each service, specify the limit on the number of requests or responses (depending on the service) per month.
If service usage exceeds the limit after you purchase a subscription, the API key is suspended until the beginning of the next month. You can change the limits for services of the key within the subscription or purchase additional limits. The service is unlocked after that.
-
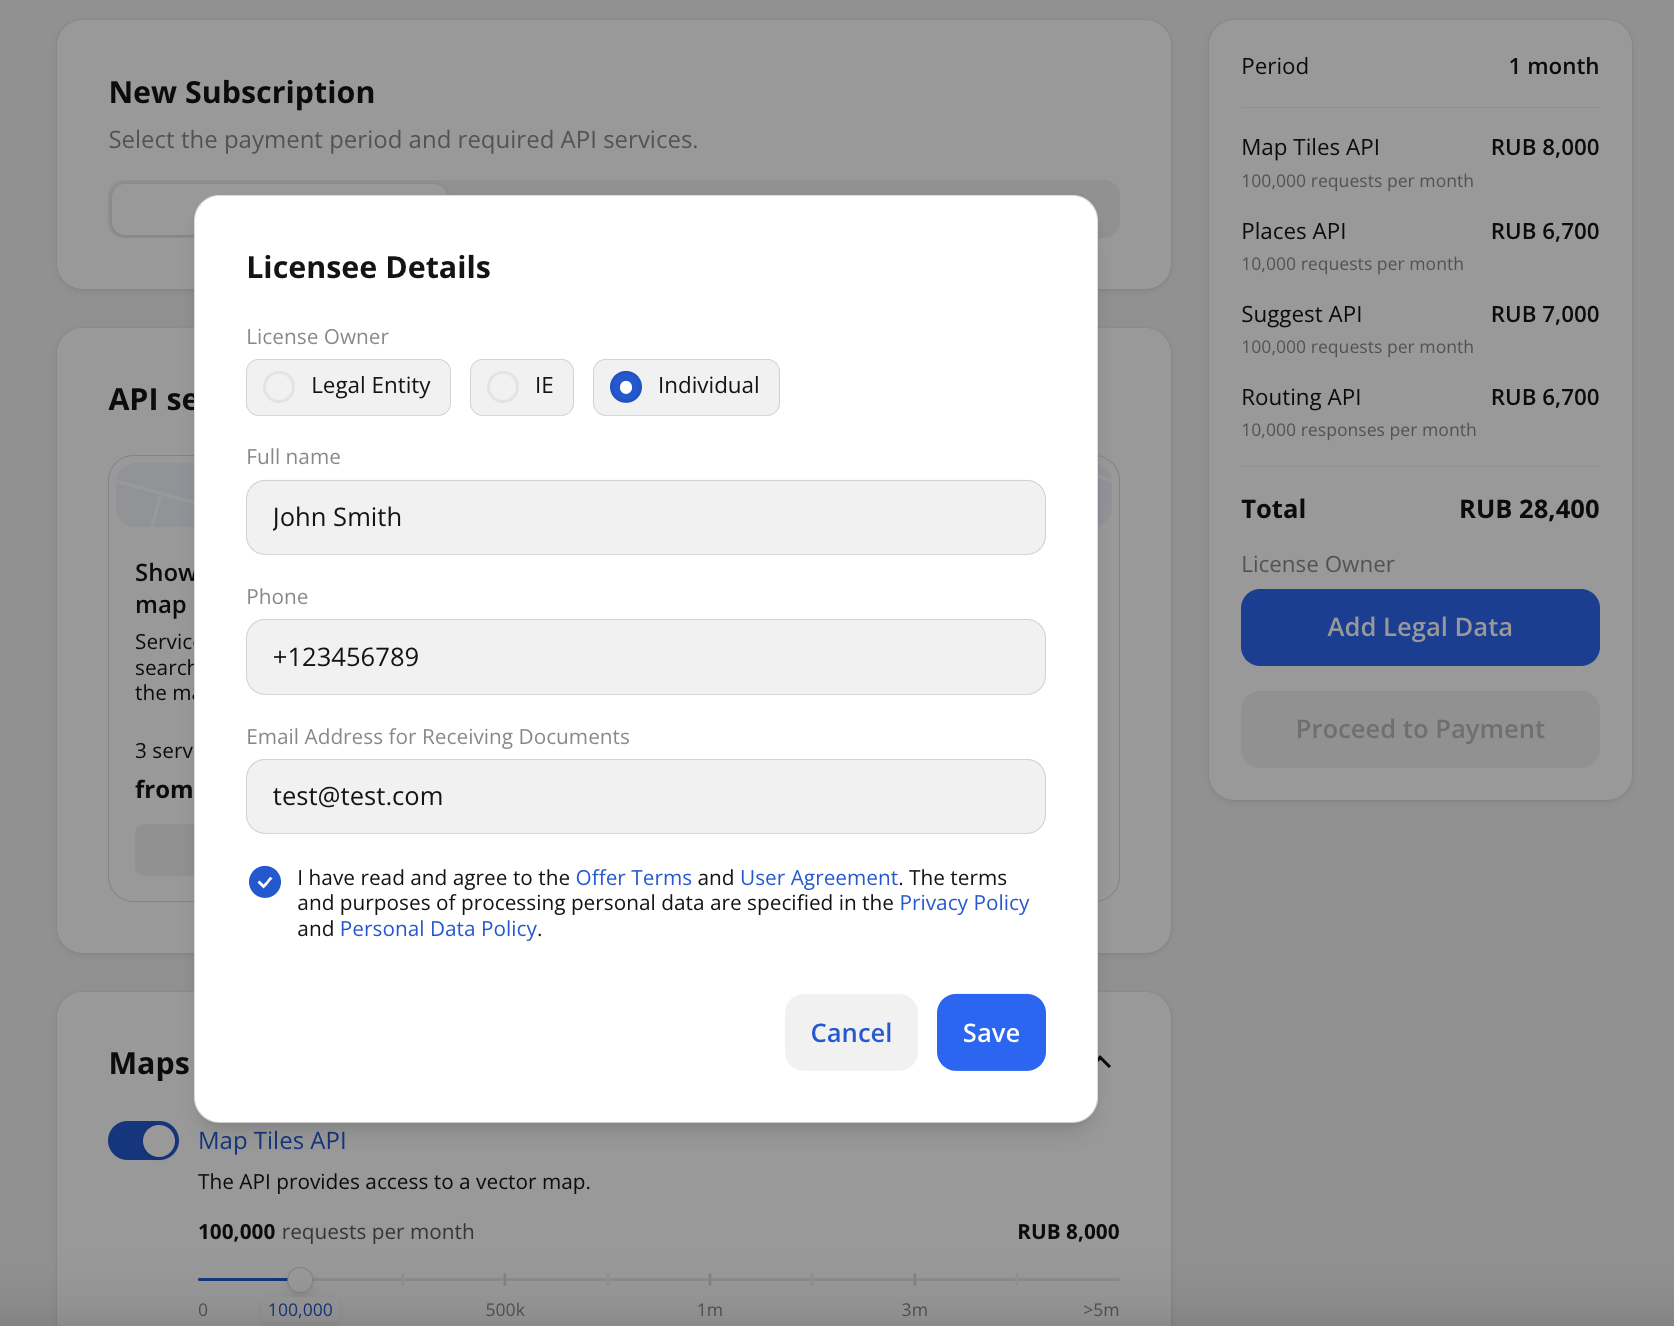
Click Add Legal Data.
-
Select the license owner: legal entity, individual entrepreneur (IE), or individual.
-
Specify the owner details depending on the legal form:
- Legal entity: tax reference number, RRC, and email for receiving documents. The name and legal address of the company will be filled in automatically.
- Individual entrepreneur: tax reference number and email for receiving documents.
- Individual: full name, phone number, and email for receiving documents.
-
Select the checkbox to agree to the offer terms and user agreement and click Save.
-
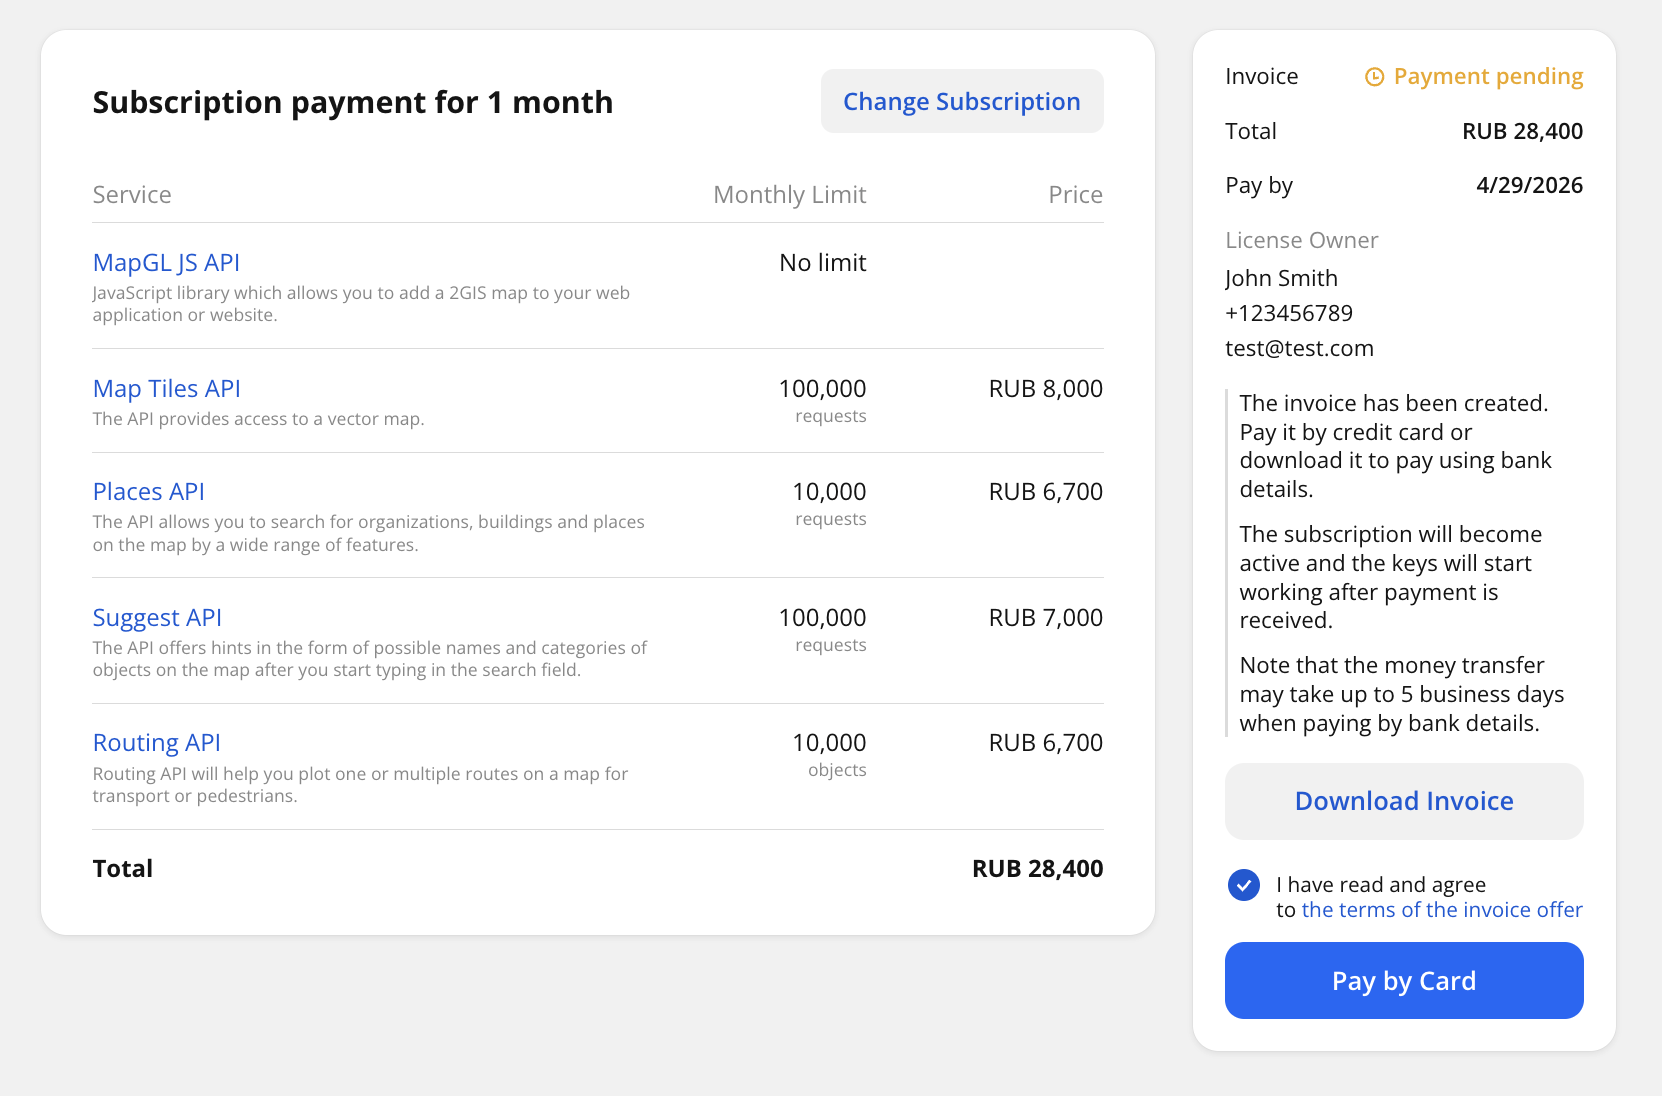
Check the specified information and click Proceed to Payment. An invoice will be generated automatically. Click Download Invoice and check it.
If you need to change the subscription conditions, click Change Subscription and specify new services and limits. Then click Proceed to Payment.
-
Pay for the subscription using any method:
- By bank card: click Pay by Card and enter card details. Mir, Visa, and Mastercard cards issued in the Russian Federation are accepted. If you pay by card, the subscription is activated immediately after payment.
- By invoice: click Download Invoice and pay using the specified payment details. Processing bank transfers may take up to 5 days. The subscription is activated only after payment. You can see the list of all invoices on the Payment tab.
If you purchased a subscription for the first time, one API key is created automatically. To create more keys, see the Creating access keys guide.
After that, you can change the subscription settings that will be valid in the next periods, or purchase additional limits and services for the current active subscription.
Changing a subscription
You can change the subscription settings that will be valid for the next billing period: duration, list of services, and limit on the number of requests or responses (depending on the service) per month. You can change the subscription settings an unlimited number of times, but only until the invoice is paid and no earlier than 25 days before the end of the current period.
New terms are activated after payment and the end of the current subscription.
To change limits and services in your current subscription, purchase additional limits and services.
To change the subscription settings for the next period:
-
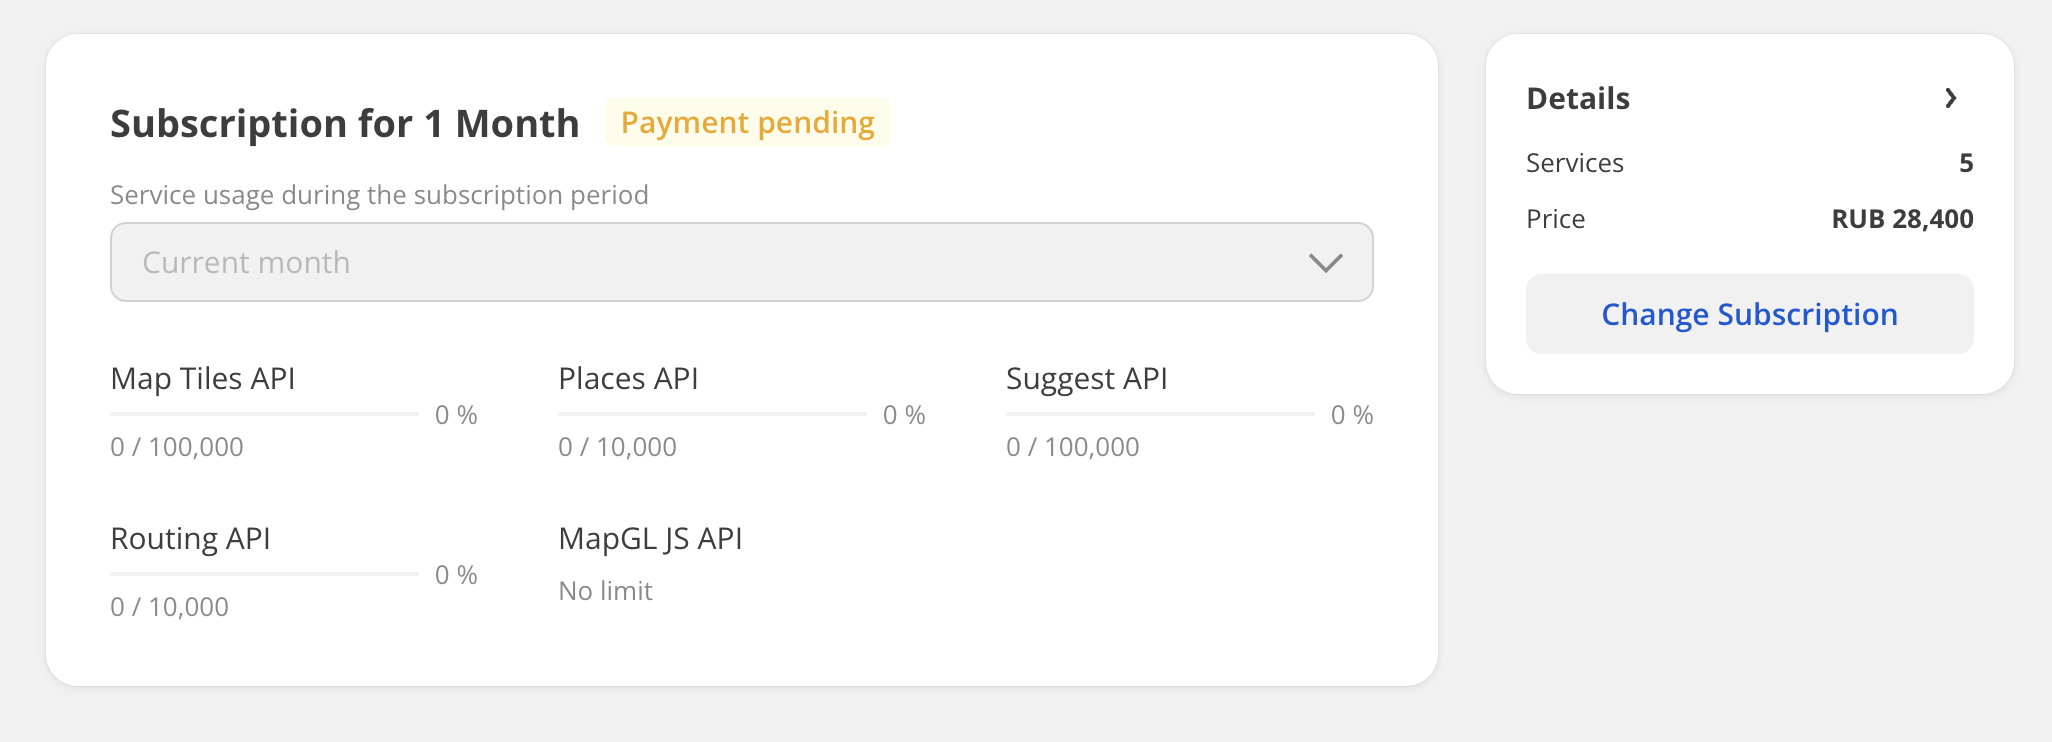
Go to the Subscription tab and open the subscription page.
-
Click Change Subscription.
-
(Optional) Select a new payment period: 1 month or 1 year.
-
Select the services you need access to. For each service, specify the limit on the number of requests or responses (depending on the service) per month.
-
Click Proceed to Payment. A new invoice will be generated automatically. Click Download Invoice and check it.
-
Pay for the subscription using any method:
- By bank card: click Pay by Card and enter card details. Mir, Visa, and Mastercard cards issued in the Russian Federation are accepted.
- By invoice: click Download Invoice and pay using the specified payment details. Processing bank transfers may take up to 5 days. You can see the list of all invoices on the Payment tab.
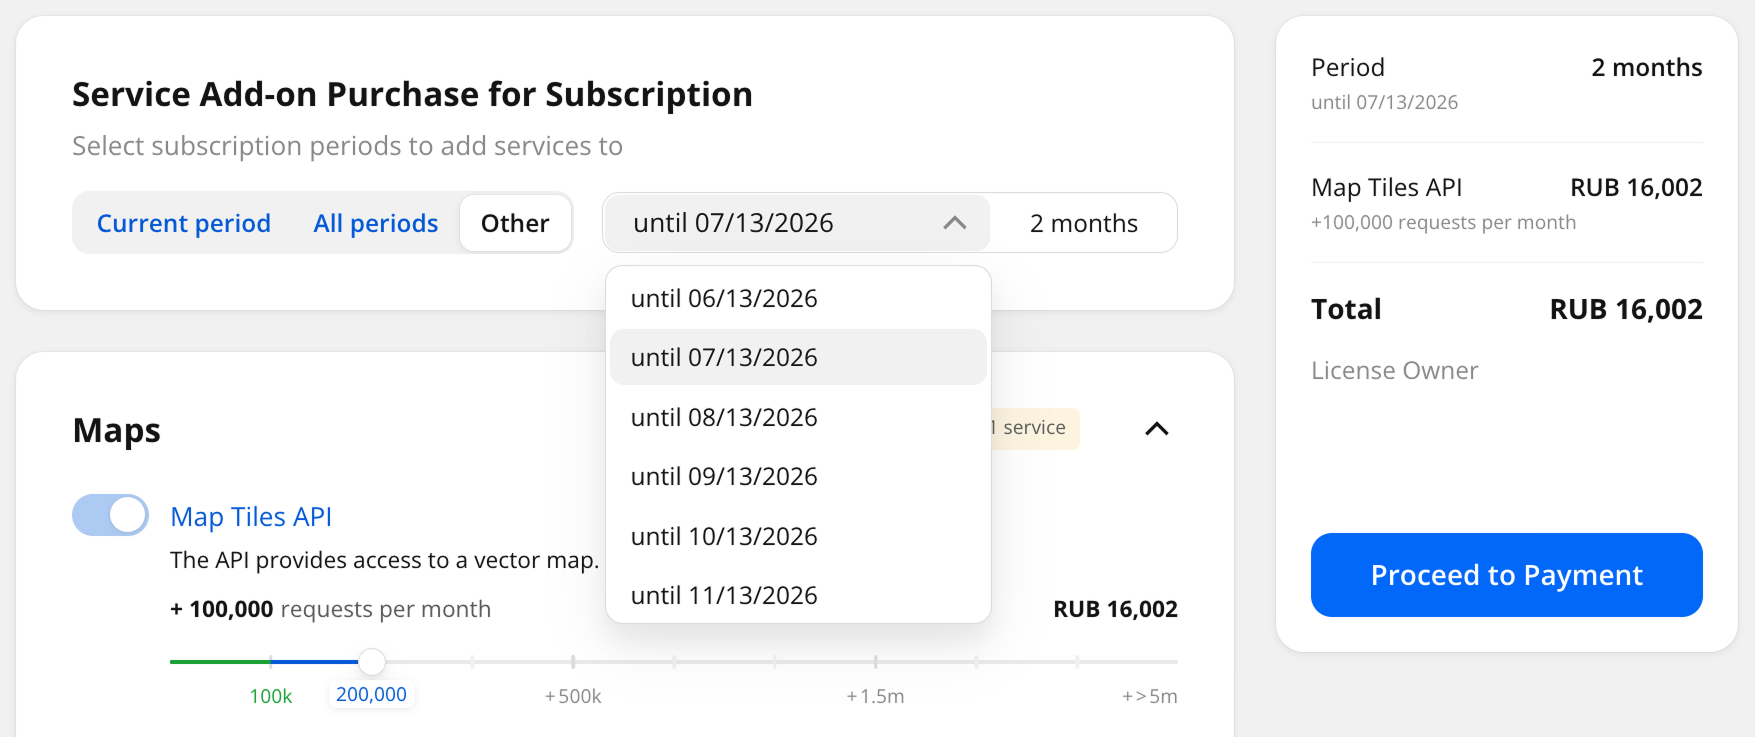
Purchasing additional limits and services
For your current active subscription, you can purchase additional services and limits on the number of requests or responses (depending on the service) per month. You can purchase additional limits and services an unlimited number of times.
The add-on cost for each service is calculated as follows: the number of billing months (including the current one) for which you are purchasing additional limits and services is multiplied by the monthly cost of the selected number of limits. For example, you purchased a 12-month subscription on December 2, 2025 and want to increase the limits for the entire period. If you purchase additional services on December 12, 2025, 12 months will be counted. If you purchase additional services on January 10, 2026, 11 months will be counted. For more information on prices, see the Prices instruction.
New limits and services are activated after payment and will be valid until the end of the subscription period you added them to.
To change the subscription terms that will be valid in the next periods, see the Changing a subscription section.
To purchase additional limits and services for the active subscription:
-
Go to the Subscription tab and open the subscription page.
-
Click Purchase Limits and Services.

-
If your subscription is active for 12 months, select the period for which you want to purchase additional limits: for the current billing month, the entire subscription period, or another period.
-
Select the services you need access to. For each service, specify the limit on the number of requests or responses (depending on the service) per month.
For enabled services, you can only specify limits that exceed the current ones.
-
Click Proceed to Payment. A new invoice will be generated automatically. Click Download Invoice and check it.
-
Pay for the limits and services using any method:
- By bank card: click Pay by Card and enter card details. Mir, Visa, and Mastercard cards issued in the Russian Federation are accepted. If you pay by card, the limits and services are activated immediately after payment.
- By invoice: click Download Invoice and pay using the specified payment details. Processing bank transfers may take up to 5 days. You can see the list of all invoices on the Payment tab.
The cost of the additional purchase is valid until the end of the current billing period or subscription.
Other questions
If you have questions about subscription management, visit the support chat by clicking Help in the lower-left corner of the Platform Manager interface.