Access key management
You can manage demo and production access keys:
- rename a key
- configure a key for SDK
- view statuses of a key and services
- enable and disable services in a key
- configure limits for services
- unblock a service
- configure additional key restrictions
- block a key
Renaming a key
- Go to the API Keys tab and select the required key.
- Click Actions and select Edit Name.
- Enter the new key name and click Save.
Configuring a key for SDK
You can switch any existing key to mobile SDK mode:
-
Go to the API Keys tab and select the required key.
-
Enable the Use for SDK option.
-
(Optional) Specify the App ID for which the key will be used. Specifying the App ID is required only for SDK versions earlier than 13.3.0 or if you plan to work with offline data. App ID requirements:
- For iOS
- For Android and Flutter
You can use Latin letters (A–Z, a–z), digits (0–9), dots (.) to separate segments, and hyphens (-).
For more information, see the official documentation.
- You can use Latin letters (A–Z, a–z), digits (0–9), dots (.) to separate segments, and underscores (_).
- The App ID must contain at least two segments separated by dots (e.g.,
com.example.app). Each segment must start with a letter.
For more information, see the official documentation.
warningIf the key has an App ID specified, you can only use this key for working with the mobile SDK. To work with the 2GIS API directly (via HTTP requests), create a separate key.
-
Click Save and download key.
Viewing statuses of a key and services
On the API Keys tab, you can view statuses of keys and services in them and the planned or actual date of key blocking.
Statuses are displayed only for enabled services added to the subscription. For example, if the subscription contains 15 services and 10 are enabled in the key, statuses are shown only for those 10.
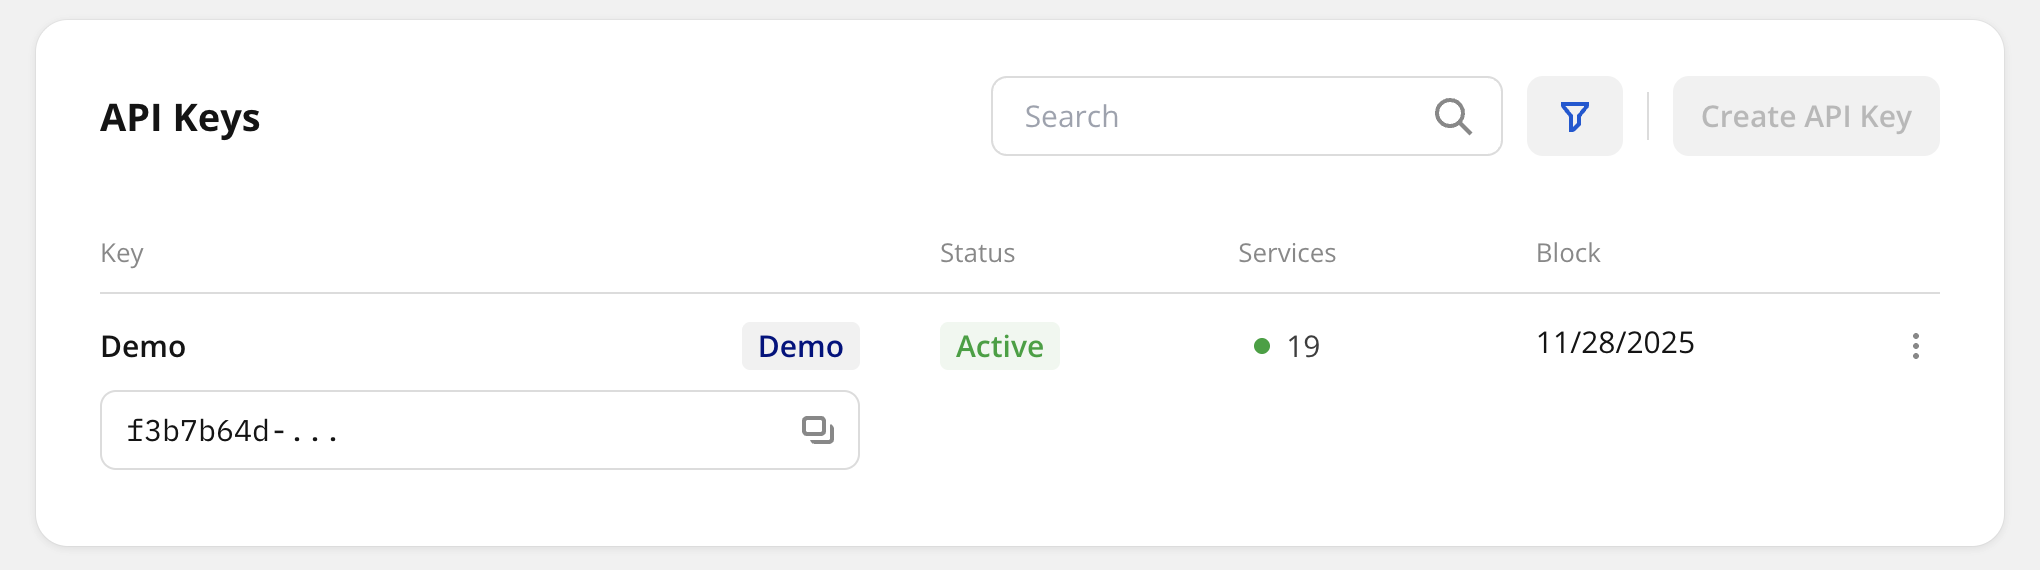
Possible key statuses:
- Active: key is operating. The service APIs receive requests.
- Inactive: key is manually blocked, or its blocking date has passed.
- Pending subscription: key is not operating due to subscription issues (for example, payment is pending).
Possible statuses of services:
- Green indicator: service is enabled and active. The service API receives requests.
- Red indicator: service is enabled but throttled or blocked due to reaching limits in the key or subscription (a Throttle or Block action was applied when the limit was reached). If the Notification action was configured, the service remains enabled because the API still receives requests.
- Gray indicator: service belongs to a key with status Inactive or Pending subscription.
Enabling and disabling services
You can enable or disable services in keys with the Active status. When a service is disabled, its APIs do not receive requests.
- Go to the API Keys tab and select the required key.
- To enable or disable the service, use the toggle to the left of a service name.
Configuring limits for services
You can configure limits only for enabled services that belong to keys with the Active status.
Limits are displayed for all services added to the subscription. If the service belongs to a key with the Inactive status, the limit counter displays 0.
If you specify a limit value for a service that is greater than the subscription limit, the service will be blocked when the subscription limit is reached.
-
Go to the API Keys tab and select the required key.
-
Click
 icon in the row of the required service.
 -
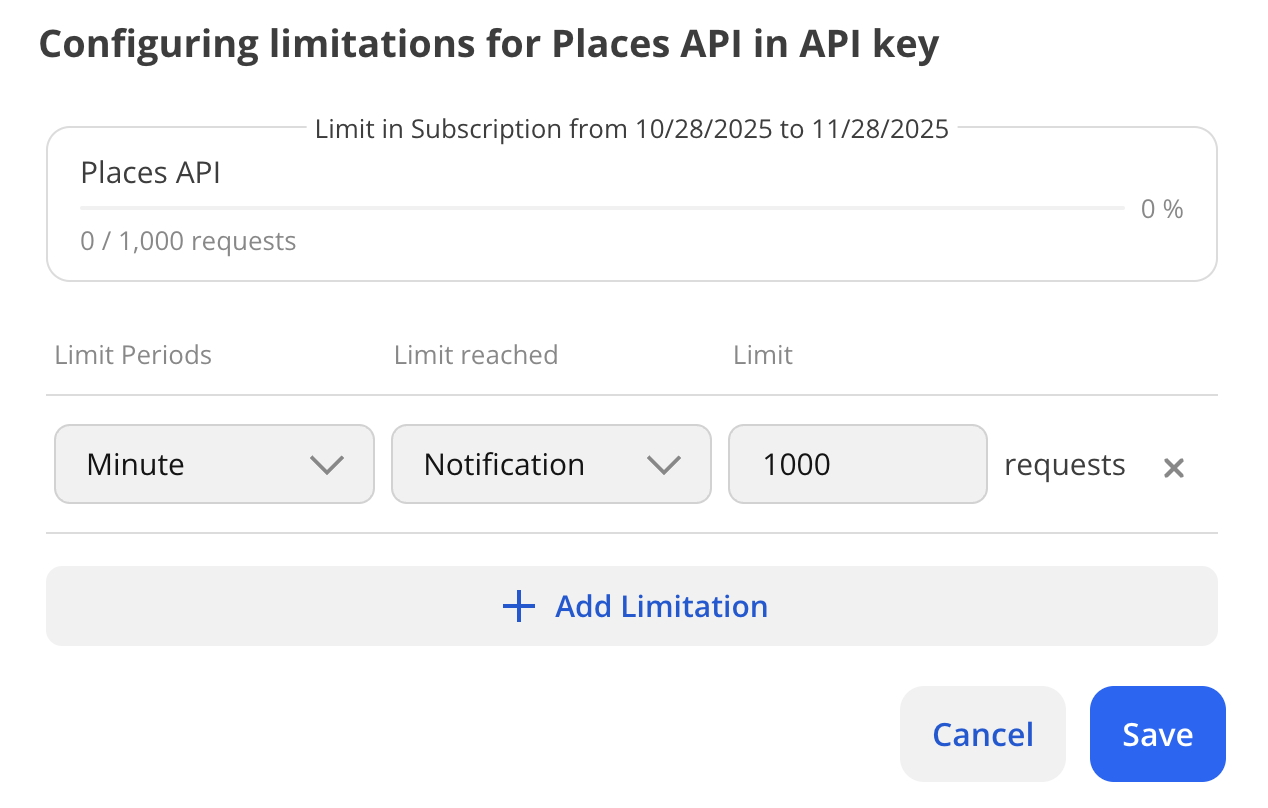
In the Configuring limitations in API key dialog, configure the service limits:
-
Limit Periods: limit duration (minute, day, or month).
-
Limit reached: action taken when the limit is reached:
- Notification: when the limit is reached, a notification will be sent to the email address specified in your profile. The service continues operating.
- Throttle: when the limit is reached, the service is temporarily blocked for the limit duration period. The service will be automatically unblocked after the limit period ends. If necessary, you can unblock the service manually.
- Block: when the limit is reached, the service is blocked. If necessary, you can unblock the service.
-
Limit: number of requests (or responses) for the service, e.g., 1000 per day.
-
-
To add another limit, click Add Limitation and repeat step 3. You can set up to 100 limits per service.
-
Click Save.
Unblocking a service
A service can be blocked after applying the Throttle or Block action when a limit is reached. To unblock a service, in the Configuring limitations in API key dialog, perform one of the following actions:
- In the Limit field, increase the number of requests (or responses) for the service.
- Delete the limit by clicking
 icon.
icon.
Configuring additional key restrictions
Restrictions are applied to all services belonging to the key. If the subscription limits are reached earlier than specified restrictions, the key will be blocked.
-
Go to the API keys tab and select the required key.
-
In the Restrictions section, configure the key restrictions:
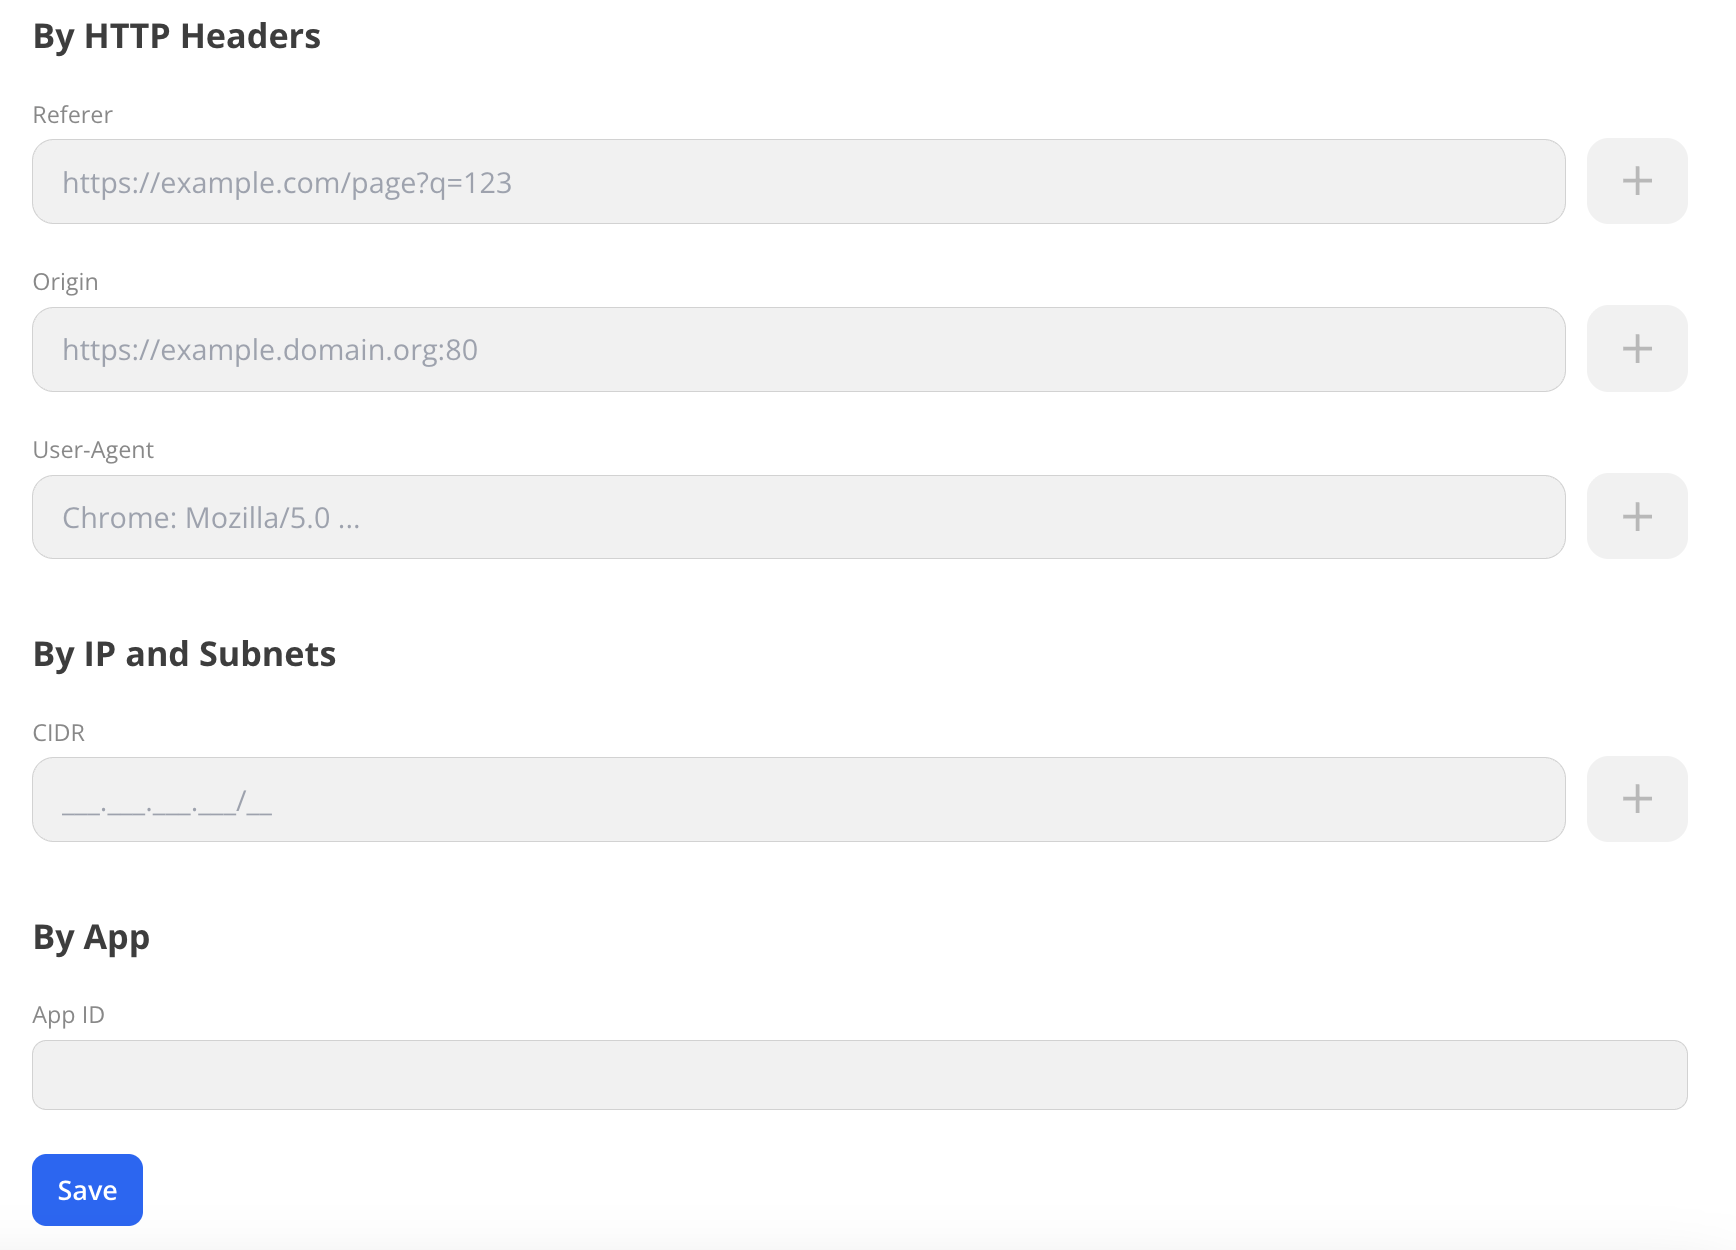
- By HTTP headers: access restriction by header values.
- By IP and subnets: access restriction by IP addresses.
- By application: access restriction by mobile application ID.
-
Click Save.
By HTTP headers
Restricts access based on HTTP headers in the request:
Referer: by page URL.Origin: by server name.User-Agent: by application type, operating system, and other parameters.
Usage example: allow access only for requests from the domain example.com and from a browser with User-Agent Mozilla/5.0 setting.
Steps:
- In the Origin field, enter
example.com. - In the User-Agent field, enter
Mozilla/5.0. - Click Save.
Result: the key works only for requests with the headers Origin: example.com and User-Agent: Mozilla/5.0. Requests from other domains (e.g., test.com) or other clients (e.g., curl/7.0) are rejected.
By IP and subnets
Restricts access based on a list of IP addresses or subnets in CIDR format (e.g., 192.168.1.0/24). The restriction uses the client IP address extracted from the following headers:
Remote-Addr: IP address of the TCP connection source or the proxy server IP address when using a proxy or NAT.X-Forwarded-For: chain of IP addresses, where the first address is the client IP. It is recommended to use this header, as it supports complex network configurations with proxy.X-Real-IP: client IP address passed by the proxy.
Usage example: allow access only for requests from the corporate subnet 192.168.1.0/24.
Steps:
-
In the CIDR field, enter the subnet
192.168.1.0/24. -
Click Save.
-
If you use a proxy or NAT, headers may be missing or contain incorrect client IP addresses, which can disrupt the restriction. Make sure that your infrastructure (proxy, load balancers, NAT, Ingress) passes headers with the original client IP address:
- Check the configuration of the nginx Ingress controller in your Kubernetes cluster (e.g., the
values.yamlfile in the Helm chart). - Check the configuration of the proxy or the load balancer (e.g., the
proxy_set_headerdirective in nginx). - Enable logging of HTTP headers (
Remote-Addr,X-Forwarded-For,X-Real-IP) in the API Keys service. - Use traffic analysis tools to confirm that at least one header contains the correct client IP address (e.g., Wireshark, tcpdump).
- Check the configuration of the nginx Ingress controller in your Kubernetes cluster (e.g., the
Result: the key works only for requests from IP addresses in the range 192.168.1.0 — 192.168.1.255, provided that one of the headers (Remote-Addr, X-Forwarded-For, X-Real-IP) correctly passes the client IP address. Requests from other IP addresses (e.g., 10.0.0.1) or without valid headers are rejected.
If necessary, you can contact the technical support for configuration clarification or recommendations.
By application
Restricts access based on the mobile application identifier (appId).
Usage example: allow access only for requests from the application with the identifier com.dgis.sdk.app.
To edit the value in the App ID field, contact the technical support.
Result: the key works only for requests from the application with the identifier com.dgis.sdk.app. Requests from other applications (e.g., com.dgis.test.app) are rejected.
Blocking a key
A blocked key cannot be reactivated. Create a new key or contact the manager.
- Go to the API Keys tab.
- In the row of the required key, click
 icon and select Block.