Creating a Project
There are three ways to create your own style for the map: from scratch, from basic templates, and from a copy of the style.
Basic Style
This is the easiest way to customize the map for your product. The basic styles are already configured as a day and a night 2GIS themes. You can copy them to your account and edit them as you like.
New Style
To customize from scratch, select a new template from the Editor's list of styles. Then select the mobile SDK as the type of map. Working on a template from scratch might take more time than tweaking basic templates: for reference, the day theme comes with over 200 pre-configured layers while a new template is blank.
Style Copy
You can copy your own or someone else's style project. To copy one of your styles, go to the main page of the Editor, select the desired project, and click on the three dots in the lower-left corner. Select the Duplicate option.
To work with another user's project, request a link from the author to make a copy. For more information about copying styles, see View and Access.
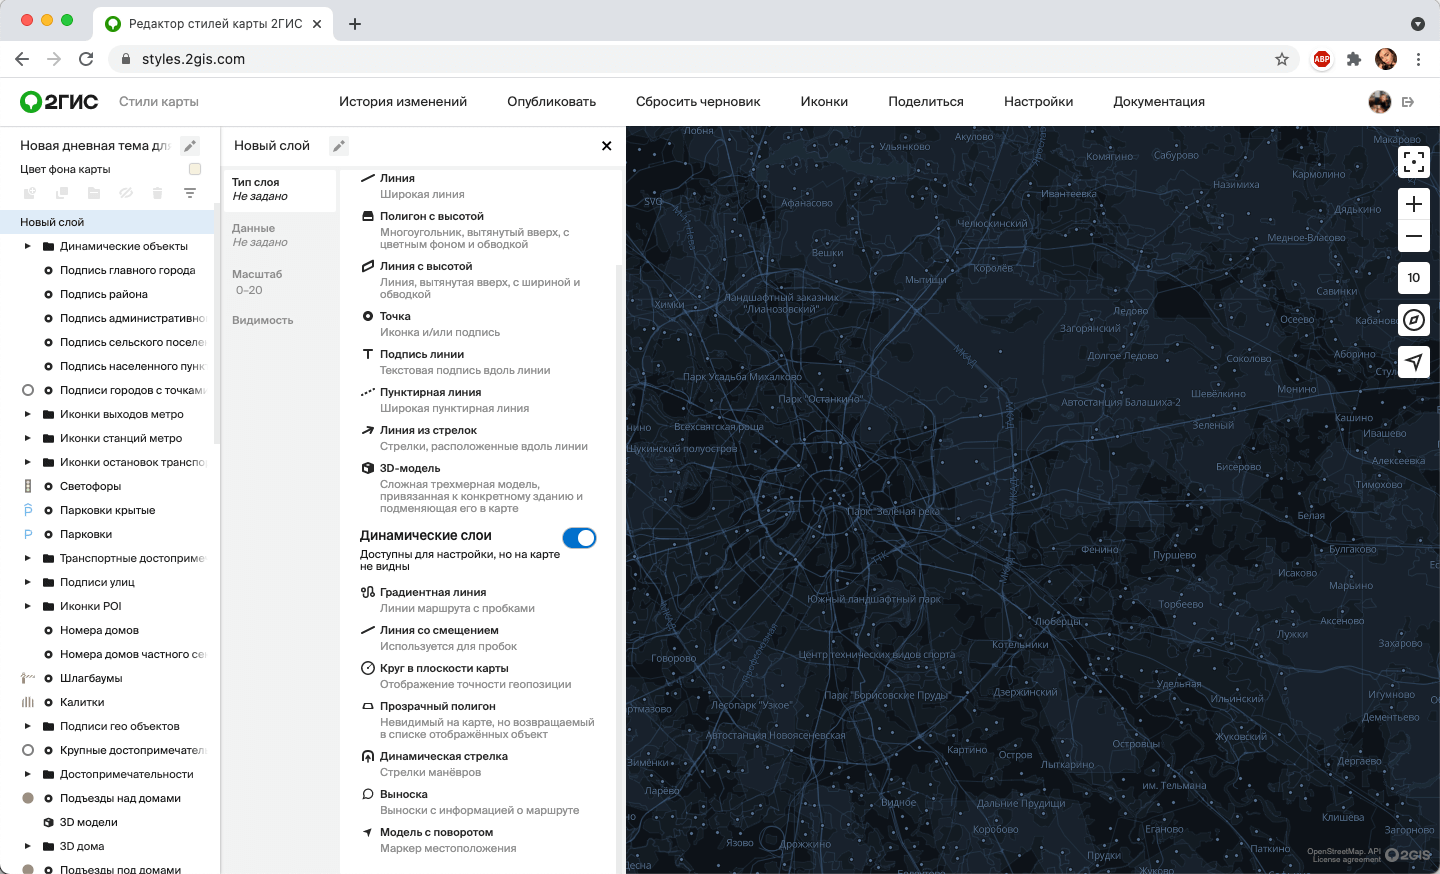
New Layer: Creation and Configuration
- To create a new layer, click on the folder icon with the plus sign in the menu on the left.
- Select a layer type, e.g. polygon, line, or point. The type determines the appearance of the layer and its customization options.
- Select the data for this layer. For each type, only certain sets of data from the map are available. For example, street data is available for a line-type layer and areas, blocks, buildings — for a polygon-type one.
- Adjust the appearance of the layer: color, display zoom, line thickness, etc.
When creating a new layer, you can add a dynamic layer. To do this, enable the Dynamic layers option. This layer allows customizing the appearance of elements that overlay the map, such as gradient lines of traffic jams or the user's location markers.
Dynamic layers are available for customization, but they are not visible on the map. You can view them only in the assembled app or in the demo app.
View and Access
In the Editor, you work with a draft. All changes in the draft are saved automatically.
You can share the link to the project with other 2GIS users. To do this, click Share in the menu bar on the top.
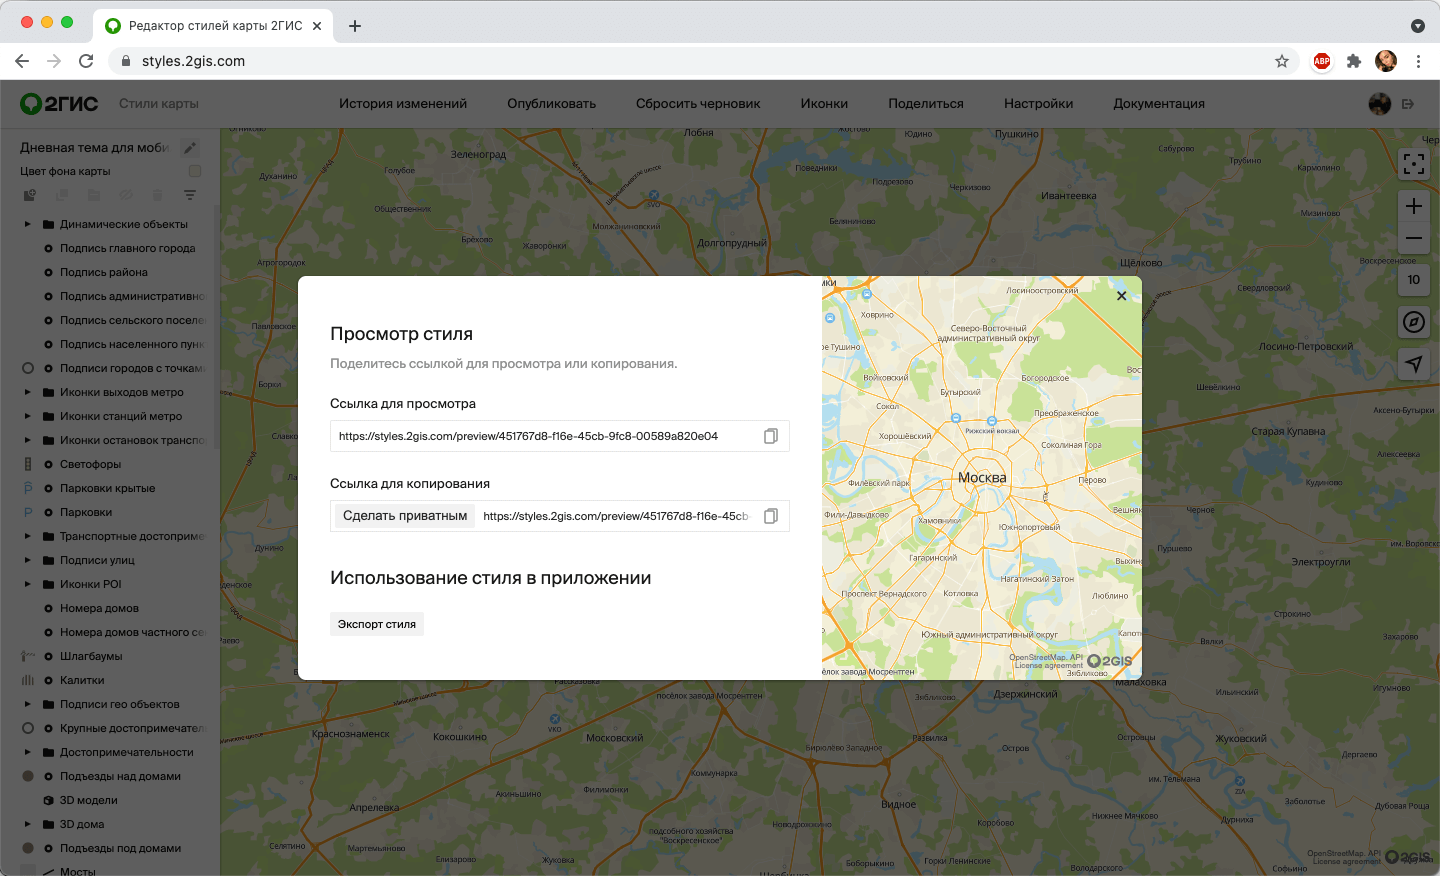
- Link to view — another user will be able to view the style, but will not be able to duplicate it.
- Link to copy — another user will be able to both view the style and make a duplicate for further work. Use this link if you want to allow other users to create their own styles based on yours.
Connecting a Style
iOS SDK
- Go to the style project and click Share.
- Click Export style.
- Select the themes to export.
- Name your themes: it'll make it easier to switch them in the code of the mobile app — for example, Day, Night, etc.
- Click Export.
- The History tab will open. Select the created file and click Download style.
- Move the downloaded styles to the folder of the mobile app and link them.
    var mapOptions = MapOptions.default
    let styleFactory = sdk.makeStyleFactory()
    mapOptions.styleFuture = styleFactory.loadResource(name: "styles.2gis", bundle: .main)
    let mapFactory = sdk.makeMapFactory(options: mapOptions)
    let map = mapFactory.map
Android SDK
- Go to the style project and click Share.
- Click Export style.
- Select the themes to export.
- Name your themes: it'll make it easier to switch them in the code of the mobile app — for example, Day, Night, etc.
- Click Export.
- The History tab will open. Select the created file and click Download style.
- Move the downloaded styles to the folder of the mobile app and link them.
val mapContainer = findViewById<LinearLayout>(R.id.map_container)
val mapOptions = MapOptions().apply {
  styleFile = null
  styleFile = ru.dgis.sdk.File("style.2gis")
  setTheme("light", "dark")
  //setTheme("cool theme")
}
mapView = MapView(this, mapOptions)
mapContainer.addView(mapView)