Adding point objects to a data sample
After uploading the data file, you can add point objects to the data sample and remove them manually.
The feature is available for data with point objects only. Lines and polygons cannot be added manually.
Adding objects
When creating a layer
-
Go to the Main or Data tab.
-
Select the required uploaded dataset.
-
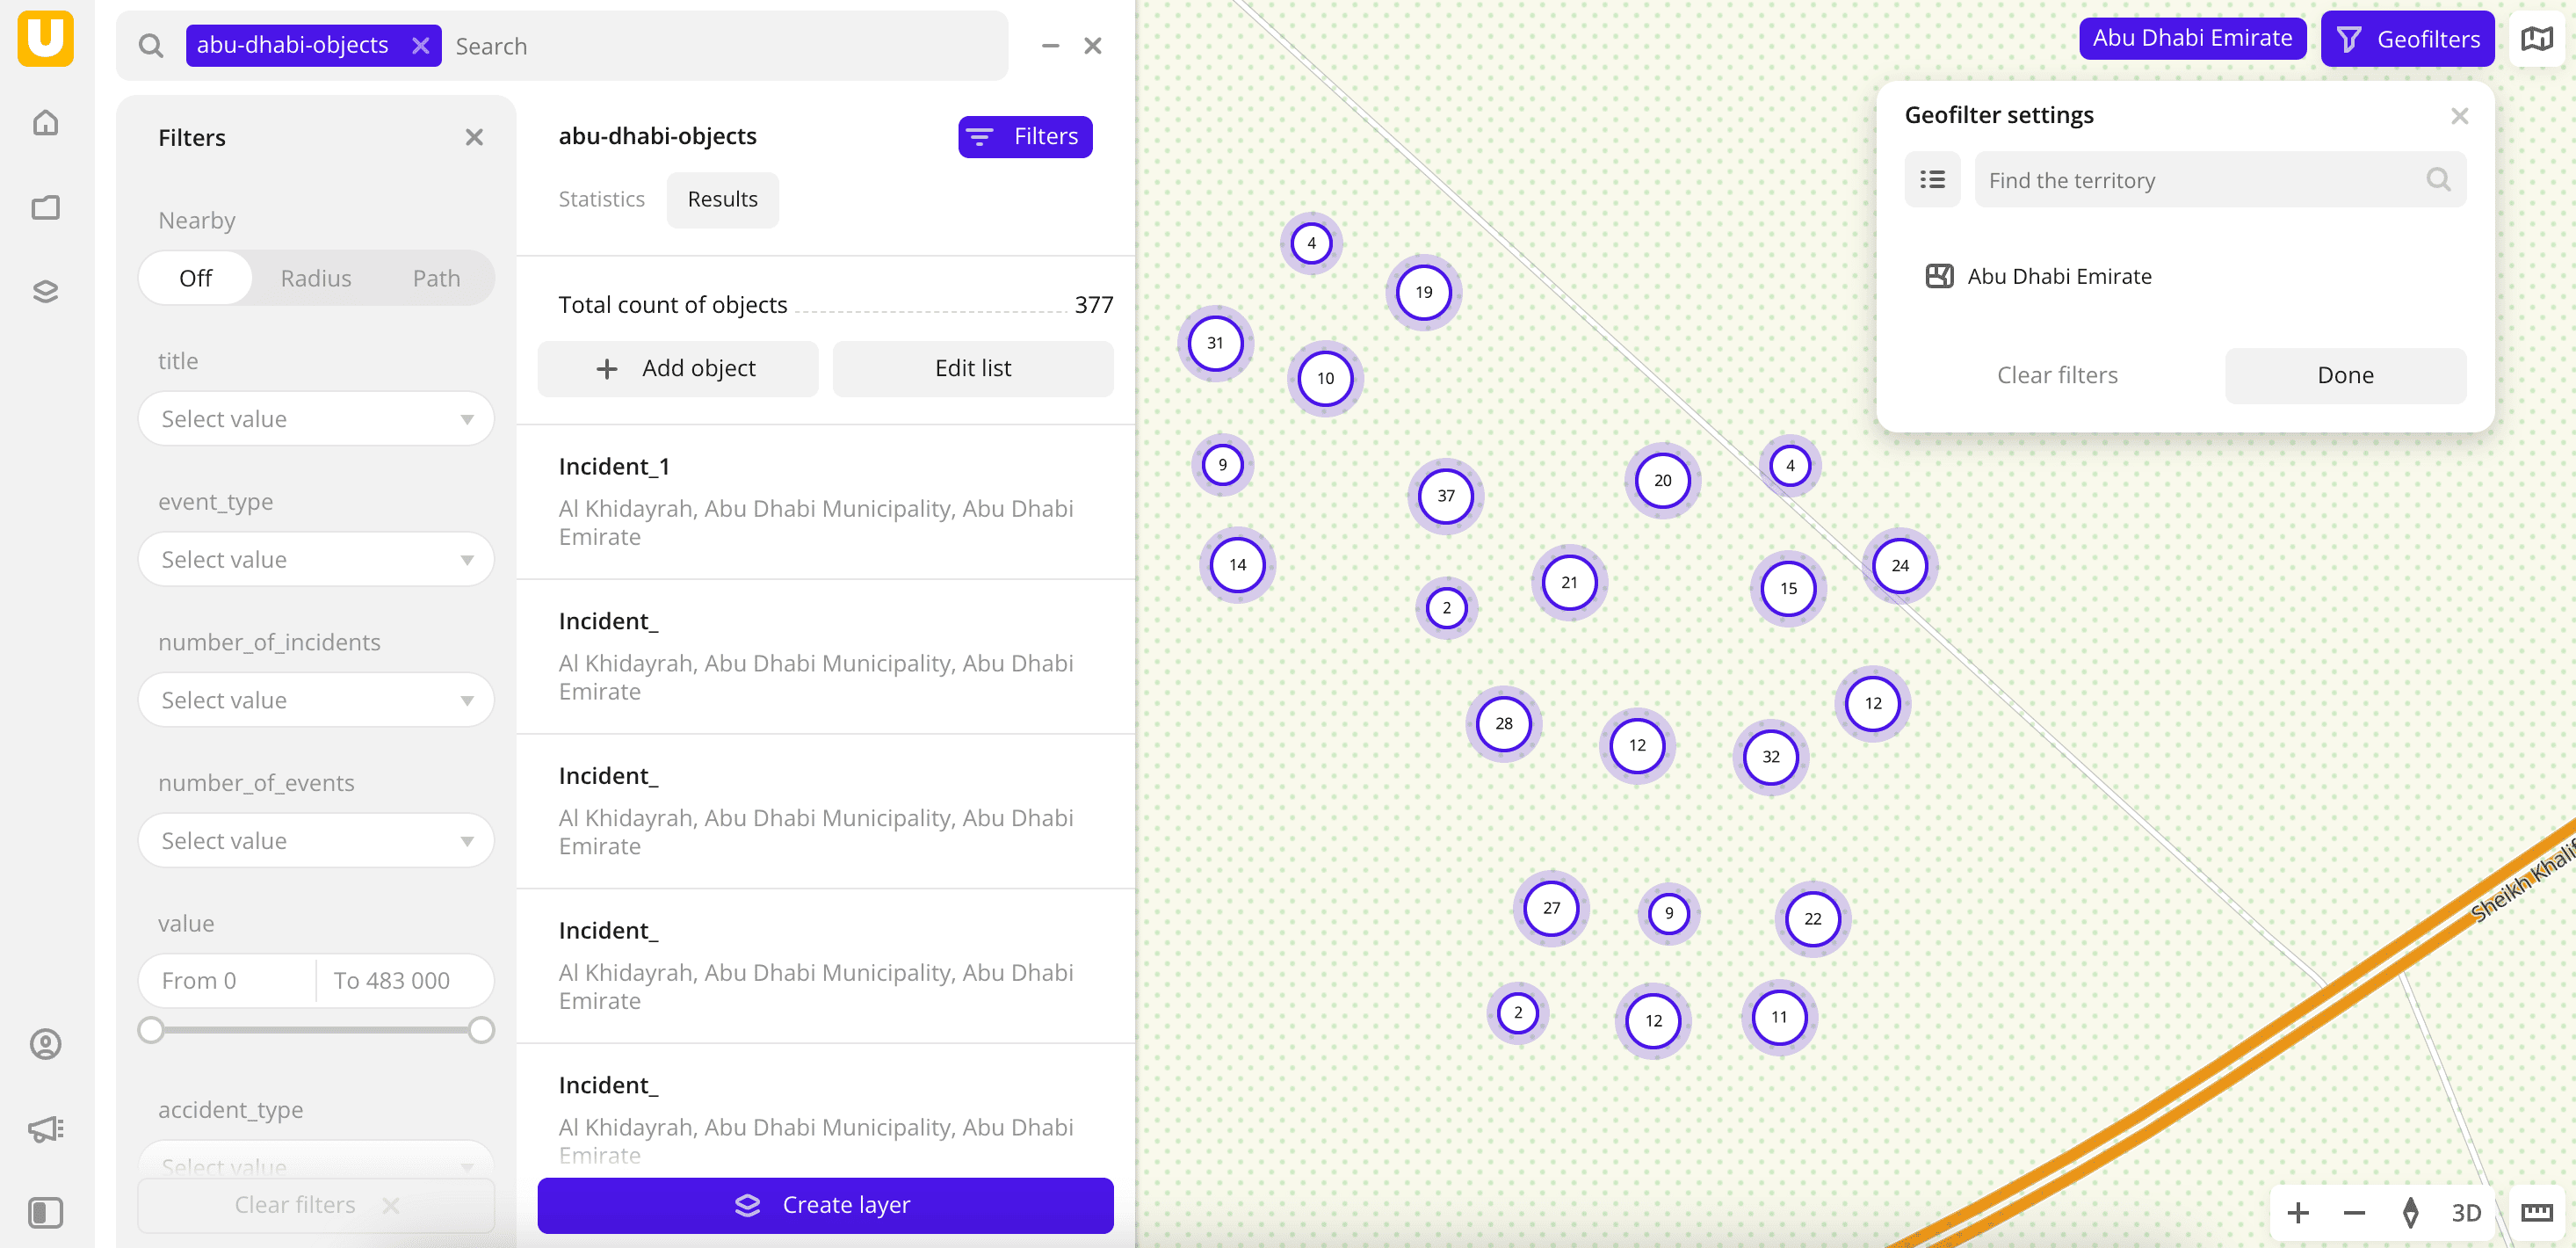
In the Geofilter settings dialog, select up to 50 territories for which the data sample is created. You can use standard and custom territories, and also build proximity zones and circles on the map. For more information, see the Geofilters section. After you select the territories, click Done.
-
On the Filters tab, set the remaining filters if necessary.
-
Go to the Results pane.
-
Click Add object.
-
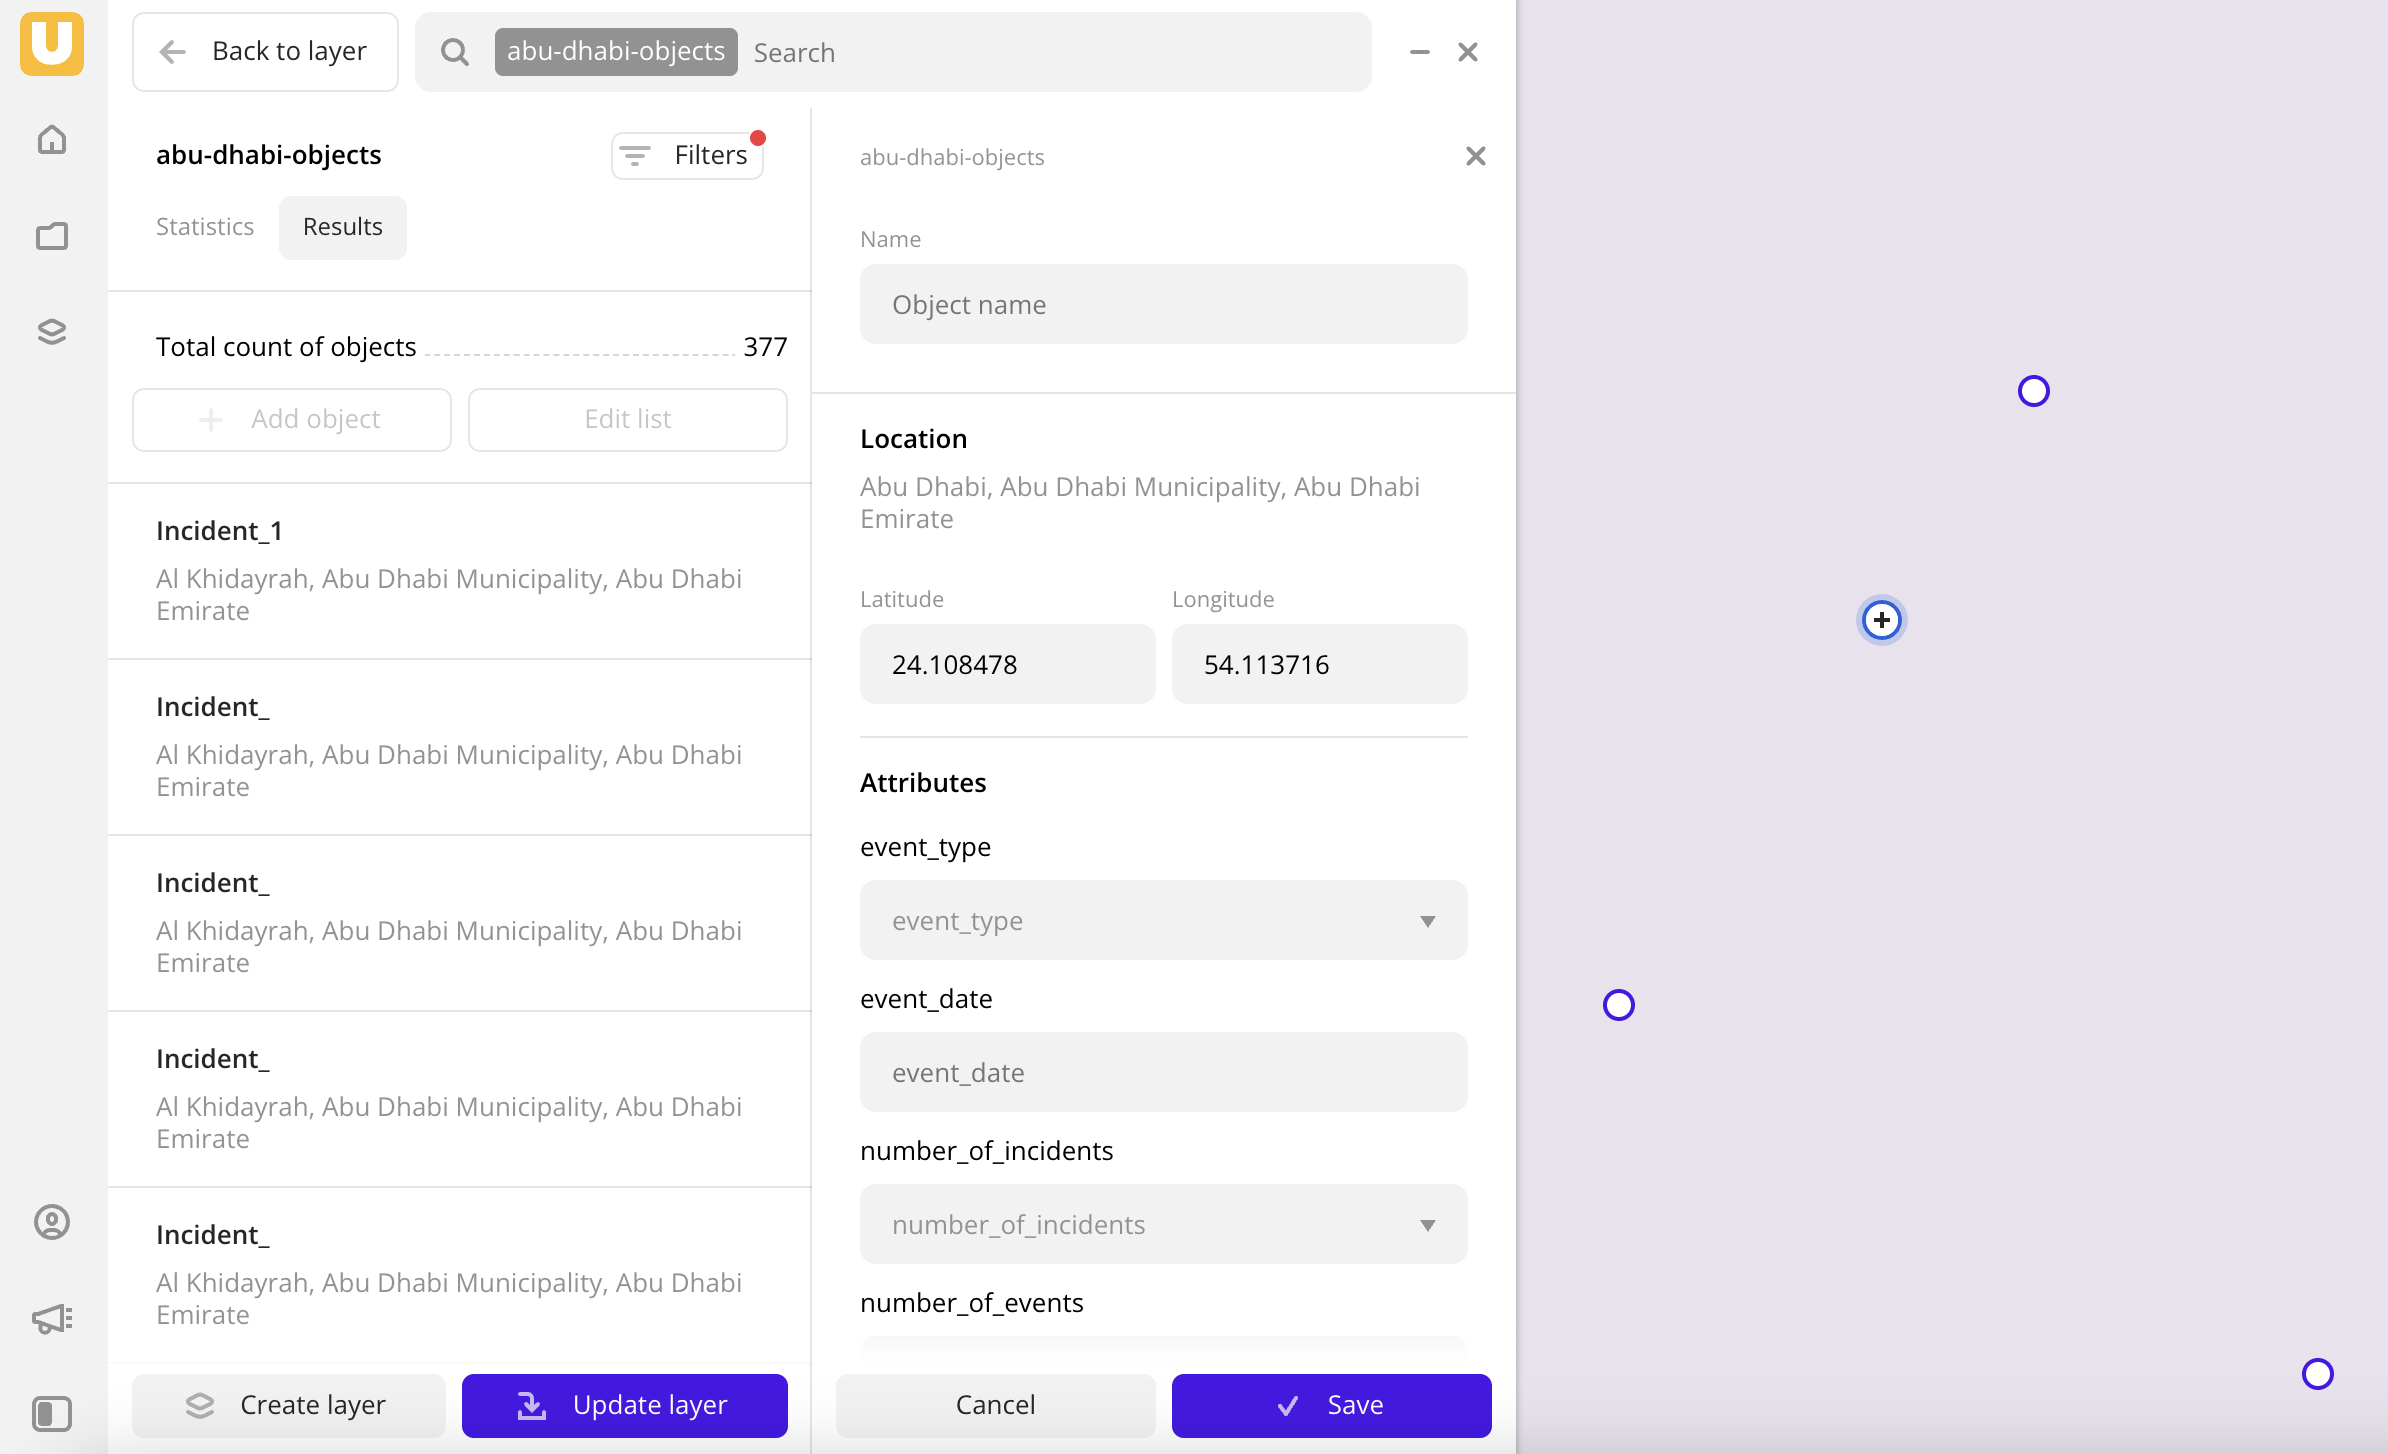
Specify data attributes.

Mandatory fields:
- Name: required if the uploaded data contains attributes of this type.
- Location: you can specify coordinates manually or drag
 to the required place on the map.
If an attribute was configured to use the
Multiple choice from the listfilter type during data upload, you can specify its value manually or select an existing one from a list in this form. -
Click Save.
-
Click Create layer.
If there are no created dashboards yet, the first dashboard with one scene is created, and the layer with data is automatically added to the scene.
-
If there is at least one dashboard created, specify where to add the layer in the dialog:
- Select the created dashboard and scene in the list to add the layer. Click Create.
- Click New dashboard, enter a name of the new dashboard, and click Create. A new dashboard with one scene is created, and the layer with data is automatically added to the scene.
Working with the created layer
-
Go to the Dashboards tab.
-
Open the required dashboard.
-
To open the scene, use the arrows
 and
and  . If there is only one scene in a dashboard, it opens automatically when you open the dashboard.
 -
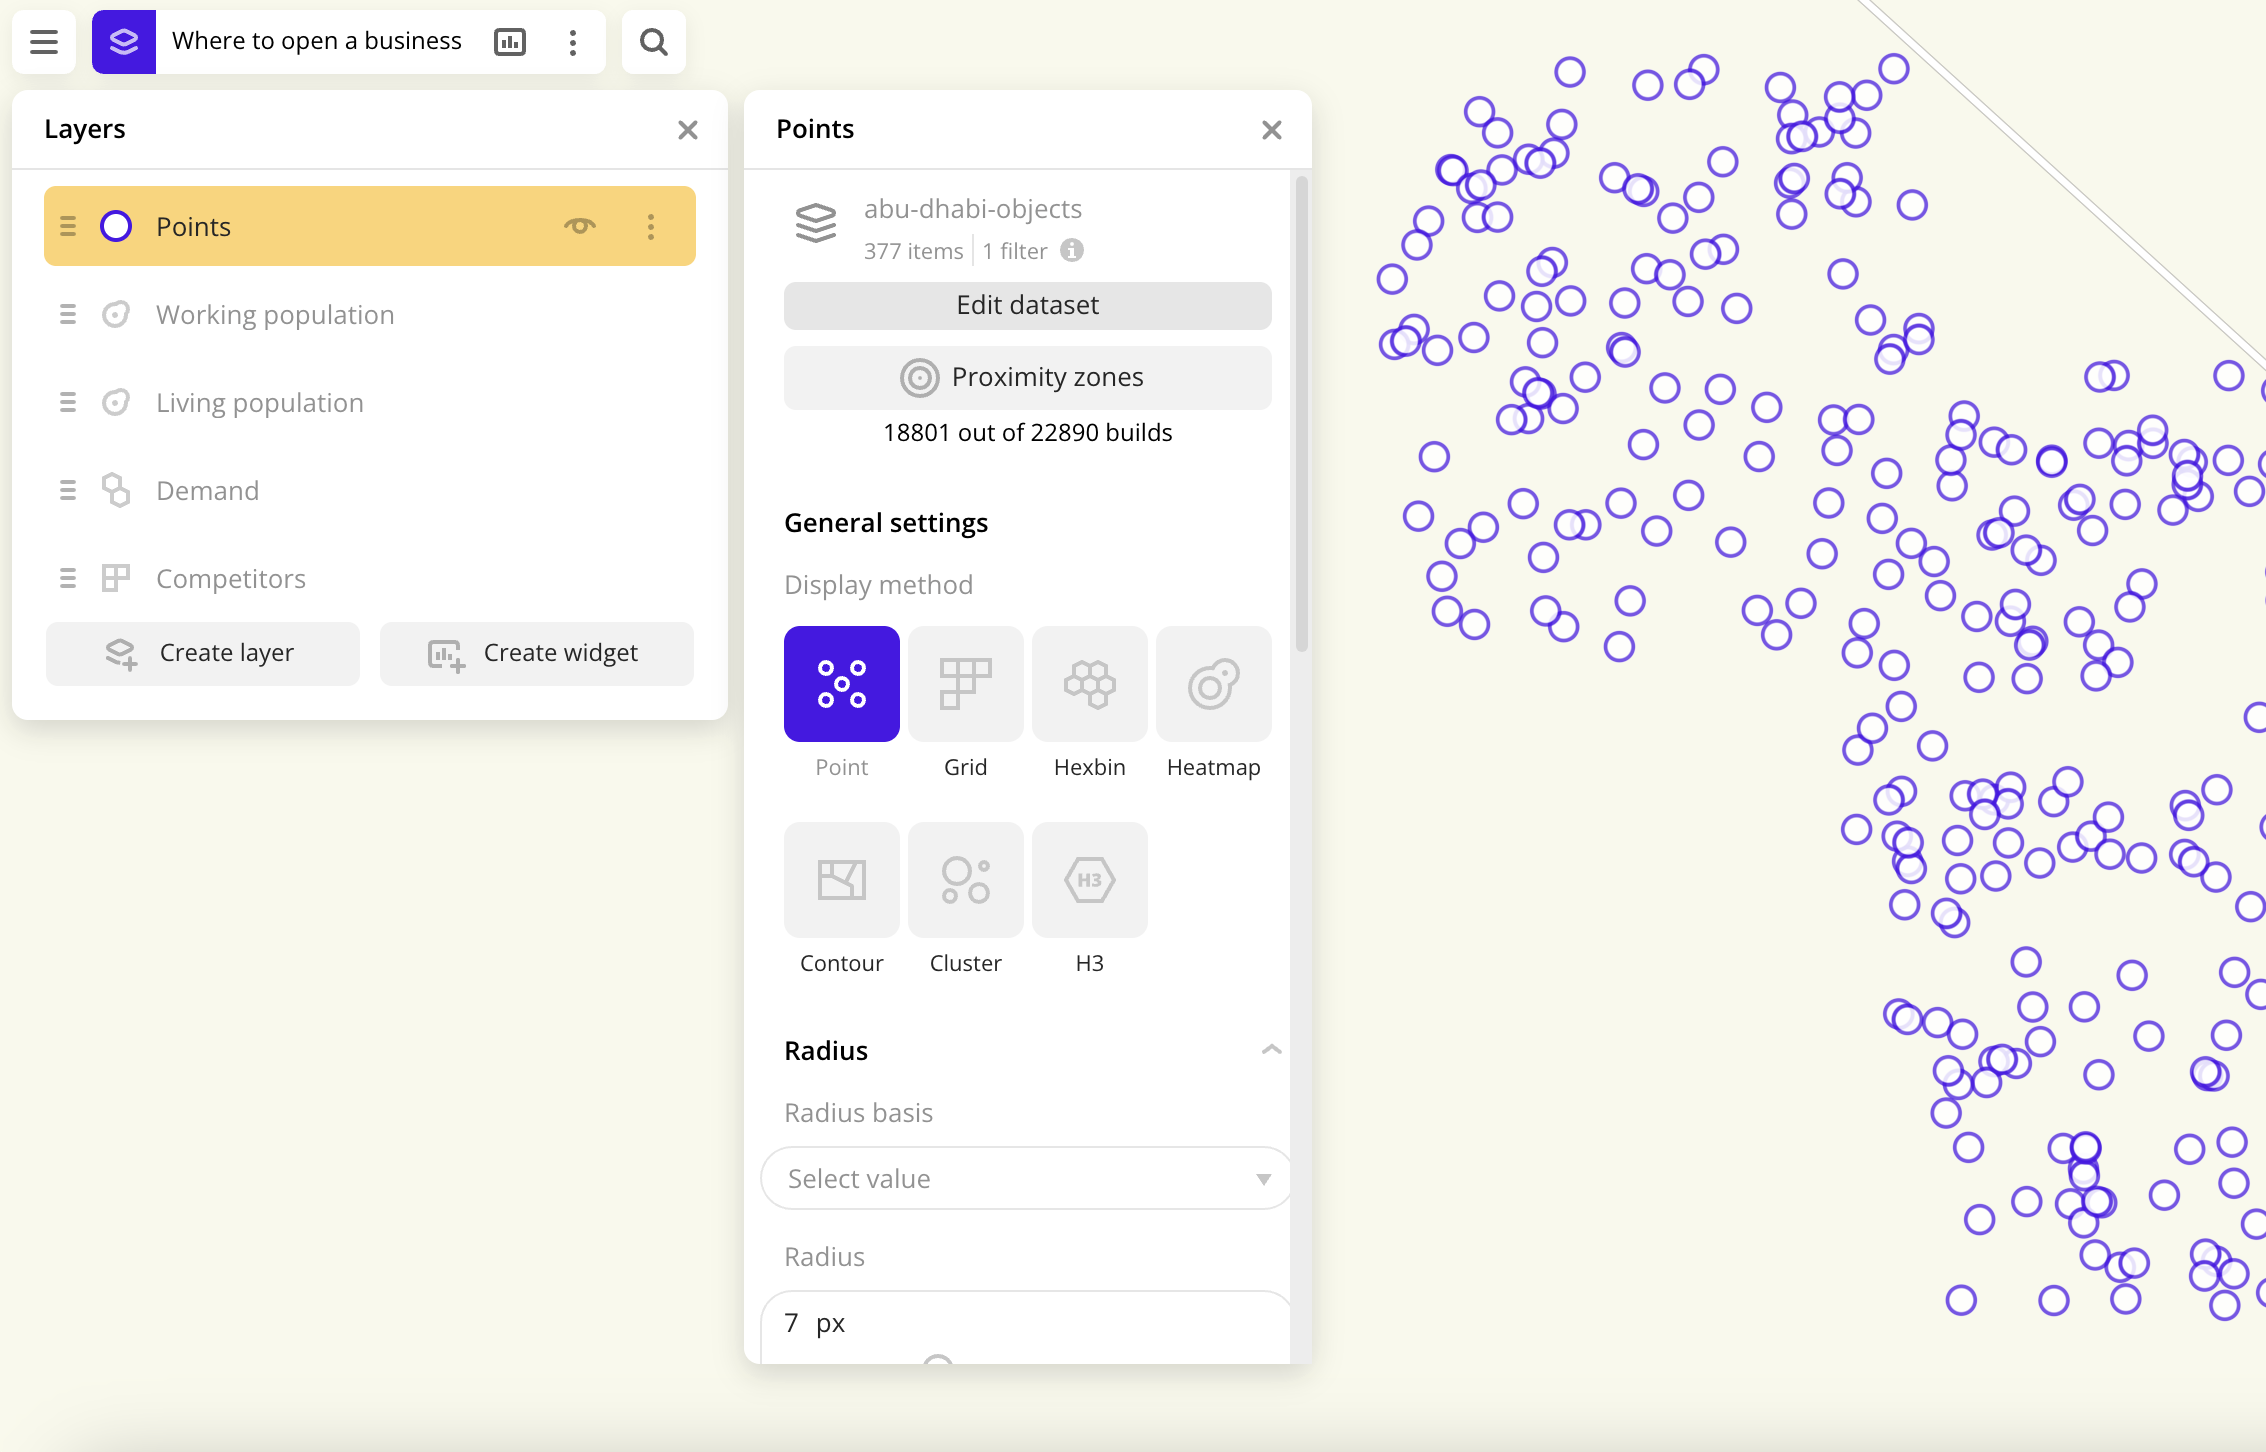
To open the layer, click
 icon and select the required layer.
 -
Click Edit dataset.
-
Go to the Results pane.
-
Click Add object.
-
Specify data attributes.
Mandatory fields:
- Name: required if the uploaded data contains attributes of this type.
- Location: you can specify coordinates manually or drag to the required place on the map.
If an attribute was configured to use the
Multiple choice from the listfilter type during data upload, you can specify its value manually or select an existing one from a list in this form. -
Click Save.
-
To finish editing, click one of the buttons:
- Update layer: all changes are saved, and the layer is updated.
- Create layer: a new layer is created and added to the current dashboard scene.
- Back to layer: the changes are not saved, and the current dashboard scene is opened.
Removing objects
To remove an object from a data sample, when editing it:
- Go to the Results pane.
- Select the required object.
- Click Delete.
- To confirm removing, click Delete.
What's next?
- Quick start.
- Get to know how to work with Data visualization.
- Get to know more about Layers, Dashboards, Scenes, and Widgets.
- Get to know prepared Analytics presets.